Showing posts with label Slimline card. Show all posts

Tuesday, March 05, 2024

So Lucky Slimline Paper Piecing Card

Hey crafty friends,
Melinda here with you on this Terrific Tuesday! Can you believe it is already March? My goodness how time is flying! Today I am sharing a fun card I created with some cute dies from Cottage Cutz. Take a look.

Here is another view of my card. The base is a 4 x 9 side fold base of Marigold Cardstock. I used some rectangle stitched slimline dies and cut out a white one and a smaller one with the polka dot patterned paper I created. 


Here's a closer look at the cute little "pot of gold". It was actually a "witches" cauldron I made the bubbles in yellow. I cut the shoes in white and then colored them in green and colored the yellow buckles. I also used the Alphabet and the same marker that I used for some of the gold coins I colored the YOU. I also lightly dusted the edges of the black cauldron with white. I then attached it to a white circle stitched die that I cut some of the patterned paper I created.

Here's a closer look at my little Leprechaun. He was actually a Christmas Baker Gnome. I just switched up his colors and then made his hat. I also added him to another circle stitched circle in some more of the patterned paper I create.

Here is a closer look at the darling little rainbow from the rainbow die. I just used a variety of my markers for the colors. I didn't use the typical rainbow colors but rather ones that I thought would work for my card. I also used my blue marker to put some outlines on the little clouds that are a part of the die set.

Here is a closer look at my title So and Lucky. I used the same alphabet I cut in white and then colored with my markers. I then just wrote to have in one of the clouds. I also cut out a variety of more pierced circles in a variety of my patterned papers.

Here are some photos showing how I pieced his little hat together. In the top left, that is the piece that the little bakers hat is. I just cut it down as shown. I then free handed the top of the hat you see it in the bottom left photos. I then traced the piece and then attached them. The bottom right shows the pieces assembled and in the back of the hat.

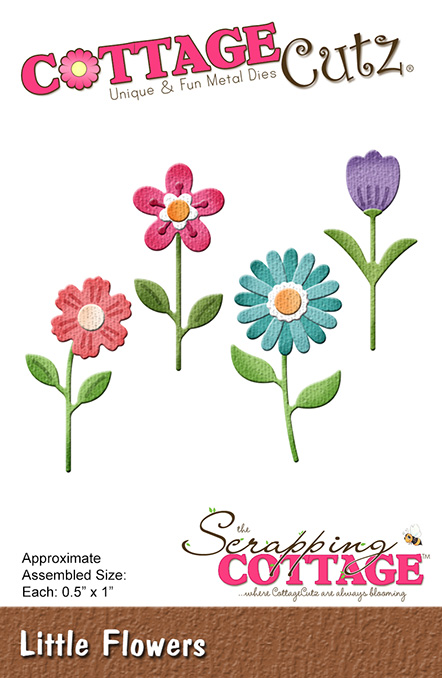
Here are some more photos showing some additional details for his little clover, I used the flower from the little garden flowers die set. You can see how the die is in white. you can see in my "clover" looking flower I cut the middle point out on each of the four petals to create the clover. On the top right I simply colored a piece of my cardstock anhd then used a hole punch to punch out several more small circles. In the lower right, you see the little leprechaun guy coming together.


Dies Used For This Project

Holiday Gnome Baker


Cauldron


Stitched Alphabet

Folk Art Rainbow 


Pierced Circle Set

Stitched Slimline Rectangle Set


Well, that about covers it for today. Be sure to come back real soon. You will want to keep up with my crafty adventures!  Don't forget to find me on social media too! Links are below.
Until the next time, have a wonderfully crafty day!
Melinda


Head over to Cottage Cutz and do a little shopping today!

Get Social With Cottage Cutz

Friday, November 17, 2023

Space Rocket Santa Slider

Happy Friday friends! 

Kris here, share with you a slimline slider card featuring the Santa Space Rocket die.  And just a li'l reminder that all of the individual dies in our Christmas 2023 Release are 30% off for a limited time!  


Pull the slider to reveal an embossed message from Santa


DESIGN STEPS:

• Start with a light teal top folding card base cut at 9" x 8" and scored in half at 4".  

• Cut a darker teal mat at 8-3/4" x 3-3/4" and adhere to card front. 

• Using the largest of the Pinking Sheer Edge Slimline dies, cut (1) from dark teal and another from a snowflake design paper.  

  --Die cut trees from the Mountains & Trees Slimline die towards the bottom of the teal layer.  (Save the top portion for another project).  Add Snow Writer (puffy snow) to the trees and set aside to dry. 

  -- From the Snowflake layer,  figure out where you want your slider channel to be and die cut the smallest of the Nested Rectangle Slimline set. (You could also use the smallest from the Rounded Rectangle Slimline set if you have that!)   Die cut the end of the die from the short edge in line with your long cut out section as shown below. 

• Cut from thick white cardstock a slider tab that is 3/4" x 8".  Cut the same from Snowflake pattern paper and adhere on top.  

  --I used a tab punch to cut the end of the tab *optional

• Cut a stabilizer piece from white c.s. at 2-3/4" x 1/2" and loosely wrap around the tab as shown.  

• Lay your snowflake patterned paper onto card front and stamp your sentiment in VersaMark in the window and heat emboss with white e.p. 


• On the back of your snowflake layer, place tab towards edge where the opening is and glue the stabilizer down between the open edge and the slimline opening.  Add 1/8" foam strips very close around the pull tab.  

 --I also angled the other end of my tab to follow the tail of my rocket so that part of the slider wasn't showing.  *optional.


• Remove tape backing and adhere to card front.


• Die cut Santa Space Rocket from white c.s., color and assemble. 


• Place rocket towards right edge of card and glue a dimensional or slider disc to the pull tab right under the middle of the rocket.


• Die cut Merry Christmas w/ Friends ... add color or shading... adhere to card front.  


DONE!


~Kristine

Monday, April 03, 2023

Spring Blessings Slimline


Welcome back Scrapping Cottage friends ☺

Kris here to share with you some more Easter inspiration! I decided to make a slimline card with the new Spring Blessings die from the Easter/Spring ReleaseI also framed them using the Filmstrip Slimline die, and I used the heart from that set for the middle of my cross.  Aren't these lambs and bunnies adorable?!  And I love the pretty flowers and bird around the cross too.  

I used some papers from Doodlebug Designs.

Design Steps:

1.  I cut my white card base at 7-1/2" x 8-3/4" and scored the 7-1/2" side at 3-3/4" 

2.  I cut my plaid paper at 3-3/4" x 8-3/4" and glued to card front

3.  I die cut the Filmstrip die once and the Spring Blessings die 3x and colored the die cuts

*It's hard to see in the photo, but I also added Wink of Stella to all their pink ears, noses, sheep's swirls, bunnies tails, flowers, heart & cross for a bit of sparkle!


4. I cut (2) purple strips at 8-3/16" x 3/8" and glued to back of the filmstrip openings (see below)

5.  I cut 3 pieces of patterned paper at 2-3/4" x 3" and glued to back of filmstrip (along purple edges)


6.   Lastly, I added all my die cut elements and stamped and glued a sentiment and done!


Thanks for taking a peek!  I hope I've inspired you in some way to get creative with your favorite CottageCutz dies!  

~Kristine


PRODUCTS I USED:


Check out the WHOLE RELEASE!!


Wednesday, March 08, 2023

Dress Up Your Die Cuts


Hi my crafty friends, it's Marla back with another card share.  Easter is right around the corner and it's my favorite holiday for so many reasons.  One being, it's when all of the beautiful colors begin to show themselves again. For today's card I mixed several dies from The Scrapping Cottage to create a beautiful, yet playful Easter card.  


The "Flowers and More" release had so many floral and foliage dies that work well together to create amazing floral swags and clusters.  I wanted a colorful card, so instead of coloring the leaf die cuts in traditional greens, I used non-traditional color combinations.  If you look carefully, you'll see I included all of the colors of the rainbow on this card for a bright and vibrant touch.

I hope you will head over to the CottageCutz YouTube Channel to see how this card came together.  I will also be giving away the "Little Flowers" die.  I provide all of the information on how you can win in the video. I have also added all of the products I used below for quick and easy shopping.

Until next time..... Marla