Showing posts with label Sea Turtle. Show all posts

Sunday, August 09, 2020

Seahorse & Sea Turtle

Hi!

It's Anja here. I have two cards for you today. I made a cute set with a Seahorse and a Turtle. 

 For this project I used:

- Cottage Cutz dies (Seahorse, Sea Turtle, Circle Set),

- Dye Inks,

- 2 white card bases (15x15 cm),

- white card stock for die cuts,

- water color paper (2 14,2x14,2 cm),

- acrylic paint sprays (blue shades),

- sentiment stamps,

- acrylic block,

- black pigment ink,

- white pigment ink,

- black pen,

- white pen,

- Wink of Stella glitter pen,

- heat gun,

- adhesive foam pads,

- paper glue. 


First I cut and colored the turtle. I used white pigment ink and a brush to emphasize some parts of the turtle. I also added a bit of glitter to it.

Next I cut and colored the seahorse.

Then I cut two paper stencils.

I put the stencil over the watercolor paper and sprayed it with acrylic spray paints. I used three shades of blue.

Next I removed the stencils and added a few drops of the lightest blue shade to add over the paper. I dried the paper with the heat gun.

After that I added some color to the edges of the background paper. I also stamped the sentiment.

When I had all the pieces ready I assembled the cards together. I added the turtle and the seahorse using adhesive foam pads for dimension. And my cards were done.


This is all from me for today. Have a nice Sunday and see you again next week.

Anja Z.


Cottage Cutz dies I used for this project:


Thursday, July 23, 2020

Turtle Time

Good Morning Scrapping Cottage Fans!

It is Pam on the blog with you today!

We have a brand new release of dies in the online store.  This selection of dies features Pirates and Sea Creatures! There are 14 awesome designs in the collection and you are going to want each and everyone of them!!


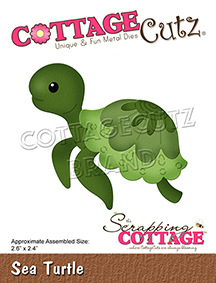
Today my card is using the adorable Sea Turtle!

Background Photo by Noah Usry on Unsplash

Design Steps:
 1.  Use a white A2 card base with the front flap cut in half.  Cut a piece of purple DP 4 x 5 1/4 and 2 x 5 1/4.  Using your second to the largest Pierced Circle die cut 2 pieces of white card stock and a piece of blue DP


2.  Glue the purple DP to the inside of the card and the front flap.  Glue the blue DP circle to a white circle and set aside

 3.  Using the Sea Turtle die cut out the pieces of the turtle in 3 shades of green.  Using the Tropical Fish die cut out different shades of seaweed and the sand in brown
 4.  Using TH inks shade the pieces with a small applicator and then assemble.  Add a small white dot on the eye with a gel pen
5.  Arrange the die pieces onto the blue circle and glue down
6.  Next put glue on half of the circle and glue it to the front flap.  Add extra sand and seaweed to the corners of the card as shown.  Stamp your sentiment and cut out, finish the front card with some sequin and star fish
7.  Open the front flap and directly behind the front circle glue down the inside circle.  Add your sentiment and some additional sand and seaweed.  Your card is complete

CottageCutz Products


Thanks so much for stopping by the blog today!  We really love seeing you!

Blessings
Pam


Thursday, August 02, 2018

Sea Turtles!

Good Morning Friends!

It is Pam sharing with you on this wonderful Thursday morning!

We are getting very close to our new release for Christmas!  And it will soon be time for us to share the new dies but until then we are showing you some new ideas for those favorite dies from the past!  I live near Hilton Head Island and the area is famous for sea turtles!  So with that in mind I used our turtle die combined with a few other dies to create my card for you today!


Design Steps:
1.  Cut out 2 Sea Turtles one in green and one in brown.  Place the shell panels from the green turtle into the brown and the brown into the green.  I just taped them into place
 2.  Add a little shading to the turtles using TH inks.  Use a fine black marker to make the eye standout
 3.  Use an A2 kraft card base, cut a slightly smaller piece of white 4 x 5 1/4.  Cut a 4 x 5 1/4 piece of wood grain DP and cut an oval in the center using the largest of the Wacky Stitched Oval dies.
 3.  Next cut a piece of 3 3/4 x 5 kraft card stock and cut out the second to the largest Pierced Oval die in the center.  Glue it directly behind the wood grain DP as shown
 4.  On the white card stock create an inked background for the water.  Use TH inks and then splatter with shimmer water (water mixed with Perfect Pearls Powder)
 5.  Glue to the back of the wood grain DP. (Make sure not to glue to close to the oval opening so you can stick the sea grass behind the oval
 6.  Using the Botanical Garden 2 die cut out the foliage in 2 shades of green card stock
 7.  Tuck the foliage into the oval and glue down
 8.  Add the sea turtle to the card front
 9.  Take a piece of white cheese cloth and spray with a walnut stain and let dry
10.  Add the cheese cloth to the card front and then add the pearls
CottageCutz Products


I hope you are having a good time looking a new ideas for all of those older favorite dies!  I am sure having fun using them again!  Stay tuned for those new Christmas dies coming very soon!

Blessing

Pam