Showing posts with label Scalloped Rectangle. Show all posts

Tuesday, January 30, 2024

Warm & Cozy Bears Card

Hey crafty friends,
Melinda here and it's another Terrific Tuesday! Today I am sharing a fun and super cute card featuring some more of the fun dies in the Cottage Cutz collections. Take a look.
My card is a standard A2 side fold card. I started with a white base. To that, I added a black mat and a cute blue polka dot patterned paper.

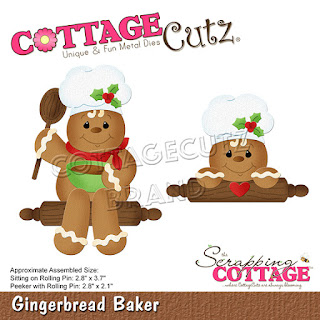
Here is a closer look at the cute little bears. I colored them with my markers. I also colored the logs, cocoa cups, fire and sign 

I used some clear gloss on my fire die cut pieces. As it dries, it dries clear and gives the die cut some glossy dimension. I did also add some to the inside of the bears' cups. You can't really see it in the photo above but it adds a cute touch.

Here is a closer look at my directional sign. I cut the pieces out in white and then used my markers to color the pieces in. I did print out the letters. I added a small pink heart and added some stickles glitter glue to it for the top of my sign.

Here is a closer look at the warm & cozy title. I also colored the purple and blue mini hearts. The darker pink (small and large one) and the lighter pink hearts were cut from that colored paper.

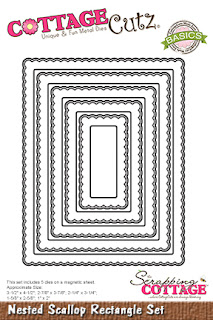
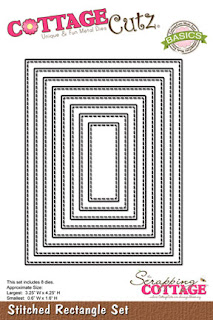
Here is one last look at my card. As I assembled the card, you can see I used the scallop stitched rectangle mat. To that I added a cute mat from some patterned paper. You can't really see it, but the paper has a heart print and it says.. Love One Another on it. I love this. Makes me think of me and my hubby as we are having a cold snap here in Florida. I have it set by my coffee and cocoa bar.


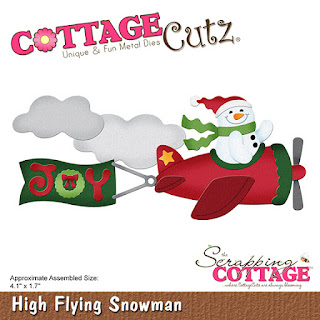
Dies Used For This Project

Rectangle scallop die (currently out of stock)


Well, that about covers it for today. Be sure to keep coming back to see what the other talented designers are creating! So much inspiration. Until the next time, have a wonderfully crafty day!
Melinda

Thursday, February 24, 2022

Munching Bunny!

 Hello Everyone!

Last chance to save at our Presidents Day Sale!  The sale has discounts of up to 60% off.  So don't miss out it ends at 9:00 PM Pacific time today!

Save up to 60% on CottageCutz Dies
Save 60% on CottageCutz "Stamp & Die" Sets
Save 60% on CottageCutz Slimline Dies
Save 60% on Little Bluebird Designs (Stamps & Dies)

Today, I have another cute little Easter card for you.  I am using Spring Bunny w/Giant Carrot.


Design Step:

1.  Using the Spring Bunny w/Giant Carrot cut out the pieces using: green, orange, pink, yellow, blue, light gray, dark gray, white, red and black card stock.  Assemble the bunny and carrot with fine tip glue.  Add a little Wink of Stella to the bow for some sparkle
2.  Use a whtie A2 card base,  cut a piece of green 4 1/8 x 5 3/8, orange 4 x 5 1/4 and Carrot DP 3 7/8 x 5 1/8.  Use the Scalloped Rectangle die second from the largest and cut it out of white.  Next run the rectangle through an embossing folder.  I used swiss dots
3.  Glue the green to the white card base, next glue the orange and then the carrot DP
4.  Glue down the white embossed rectangle to the middle of the card front.  Place pop dots onto the back of the bunny and add it to the center of the white rectangle

5.  Last stamp your sentiment and layer onto orange card stock add your little sequins and your card is complete

CottageCutz Products


As always thank you so much for stopping by today!  I look forward to seeing next Thursday!
We have more inspiration on our YouTube Channel check it out HERE

Blessing and Take Care


Friday, October 22, 2021

Santa’s snowed in


Happy Friday everyone. I really hope that your weeks have been great. Today I’m bringing you a cute little shaker card. I really love this card as its is filled with faux snow which is so realistic. Santa has been snowed in, so he’s hiking a ride to help him deliver the presents.

To begin with I took a card, that when folded measured 4.75” x 3,75”. I then cut out the largest of the scalloped stitched rectangles and cut it out in red card.  From this I cut out the centre of the card with the stitched rectangle measuring  3,5” x 2.5”. I overlayed a piece of acetate behind the red Frame and attached 2mm foam pads all the way around the edge to give me some lift for my shaker card. I also cut a navy piece of card the same size of the rectangle I cut into the centre of the card, so 3.5” x 2.5”.

Next I took some strips of the slimline clouds and overlayed these into my design. It’s easy to get these the right size to fit into the design by using the same size rectangle as you’d did to cut out the centre of the picture

Next I die cut Santa, his sleigh and a present from the Special ‘Delivery’ die set and assembled over the snowy hills. I then put some of the faux snow onto the card before layering over the red rectangle. I used the joy sentiment from the ‘High Flying Snowman’.  So give the card a shake and the fun begins.

I just wanted to share a fun little make with your Christmas table in mind. This cute little place card is made with my favourite gingerbread die. When folded the card measures 3.5” x 2.5” and I have used the 2” stitched circle to place in the middle of the card. You can use you stitched rectangles to write or print names


I wish you all the very best for the weekend ahead and remember to take some time to craft. I will be back with you on Tuesday
Wendy

Dies I used to make the card 


YouTube Winner Announcement: The winner of the Santa's Delivery die from the Marla Harris YouTube video is Joyce Kurtz. Please email Mary Marsh at mrmarsh917@gmail.com to get it sent out.


Thursday, November 19, 2020

Gingerbread Gift!

Hello Friends,

It is Pam creating with you today!

Just a reminder that our online store is featuring some beautifully detailed Christmas dies.  The dies are from Christmas Part 1 (22 designs), Christmas Part 2 (21 designs), and Christmas Part 3 (12 designs).  All of these fabulous dies are on sale right now in the store for 25% off.  Just click here to check them out.

Today,  I am working with the Gingerbread Baker die.  It is perfect for making little gift bags full of gingerbread cookies! I found this adorable little gingerbread man cookie cutter.  So I am going to fill these bags with little tiny gingerbread men! 


Design Steps:

1.  Using the Gingerbread Baker die cut light brown, dark brown, red, green and white card stock.  Shade the pieces using a variety of ink colors and a small applicator

2.  Assemble the little gingerbread men using a fine tip glue.  Use a fine tip black marker to color in the eyes and then add a dot of white ink using a white gel pen

3.  Use a polka dot background stamp and stamp a small white bag.  Next I used our largest Scallop Retangle die to cut off part of the bag and to get a scalloped edge.  I also used an Avery Shipping Tag 2 3/4 x 1 3/8.  Stamp the tag in brown with A gift for you.  

4.  Loop the tag over the top of the bag and glue the Gingerbread man with the rolling pen on top of the string.  I only glue down the right side of the gingerbread man on the bottom of the bag so the tag could just slide behind him.  This way you can open the bag without ripping him. Your cute little gift back is complete

CottageCutz Products

Thanks so much for stopping by today.  I really appreciate it!
Blessings
Pam