Showing posts with label Scallop Stitched Slimline. Show all posts

Tuesday, January 31, 2023

Hello Slimline Card With Flower 1 New Release

Hello Cottage Cutz Friends!
Melinda here with you, and today I am sharing a pretty slimline card I created with the amazing new Flowers & More release from Cottage Cutz!
Okay, I don't say this too often, but this release is a MUST HAVE for your creative collection! Sooooo many fantastic dies in this new release! Here is my project for today!
I created this simple yet pretty card featuring the Flower 1 die from the new release! It is such a great sized die and very, very easy to put together.


Here's a closer look at the two flowers. I cut them both out in plain white cardstock. I then colored them in with my markers. 

For the base of the card, I started with a piece of white cardstock measuring 7x8.5". I scored and folded it to make it a side folding card base measuring 3.5 x 8.5". I then cut a piece of pink cardstock for a mat. I cut that 1/8" inch smaller than the base. I then cut out the largest scallop stitched slimline die from that set and then two of the rectangle stitched slimline dies from that set all in white cardstock. I then cut two mats for the larger two bases. One in the patterned red paper and then in the same pink patterned paper. For the smallest stitched rectangle, I left it plain. I then layered all of them together adding foam tape under the scallop stitched mat and the second stitched rectangle mat to give them just a little lift. I then put the pretty flowers on the card and added some sequins. 

Here's a closer look at the bottom portion of my card. 
To finish off my card, I cut out the smallest double stitched oval die from that basic set and the word hello from the hello spring bunny cottage die from last spring's release. I cut both of them out in white cardstock and then used the same color red marker to color in my hello so that it would match my flower.

The card came together quickly and can be reproduced easily! Here is a look at the fabulous collection!

Flowers & More collection!

Grab it fast while you can get the entire bundle for one amazing low price!


Dies I Used


Don't forget to head over to the Cottage Cutz You-Tube Channel where you can see some of our amazing design team members create some beautiful projects!


Well that about covers it for today! Until the next time, have a wonderfully craft-die day!
Melinda Beltran

Thursday, October 06, 2022

Halloween Kitties

Hello Scrapping Cottage Friends

Super Excited to announce we have a brand new release just in time for all of those amazing Halloween cards everyone makes!! The collection has 22 fabulous dies that are going to make those scrapbook layouts and cards look SPOOKTACULAR!!!  The dies are currently on sale so make sure you get them while they last at this special introductory offer!!

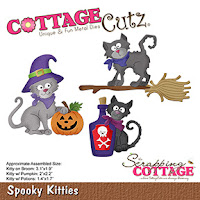
Today, I am using the Spooky Kitties.  It has so many cute pieces.  These pieces could be used in a variety of different ways!  For this card I decided to make a slimline.

Designer Steps:

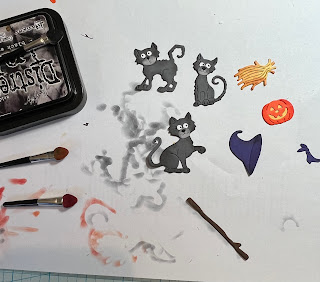
1.  Using the Spooky Kitties die cut out the following colors of card stock:  orange, purple, brown, light and dark gray, yellow and white.  Ink the various pieces with TH inks and then assemble with a fine tip, fast drying glue.  I used a black Glaze Sakura pen for the eyes

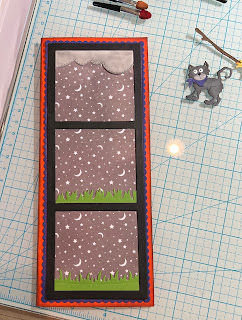
2.  Use an orange 3 1/2 x 8 1/2 card base, cut a piece of purple card stock using the largest of the Slimline Scallop Stitched Rectangle dies, Cut a piece of DP 2 3/4 x 7 3/4,  and finally cut a piece of black using the Window Slimline.  Ink the edges of the orange base in black ink
2.  Glue the purple scalloped rectangle to the orange base then glue down the DP.  Before adhereing the black window frame to the base cut two pieces of green grass using the Grass Slimline die and cut a light gray cloud  using the Clouds Slimline.  Glue the pieces to the back of the black windows as shown above and cut off the extra.  Ink the clouds with a black TH ink
3.  Glue the black windows to the card base do not glue the tops of the grass so you can tuck your cats down into the grass
4.  Arrange your kitties in each of the window glueing the pieces flat to the card base make sure you tuck the kitties feet into the grass.  Add the sentiment and your card is complete

CottageCutz Products


Please make sure to check out this amazing Halloween release right HERE!


We have more inspiration on our YouTube Channel check it out HERE

Thanks so much for stopping by!  And I will see you next Thursday.

Blessings and Take Care