Showing posts with label Safari Cruiser w/Banner. Show all posts

Monday, September 18, 2023

Safari Slimline Slider Card

Welcome back Scrappin' Cottage friends!

Kris here to share some Monday inspiration with you☺  I made a Safari-themed Pull Tab Slimline Slider card (that's a mouthfull! LOL!)  I made this for my great-nephew's 6th birthday.  

(click the pic to see it larger)

COTTAGECUTZ PRODUCTS:

SUPPLIES:
small magnets
foam tape or strips
ink blending ink pads
glue

CUTTING & SCORING:

• Cut base (green) at 7-3/4" x 9" 
-- score the shorter edge at 3-7/8"
Cut (black) at 8-1/2" x 3-1/2" 
• Cut (black) at 3/4" x 2-1/8" (cut 2 of these)
• Die cut (white) largest Scallop Stitched Rectangle Slimline
• Die cut Safari elements (die cut the cruiser 2x)


DESIGN STEPS:

• With the black layer, use the extended die technique to elongate the cut using the 2nd smallest Nested Rectangles Slimline set as pictured below.


• With the white scalloped layer, die cut the lower portion as pictured using the straightest die from the Hills Slimline set.


• Add vintage photo D.O. ink (or color of your choice) to the lower scalloped part.

• Ink blend the top scalloped part with D.O. wild honey, carved pumpkin, crackling campfire, and candied apple (or colors of your choice).


• Color the Safari die cuts (if cut from white cardstock) 


• Add glue to the TOP only of black layer, leaving 1/8" border around top and sides and add TOP scalloped layer.


• Glue the tree to the bottom of the top scalloped layer as shown below.

• Add glue to bottom of black layer, leaving 1/8" border and add BOTTOM scalloped layer, overlapping the top just a tiny bit.


• Affix the rest of your Safari die cuts.


•  On the back of the safari cruiser, add 2 magnets (I used glue and Scor Tape):  one towards the front and one towards the back.  (I used 3 because I messed up on the placement of my slider wrapper the first time, so I went back and added a 3rd magnet and moved my wrapper.)  


• Add glue and/or Scor Tape to magnets and add the 2nd cruiser on top.  Cover up backside as much as you can w/out adding builk.


• Add glue to the center of both slider wrappers as shown below.


• Add one near the edge of opening on the back and glue the next one 1/2" - 3/4" away from the first (see photo below)

**Important:  the placement of the 2nd Wrapper prevents the Cruiser from running over our baby gorilla when the magnet hits the wrapper!!

• On the front, place cruiser to the far right of card and holding it there, turn card over and place your magnets where they automatically want to attract them.  

•  Add foam strips or tape to the back, around edges and close to the slider opening without hindering it from moving.  


• Add glue to magnets and carefully slide the slider tab thru the wrappers and over the magnets.  You will have 1/4" of the tab sticking out -- this is what you'll need to grab and pull the slider.  


• Pull slider out and write your sentiment, or emboss a stamped sentiment in white!  I used a white and a gold sparkly pen.


• Remove tape backings and attach to center of card front!


I hope you enjoyed this tutorial and that you get crafty with your favorite CottageCutz dies!

~Kristine


Monday, August 28, 2023

Say YES to New Adventures

Hello CottageCutz friends!

Kris here, sharing some Monday inspiration with you!  


DESIGN STEPS:

1.  I started with an A2 side-folding card in Crumb Cake cardstock.  

2.  Next I cut a piece of Pecan Pie cardstock at 5-1/4" x 4" and die cut an oval using the Pierced Oval Set.  I then used a stencil to emboss that layer, then brushed Distress Oxide ink lightly over the embossed parts.


3.  I cut a piece of jungle patterned paper a bit smaller than the top layer and glued it to the center of my card front.  

4.  Then I added foam tape to the back of top layer and adhered to card front.


5.  Next, I die cut the Safari Adventure Gang and Safari Cruiser with Banner from white cardstock and colored all the pieces with Copic markers and Distress inks. 


6.  I stamped a sentiment onto the Pecan Pie cardstock in Versamark and embossed in white.  I layered it onto a blue c.s. that I inked with Distress inks and fishtailed the ends.  I then adhered it with foam tape.  

7.  I tucked the giraffe under the oval frame as well as some of the leaves and glued the rhino and rest of the leaves on top.  


PRODUCTS:


Thanks for looking today!  I hope you are inspired to get crafty with your favorite CottageCutz dies. 

~Kris


Thursday, May 27, 2021

Adventure Awaits

 Hello Scrapping Cottage Friends

It is Pam sharing with you on the blog today!

I have a fun and unique teacher's card for you today.  My niece just finished up her school year, as a teacher, so I thought I would make her a really different end of the year card.  She has a Jeep and loves to go on trips with her family.  So I made her this card but really I think it could be for any teacher getting ready for their summer vacation!  The inside will say enjoy your summer!


Design Steps:

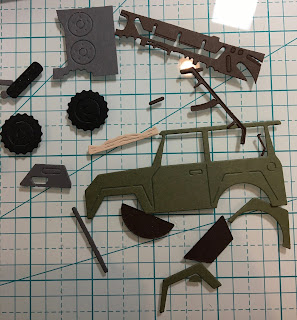
1.  Cut the pieces out using the Safari Cruiser w/Banner die plus green, black, dark brown, grey, and tan card stock
2.  Use a variety of inks and a small applicator to shade the pieces.  When shading is complete assemble the Jeep with a fine tip glue
3.  Using the Safari Phrase die cut out the words twice on dark brown card stock.  Glue them together
4.  Use an Slimline kraft card base and ink the edges.  Use a piece of sunset DP cut slightly smaller then the base, use the Hills Slimline die to create the road.  Spray the road with a black ink to create some texture
5.  Glue the sunset DP to the card base, add the road, glue down the phrase and then the Jeep and your card is complete

CottageCutz Products


Thank you so much for stopping by!  I hope you have some wonderful adventures this summer!

Take Care and Blessings

Pam


Sunday, February 07, 2021

Go Wild

Hi!

It's Anja here. I have a very simple card for you today. My Circus dies are still on its way so I made another card using the Safari dies.


For this card I used:

- Cottage Cutz dies (Safari Cruiser w/Banner, Safari Phrases, Savanna),

- Distress Inks and Oxides,

- craft card base (12,5x18 cm),

- white card stock for die cuts,

- silver pigment ink,

- brushes,

- paper glue. 


First I cut and colored the car and the sentiment.

Next I did the trees.

And last I did the background. I colored directly on the craft card base with Distress Oxides. I used different types of brushes for coloring.

And when the color was dry I added the colored pieces to the card base and my card was done.


This is all from me for today. See you again tomorrow for my Monday post.

Have a nice Sunday!

Anja Z.


Cottage Cutz dies I used for this card: