Showing posts with label Royal Horse. Show all posts

Thursday, May 30, 2019

Farm Scene

Good Morning Friends!

It is Pam creating with you today!

I know so many girls and boys love horses.  So I thought it would be fun to create a farm scene using the horse from our Magical Fantasy release.  I have to admit I love horses too!  This card also combines some dies from other releases.  I love mixing the old and new dies!!


Designer Steps:
 1.  Using the Royal Horse die cut out the body in dark brown card stock.  Then cut out the mane and hooves in tan.  Color the tan hooves black with your favorite markers.  Then use TH ink to shade the mane and add a little pink to the inner ear.  Assemble the horse
 2.  Using the Barn and Windmill die cut out the barn in white.  Color the barn pieces using a black and red marker
 3.  Assemble the barn
 4.  Cut a piece of designer cloud paper 4 x 5 1/4 and add the barn and grass
 5.  Using the Picket Fence Border die cut out a white fence.  Using the Spring Grass die cut out to rows of grass in the same green and as the background grass.  Glue down the fence and then the 2 layers of grass as shown.  Then add the horse
6.  Use a white A2 card base cut a slightly smaller piece of red and glue it to the front.  Then add the panel with the horse and barn and your card is complete
CottageCutz Products


Thanks so much for stopping by and be sure to check out the sales in our store!
Blessings
Pam


Sunday, May 19, 2019

U Rock!

Hi!

It's Anja here. I have a simple card for you today. I combined two dies from Magical Fantasy release and made a cute card.


For this card I used:
- Cottage Cutz dies (Knight, Royal Horse),
- Distress Inks (Pumice Stone, Black Soot, Fired Brick, Tattered Rose, Worn Lipstick, Hickory Smoke) and Oxides (Fired Brick),
- white card base (10,5x15 cm),
- white card stock for die cuts and background (10x14,5 cm),
- silver pigment ink,
- black pen,
- white pen,
- sentiment stamp,
- acrylic block,
- sponge,
- paper glue.

First I cut and colored the knight.


Then the horse.

Next I stamped the sentiment. I cut around it.


I used white card stock for the background. I used a sponge as a stamp and stamped "bricks" over the paper. I colored also around the edges.


And when I had everything cut and colored, I glued all the pieces onto the card. And my card was done.


That's all from me for today.

Have a nice Sunday.
Anja Z.


Cottage Cutz dies I used:


Tuesday, April 23, 2019

Knight and Dragon

Hi, Janja is here with you.
Above the dragons and knights, boys are always excited. I made two cards for all the little boys who dream that they are brave knights who overcome the dragon.
I used dies from the new release - Magical Fantasy.


- CottageCutz dies: Knight, Royal Horse, Magic Dragon, Fairytale Castle, Rainbow With CloudsRetro Alphabet
- white card base: 4.25 x 5.5" (10,8 x 14 cm), folded
- white cardstock: 4 x 5,2" (10,2 x 13,2 cm)
- scrapbooking glitter paper
- colored cardstock
- colored ink pads
- embossing folder
- glue, double side adhesive tape, self adhesive foam pads

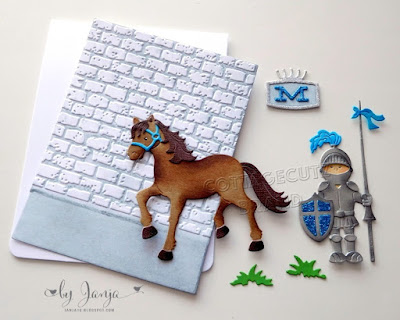
For the first card, cut out the knight and horse. Then darken all the pieces with colored ink pads along the edges and fasten them together.


For the brick wall use embossing folder and distress ink - Iced spruce.


The first letter of the boy's name is cut out of blue and silver scrapbooking glitter paper.


Completed card.


Repeat the process on the second card and cut out the central motive first. 
Cut the hill with scissors.


I used an oval brush and a plastic stencil for the cloudy background. Very simple and the result is flawless.


Now we have everything ready. We finish the card as shown.


Have a nice day.
Janja