Showing posts with label Random Circles Slimline. Show all posts

Wednesday, May 11, 2022

New Release Sweet Treats "Pedestal w/Cupcakes" and GIVEAWAY


Hi, it's Marla here today with a new video over on the Cottagecutz YouTube Channel.  Are you as excited as I am about this sweet new release?  I literally squealed when I received my new CottageCutz Sweet Treats dies.  Talk about some yummy goodness.  

I am in full blown summer mode, so for my card I went bright, bright, bright with my colors today.  My card features the new "Pedestal w/Cupcakes die which paired perfectly with the "Random Circles Slimline" die.  I hope you'll join me to see how this card came together AND to see how you can win the "Pedestal w/Cupcakes" die.  I will also be announcing the winner of the "Koalas" die, so you don't want to miss that.  

Thank you for supporting both our blog and YouTube Channel.  CottageCutz fans are the BEST!


Thursday, October 14, 2021

Christmas Hound and Friend

Hello Scrapping Cottage Friends

It is Pam sharing with you on the blog today!

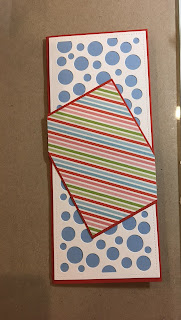
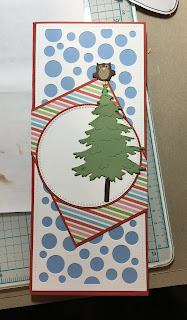
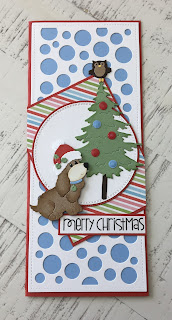
Our new release for Christmas is available for purchase today!!  It has 40 darling dies that would make gorgeous cards, gift tags, banner or toppers for a bag.  In this release there is everything from farm animals to beautiful Navitiy Scenes.   Today, I am using the Holiday Hound Dog.

My card was inspired by a fun and playful design by Meghan Kennihan.  I just loved the sketch she created so I had to give it a try.  Thanks for the wonderful idea Meghan.  


Design Steps:
1. Start out with a red slimline card base 8 3/4 x 3 3/4.  Next use the Random Circle Slimline die and cut it out of white card stock.  Cut a piece of blue card stock 8 1/2 x 3 1/2.  Cut a piece of red card stock 3 x 4 1/3 and a piece of striped DP 2 3/4 x 3 3/4.  Glue the blue to the red card front, next glue the white random  circle piece to the blue and last mount the striped DP to the red and glue to the card front at an angle as shown
2.  Cut out a white circle using the Crossed Stitched Circle die second from the largest and a red circle cut with the second from the largest Pierced Circle die.  Glue together and then to the card front
3.  Using the Holiday Hound Dog die cut him out of brown, blue, green, red, black, tan and white.  Shade the dog and assemble

4.  Using the Moose and Tree die cut out the tree in green and the trunk in dark brown.  Assemble and glue to the card front as shown.  The little owl is from the die Snowman w/Woodsy Friends

5.  Pop up the dog using dimensionals add the little bulbs on the tree and coat them with glossy accents.  Add the sentiment and your card is complete

CottageCutz Products


Thanks so much for stopping by and don't forget it is never to let to start on those Christmas cards or even start to shop for our crafty friends!  One more bit of info our YouTube channel is up and running with some wonderful video inspirations check it out HERE.

Blessings and Take Care
Pam


Sunday, September 19, 2021

Sea You Soon

It's Anja here. Summer is more or less gone so for today's post I made a sea inspired card. To say goodbye to Summer. 


For this card I used:

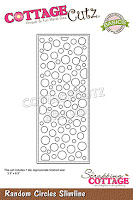
- Cottage Cutz dies (Lil' Bluebird Designs Under the Sea Stamp Set, Random Circles Slimline, Waves Slimline),

- Faber Castell Polychromos Color Pencils,

- blue and grey card stock for die cuts,

- light blue card stock for card base (22,5x19 cm),

- white card stock for stamping,

- black pigment ink,

- acrylic block,

- white pen,

- washi tape,

- paper scorer,

- scissors,

- paper trimmer,

- paper glue. 


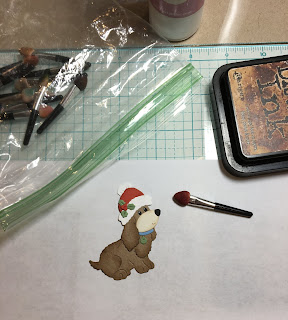
First I stamped and colored all the images. This time I cut the images with the scissors to a get a different effect.  

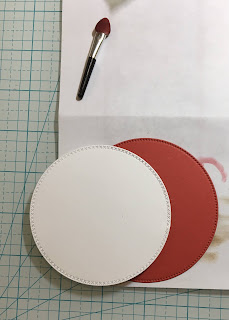
Next I made the card base from light blue card stock. I also cut a bubbly background using the Random Circle Slimline. And last I cut a strip of grey card stock to use as a sandy ground on the bottom of the sea.

I also added the sentiment to the grey strip. 

Next I took a white pen and made some lines to the bubbles to give it more dimension. 

After that I just added all the cut creatures and my card was done.


And that's all from me for today. Have a nice week and see you again next Sunday.

Anja Z.


Cottage Cutz stamps and dies I used: