Showing posts with label Polar Friends. Show all posts

Wednesday, December 23, 2020

I can Bearly wait 'til Christmas!

Hello!  This is Sukie and today I have a sweet card to share.  I used the most adorable Polar Friends die set as the focal point of my card.  It's available in the store along with so many other amazing die sets.

I used card stock to cut out the critters and Birch Trees.  I ended up only cutting out one of the penguins from the Polar Friends die set.
I created an ink blended background, splattered it water and then added a bit of paint for a snowy effect.  The birch trees were trimmed down for a better fit on my card.  I also hand cut a snowy slope.
The fun sentiment was stamped on the slope while the trees were tucked in behind.  The polar bear fit perfectly between the set of trees.
Next came the penguin which was adhered on top of the polar bear for a playful look.
This whimsical card completes my collection of Christmas cards for this year and as the sentiment says, "I can Bearly wait 'til Christmas!"
Here are the die sets used on my card, available in the store:

Saturday, December 19, 2020

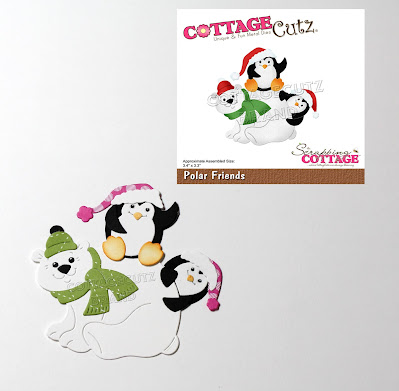
Polar Friends

Hello Scrapping Cottage friends! Thanks for taking the time to stop and visit with us today. It's Mary Marsh here bringing you the Saturday edition of the Blog.

Our Christmas dies are still available in the online store.  We have Christmas Part 1 (22 new designs), Christmas Part 2 (21 new designs) and Christmas Part 3 (11 new designs).

Today, for your viewing pleasure I have a card featuring the new Polar Friends die. It's one of those whimsical dies from the Christmas Part 3 collection that makes for a really cute Christmas card. I kept it more on the simple side. If you have this die and are looking for an idea, this one would be easy to recreate multiples of. Let's get started on some details of how I created my card.

Design Steps:
My card this week started with the color challenge #822 on Splitcoaststampers. The colors are bright and I thought the polar friends would look great sporting these colors. 
magenta madness, granny apple green basic black

I decided to emboss my background with an evergreen embossing folder. I used a designer paper in the granny apple green color. I liked the ombre appeal of the paper and it made for a quick background design. 

Next, I cut my images in the challenge colors. I used designer paper for their hats and the bears scarf. It just added to the fun loving appeal of this card. 

I am ready to start card assembly. I attached the embossed panel to the white card base with double sided tape. Cut a snowy slope for the polar friends to frolic around on. They are a perky little bunch after all! The slope is attached with dimensional adhesive.

White card base: 5 1/2" x 4 1/4"
Embossed panel: 5 3/8" x 4 1/8"  

 The images are also attached with dimensional adhesive. I wanted them to be lifted slightly from the embossed background. 

To complete my card, I stamped a playful sentiment and added some green glitter enamel dots. I scattered a few snowflake sequins in the sky and my card is complete. 

Well, that's it for me for this week. I will be back on Monday with another Christmas card. See you then!

die I used to create card:


Friday, October 16, 2020

Polar Opposites

Happy Friday Cottage Cutz fans!  It’s Jeanne today with a card featuring one of the dies from Part 3 of the new Christmas release; however this is not a Christmas card!  I found this sentiment and knew it would be perfect for the Polar Friends die.

I have always found it amusing that every (it seems) card maker puts polar bears and penguins together, but in real life one is an Arctic animal and the other lives in the Antarctic.  This sentiment brings both  together and it all makes sense!

Wouldn't this make a cute anniversary card for someone married in the winter?  (I may give it to my husband for his birthday which is coming up quickly.)

To begin I made the background.  I heat embossed the snowfall using white embossing powder and a stencil.

I stopped the stencil about an inch from the bottom so I would have a smooth area for my sentiment.

Next, I used blending brushes to create the background.  Since this is not a Christmas card I chose a light violet and two blues.  If this were for Christmas, I would not have used the violet.

I cut my bear, penguin and iceberg from white cardstock and colored using Distress Oxide inks and Copic markers.  I did cut the penguin body from black so it would be a nice solid color.  I used the large iceberg from the Seal & Walrus Pals die.

I cut a strip of white cardstock 3/4 x 4 inches and stamped my sentiment.  Then I cut a strip 1 x 4 inches from lavender glitter paper to frame the sentiment strip.

After using scissors to point the left ends and gluing them together,  I adhered them to the card front about 1/4 inch from the bottom.

I snipped off the part overhanging the right side of the card. 

To adhere the image I used used foam dots. 

Finally I added a few snowflake shaped sequins for sparkle and interest.

Dies used:


I hope you enjoyed my card today.  Be sure to stop by the online store where the new release is on sale for a limited time!  The new Christmas dies are super cute!

I hope you have a fun and creative weekend!