Showing posts with label Planter Box & Seeds. Show all posts

Sunday, June 21, 2020

Make A Wish

Hi!

It's Anja here. I have another simple card for you today. This time I made a cat, planting flowers and herbs.


For this card I used:
- Cottage Cutz dies (Garden Cat w/ Wagon, Planter Box & Seeds, Fairytale Birthday),
- Distress Inks,
- white card base (10,5x21 cm),
- white card stock for die cuts,
- black pen,
- paper glue.

First I cut and colored the cat and the planter box with all the plants.


Next I did the same with the sentiment.


Last I did the background. I colored the grass on the ground and cloudy sky in the back.


And my card was done.


And this is all from me for today. Have a nice Sunday and see you again next week.

Anja Z.


Cottage Cutz dies I used for this card:


Tuesday, June 09, 2020

Herb Garden

Hi Janja here. Welcome to the blog today.
I don’t know about you, but I adore fresh kitchen herbs myself. I combined some dies and made a card with herb garden.


- CottageCutz dies: Planter Box & Seeds, Flower Power Tomte, Gardening Cat (basket), Square Set, Cross-Stitched Square Set
- blank card: 5 5/16 x 5 5/16" (13,5 x 13,5 cm), folded
- patterned paper: 5 1/8 x 5 1/8" (13 x 13 cm)
- kraft cardstock: 5 1/8 x 5 1/8 " (13 x 13 cm)
- different colors of cardstock
- different colors of ink pads
- glue, double-sided adhesive tape, self-adhesive foam pads

First die-cut all the pieces for main image out from different colors of cardstock. Shade all cutouts with ink pads.


Later, I stamped the names of the kitchen herbs on the sign and added a birdhouse to the top.


Trim three squares. Using two square dies, cut out two frames. Glue both frames together. Paste a small square to the back of the frame.


Start assembling the card. 


Thank you for stopping by. 
Janja


Saturday, May 30, 2020

Puppy Hugs


Hello Scrapping Cottage friends! Thanks for taking the time to stop and visit with us today. It's Mary Marsh here bringing you the Saturday edition of the Blog.

We have a brand new release of dies in the online store. This one is garden themed and has 19 new designs. These new dies are perfect for Mother's Day, Father's Day, birthdays, thank you, or even a thinking of you card for the person who loves to garden. 

For my card today, I am featuring the new Puppy in Garden Cart die and created a thinking of you card for one of my dog loving friends. This one could even be used for a birthday card with a birthday sentiment on the inside. So let's get started with some details on how I created my card.

Design Steps:

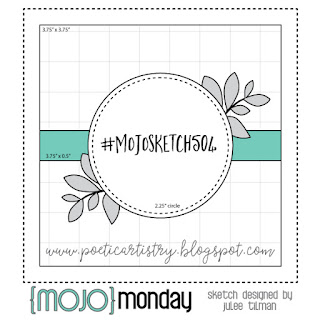
I started this card with my sketch. I had one saved on my Pinterest board that I thought would work well with this die image. It calls for a square shape that I also liked. It changes things up just a bit. 
Once the layout was decided on I chose my card colors. I decided to go with a medium blue shade and use the matching gingham designer paper. 
Card Base: 4 1/2" Square
Gingham Designer Paper: 4 1/4" Square
I cut the images in various shades of cardstock. For the garden cart I used a brown striped designer paper for added interest. 
The circle is the 2nd largest from the Stitched Circle set. I used a cloud stencil to sponge in some background clouds with tumbled glass distress ink. Sponged some mowed grass distress ink at the bottom of circle for a grassy area.
The "Big Hugs" sentiment  is stamped in a dark blue ink.
Now that everything is cut and stamped, I am ready for card assembly. Started by attaching the images to the circle using double sided tape. 
For the rectangle strip across the middle, I decided to use ribbon that matched the designer paper. 
I used dimensional adhesive to secure the image circle. I wanted it lifted slightly off the designer paper. The side leaves are cut from the Planter Box & Seeds die.
To complete my card, I attached the image panel to the card base. Scattered a few blue glitter enamel dots - just because I like using them on a card (lol)!! 

Well, that's it for me for this week. I will be back on Monday with a Father's Day card using the new Potting Shed die. 

Dies I used to create card:


Wednesday, May 13, 2020

Good day, Sunshine!

Hello!  This is Sukie and today I have a project to share for my design team post.  I'm showcasing a couple of dies from the fabulous new Gardening release.
I cut out all of my pieces from the Puppy in Garden Cart and the Planter Box & Seeds die sets.  The oval is from the Stitched Oval Set.
I selected a whimsical floral pattern for my card panel and drew out the different colors for my die cuts.  A small strip of paper was punched with the Fiskars Scalloped Sentiment punch.
I created my card base by layering the pieces together and adding a stamped sentiment to the punched border.  The garden cart was centered inside the oval and adhered on my card.
Next, I tucked in the greenery along the punched border.  The seed packets and garden sign were nestled in between the greenery.
The fussy cut flag was adhered along the top edge of my card adding an extra pop of color to the gardening scene!
Here are the dies used on my card, available in the store:

Saturday, May 02, 2020

Garden Ladder Step card

Hello Scrapping Cottage friends! Thanks for taking the time to stop and visit with us today. It's Mary Marsh here bringing you the Saturday edition of the Blog. Hope you are doing ok in the midst of the pandemic. Since so many of us have the stay at home orders in place, it's nice to have a hobby where we can create beautiful cards. I put on some music and let my creative juices flow!!!

We have a brand new release of dies in the online store. This one is garden themed and has 19 new designs. These new dies are perfect for birthdays, Mother's Day, Father's Day or even a thinking of you card for the person who loves to garden. 

For my card today, I am featuring the new Garden Ladder die to create a Mother's Day card for a friend. I make a lot and send them to my family and friends. This year they will especially like the kind thoughts. So let's get started with some details on how I created my card.
Design Steps:

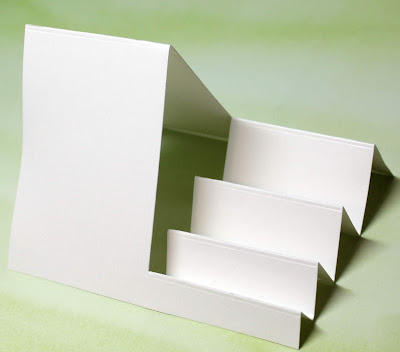
This week I decided to use a fun card fold to display the ladder image. I made a side step card. Check out this step by step tutorial with a video for how to create one. Here is another tutorial that a former DT member did for our Blog. They are fairly easy and also fun to decorate with images or stamps.
This is one of those cards for me, that is a work in progress. When I started I wasn't really sure how I would decorate the side steps. So I started with the main rectangle panel. I found this designer paper in my stash and thought it would work for a sky background. For grass I used a dirt mound from an older CottageCutz die - it's retired now and out of stock - the Carrot Patch Bunny die. But you could use this Spring Grass die also.
Next, I cut all the images from the Garden Ladder die. I used various colors of cardstock. You could use white cardstock and color with your medium of choice or sponge with distress or other inks.
Attached the ladder to the designer paper using glue dots and then attached all the other elements to the ladder.
The grassy border was attached with double sided tape.
Next I started on the side steps. On the first step, I used the garden tools from the Potting Shed die. On step 2 I used the seed packets from the Planter Box & Seeds die. The tulips on Step 1 are also from this die. On the 3rd step, I used the same die for the heart banner. My card is starting to take shape.
For the top step, I decided to stamp a sentiment. I thought this one complemented the garden images well. I stamped on the designer paper and then cut another layer from the same paper.
To finish off the front of my card, I attached the sentiment and added 2 small bees to the 3rd panel. 
For the back of the card, I stamped a Mother's Day sentiment and added a small flowerpot.
And, that's it for me for this post. I hope I have given you an idea for a way to use the new Garden Ladder die. Have a great week and I will see you next Saturday.

dies I used to create card.