Showing posts with label Peace and Joy Wreath. Show all posts

Saturday, August 26, 2023

Folk Art Deer Christmas

Hello CottageCutz friends! Thanks for taking the time to stop and visit with us today. It's Mary Marsh here bringing you the Saturday edition of the Blog.

Our new Folk Art release is still available in the online store at 35% off individual dies. There are 19 new designs that are so perfect for cardmaking, journaling, and scrapbooking.

In fact, all of the releases from 2023 through Halloween of 2022 are currently on sale. Check them out here if you want to pick up any that you may have missed and still want. The sale won't be on long.

Since we are coming into my favorite holidays of the year, I decided to make a Christmas card using the new Folk Art Deer die. So, let's get started with the details of how I created this card. 

Design Steps:

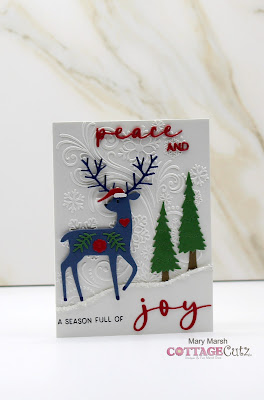
I started by cutting the Folk Art Deer. I used a medium blue, green and red cardstocks. I used an older die to cut the pine trees to create my outdoor scene. I added a hat to my deer after all he is a Christmas deer. The hat is from the Christmas Flamingo die. It fits him perfectly. 

Next, I embossed my background using a swirly snow embossing folder. I attached it to my white card base.

White image panel: 4 1/4" x 5 1/2"
White card base: 4 1/4" x 5 1/2"
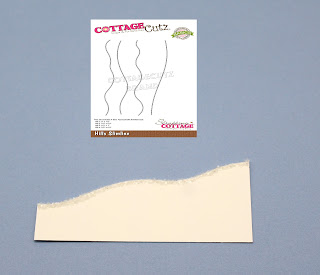
Then I cut the snowbank using the Hills Slimline die. I added some chunky glitter for added interest. 
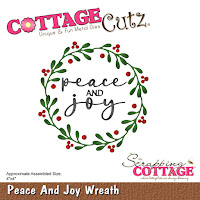
I cut my peace and joy phrase from the Peace and Joy Wreath die in red cardstock.  
I attached the Joy phrase to the snowbank and stamped my sentiment in black ink. 
Now that my elements are prepared, I am ready to start card assembly. I attached the deer with dimensional adhesive and the snowbank with double sided tape. 
I added the pine trees using double sided tape. 
To finish off my card I attached the Peace and phrase using a clear drying glue. 
That's it for me for this post. See you next Saturday.

Reminder: Marla has a video up on the CottageCutz YouTube channel. Click here.


Monday, July 31, 2023

Paper Snowflake Ornaments 2-Ways

Hello!  Welcome back to a new crafty week here at the Scrapping Cottage!  

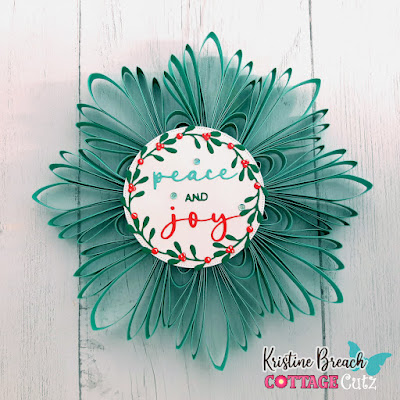
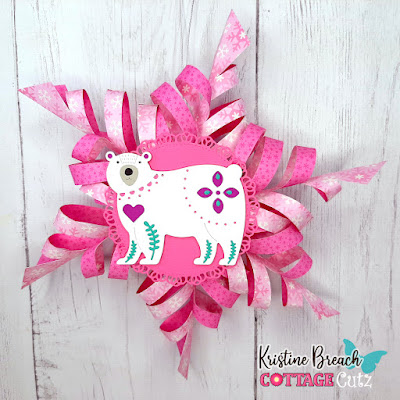
Kris here to share 2 different styles of paper snowflake ornaments that feature the Folk Art Bear and the Peace & Joy Wreath!  I figured since today's the last day to create a Christmas in July project I would jump on that bandwagon  ☺ 

Don't forget... our CHRISTMAS SALE is still going on -- you can SAVE 65% on ALL CottageCutz Christmas designs!!


They are both easy to make, however the 2nd took a bit longer and needed more explanation, so I did a quick 5 min. video on part of that one.  

DESIGN STEPS for the PINK SNOWFLAKE

1.  Cut 6 pieces of 4" x 4" paper (patterned or solid... not too heavy) and fold them all in half on the diagonal.


2.  Measure 1 cm (or about 1/2") on the 2 sides perpendicular to the fold and draw a light pencil line to connect as shown below.  

3.  Make 6 equal cuts up to the drawn line.  Then erase your pencil line.


3.  Open up your square, and starting at the top, bring the top 2 flaps together in front, overlapping them and glue to adhere.  (You could use small staples instead to make it go quicker.)

(See next 2 photos)

4.  SKIP the next set of flaps and glue the 3rd set and 5th sets.


5.  Flip it over and glue the remaining flaps together.  You should have something that looks like this...


6.  Make 5 more!


7.  Alternate the colors (if you used 2 patterns or shades of double sided papers) then staple 3 of them at the base as shown below.


8.  Repeat with the other 3 pieces, then staple the 2 halves together to make a whole snowflake!


9.  Die cut a Nested Stitched Doily in pink and the Folk Art Bear in white, magenta, teal, and the muzzle in grey.  Assemble and pop her onto the doily with foam tape.

10.  Glue doily onto front of ornament.


DESIGN STEPS for the TEAL SNOWFLAKE ORNAMENT:

1.  Cut (2) strips that are 1 cm x 30 cm and glue them end to end.  

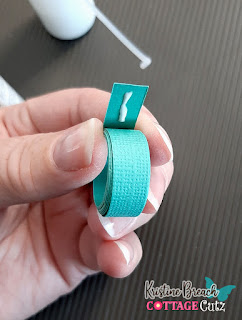
2.  Wrap around a cylinder that is about the size of your mini glue bottle, or the plastic lid of the Stampin' Mist etc. adding glue every so often so it holds in place and especially at the end of your roll. 


The rest of the steps to this snowflake ornament are in the video below.  If it doesn't play for you, you can see it on YouTube here - https://youtu.be/vOY3Ptw3q6c

3.  Cut 3 strips that are: 
11 cm x 1 cm
9 cm x 1 cm
7 cm x 1 cm

(you'll need to make 8 total)

4.  Cut (1) strip 21 cm x 1 cm
(2) 19 cm x 1 cm
(2) 18 cm x 1 cm
(2) 16 cm x 1 cm

(you'll need 8 total)


PRODUCTS:


I hope that was easy to follow & that I've inspired someone out there to give it a go!

Happy crafting! 

~Kristine

Saturday, July 08, 2023

Folk Art Bear at Christmas.

Hello CottageCutz friends! Thanks for taking the time to stop and visit with us today. It's Mary Marsh here bringing you the Saturday edition of the Blog.

Our new Folk Art release is still available in the online store at 35% off individual dies. There are 19 new designs that are so perfect for cardmaking, journaling, and scrapbooking. 

They allow you to add a beautiful touch of folk art to whatever you may be creating - birthday, thank-you, new home, thinking of you and even Christmas. The design team has featured many creative ideas using these dies so take a look back at our posts for inspiration. 

Today, I am featuring the new Folk Art Bear die on a Christmas card. I think my completed card has a bit of a Nordic appeal. So, let's get started with some details of how I created my card. 

Design Steps:

I wanted my bear mostly white with a few touches of color. For that color I used red and navy blue, and I did the die inlay technique. 
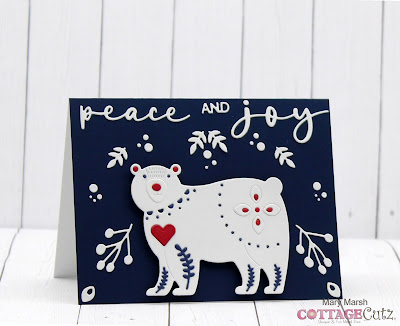
Next, I cut my phrase in white cardstock from the Peace and Joy Wreath (Christmas 2022).  
I started assembling my card. I attached the bear with repositionable tape to get an idea of where I would place my peace and joy phrase. 
I cut some greenery from the Folk Art Flowers Mixed die to layer on the card front. I also realized I forgot to inlay the red heart for the bear. I also added dimensional adhesive to have the lifted slightly off the background. 
To finish off my card, I added more greenery. This time it's cut from the Folk Art Fox die. I also scattered some circles around for added interest. They were cut from the dies I mentioned above. 
That's it for me for this post. See you next Saturday!


Tuesday, December 06, 2022

Peace and Joy Wreath

Hello CottageCutz friends! Thanks for taking the time to stop and visit with us today. It's Mary Marsh here bringing you the Tuesday edition of the Blog.

I hoped you enjoyed all the cards and projects the DT has shown with the Classic 50's release. We are heading back to Christmas designs now for even more inspiration. The Christmas Part 1 and Christmas Part 2 dies are still 30% off individual dies. It's only for a limited time so don't delay.

Today I am featuring the new Peace and Joy Wreath die. I thought the wreath should have a bow so I used the Halloween Wreath die. I created a quick and easy Christmas card that would be easy to make multiples of, if you are running short on time for Christmas. 
I also chose an easy layout that features designer paper. That always ups the look of a clean and simple card. It's from a Christmas collection that has lots of greenery, foliage and pinecones. I chose the pinecone pattern. 
Light Green Card Base: 5 3/4" x 4 1/2"
Designer Paper Layer: 5 1/2" x 4 1/4"
White Image Panel: 4" x 3 3/4"
The wreath is cut in a dark green cardstock, and I used red for my berries, bow and the peace and joy phrase. That completed this card. 

dies used to create card: