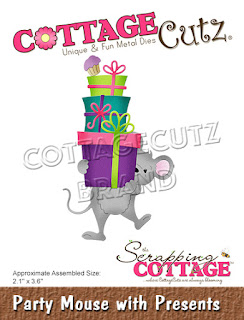
Showing posts with label Party Mouse with Presents. Show all posts

Wednesday, August 07, 2019

Happy Birthday

Hello!  This is Sukie and I have another birthday card to share created with the new Cottage Cutz Birthday dies.
I found the patterned paper in my stash and pulled the solid color stock to coordinate with the colors.
I cut out the Party Mouse with Presents in white card stock and used some inks to shade all of the pieces.  I also cut the Stitched Wide Rectangle Frame.
Totally Sky Trendy Twine coordinated perfectly with my background paper.  The sentiment is from the Scrappy Moms (retired) Simple Sentiments.
The patterned paper was layered on the red card stock.  I wrapped the twine at the top of the card base.  The lighter blue paper was layered underneath the Wide Rectangle Frame.
The sentiment was anchored in the corner of the frame and the Birthday Mouse with Presents was balanced inside the frame.
The finishing touch was a twine bow.  I tied the ends of the bow for a bit more softness on my card. 
Here are the dies used on my card, available in the shop:

Friday, August 02, 2019

It's A Party!

Happy Friday!  It's Jeanne today with a clean and simple birthday card using a die from the new birthday release.  This Party Mouse with Presents is adorable and makes for a very festive birthday card.  About half way through making this card, I realized that by making the presents in Christmas colors and changing the sentiment I could have a sweet Christmas card too!  How wonderful is that?
I started by stamping my stripes on a white A2 card base.
I then cut the die pieces from white card stock and used a combination of die inks and Distress Oxide inks to color them.
I stamped the sentiment in green and used the second largest oval from the Wacky Stitched Oval set to cut it out.
I glued the mouse and packages to the oval.
I used some gold cord underneath and popped the oval off of the card base using foam dots.  As a final touch I added a few gold sequins.
I hope you enjoyed today's card.  It went very quickly but I think it is very effective.  I will definitely be making this card again using a Christmas theme!

Dies:
http://www.scrappingcottage.com/cottagecutzpartymousewithpresents.aspx
http://www.scrappingcottage.com/cottagecutznestedwackystitchedovalset.aspx

Thanks for stopping by today - I hope you have a fun and creative weekend!

Tuesday, July 23, 2019

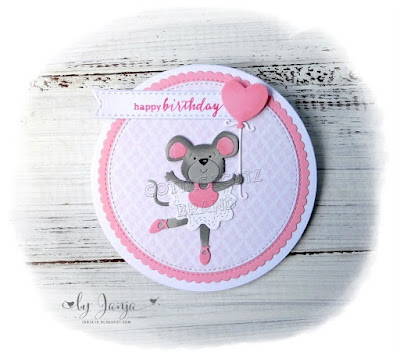
Round birthday cards

Hi! Janja is here. My summer holidays are over and I'm with you again.
For my today post I prepared 4 cards with a new release - Birthday.
Let's see how they are made.


- round card bases
- white and colored cardstock
- colored ink pads
- self-adhesive foam pads, glue

Cut out all the pieces from a colored cardstock. Color them around the edges with colored ink pads. Then assemble all mouses.


Prepare white round card bases. Cut circles from patterned papers and colored cardstock. Paste all circles on card bases.


Attach the mouses to the background with glue and self-adhesive foam pads. Stamp a sentiment and we're done.


Thanks for stopping here and happy crafting.
Janja