Showing posts with label Owl in Pumpkin. Show all posts

Thursday, September 21, 2023

Happy Fall Y'all

Hello Friends,

It is Pam sharing with you this fabulous Thursday.

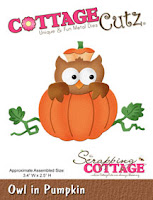
I have another fall card for you.  It can be used to welcome in autumn or for a Thanksgiving card.  I am using the Owl in a Pumpkin die. It is an oldie but a goodie and still available in our store today! 


Design steps:

1.  Using the Owl in a Pumpkin die cut out the following pieces of card stock: brown, green, yellow, white, black and a DP orange
2.  Using coordinating ink colors shade the pieces and then glue together
3.  For the base use an A2 blue card, cut a piece of brown 4 1/8 x 5 3/8, and a piece of leaf DP cut 4 x 5 1/4.  Using the largest Pierced Wide Circle Frame die cut out 2 circles in brown and glue together.  Using the second from the largest Pierced Circle die cut out blue and then run through an embossing folder of your choice.  I used a leaf embossing folder
4.  Glue the brown to the blue card base and then add the leaf DP.  Glue down the blue circle slight above center as shown above.  Place dimension dots on the back of the circle frame and pop of the blue circle
5.  Place dimension dots on the back of the Owl in the Pumpkin and pop it to the blue circle as shown.  Add your green leaves.  I cut a few extra leaves as you can see below
6.  Finish your card by adding the sentiment


We have more inspiration on our YouTube Channel check it out HERE

Thanks so much for stopping by!  And I will see you next Thursday.

Blessings and Take Care


Wednesday, November 18, 2015

CottageCutz Focus Week - Holiday Treat Holder

Hello and welcome to our Holiday Treat Holder Focus Week. 
Vladka here today!

I decided to create something for Thanksgiving and came up with picnic basket. I created template by myself and after the base was cut out, I cut out also a looooot of stripes and weaved them together to get the look of real weave basket. I did this separate, not directly on my basket. I glued weaves parts afterwards and cut away the excess. I did the same with basket cover, which can be open on each side or removed completely to easily get the treats. After basket was finished, I distressed all sides with brown distress inks. And of course I used a lot of different dies from On the Farm release and all of them are listed at the end of this post. So, if you are interested, just click on the picture and this will get you directly to the die in Scrapping Cottage store.

And this is not all my friends. Also this time we will be giving away a gift certificate for $15.00 to shop at the Scrapping Cottage Store. All you have to do is, to comment on each post for that week here in CottageCutz blog (between 18th and 25th of November) and one lucky winner will be announced on November 28th

So, good luck!

Card Supplies I used:
CottageCutz dies: they are listed below
Card stock: light brown
Distress Ink: Walnut Stain and Vintage Photo to distress the edges
Other: scissors, paper trimmer, scor-buddy, glue tape


Be sure to leave a comment now through the 25th for a chance to WIN a Gift Certificate to the Scrapping Cottage Store! We always enjoy reading your wonderful and sweet comments! Thank you all!!