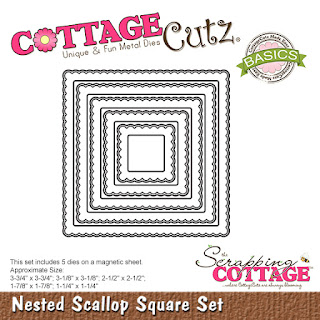
Showing posts with label Nested Scallop Square. Show all posts

Monday, September 25, 2023

Holiday Deer

Happy Monday crafty friends!

Kris here to share some rustic Christmas inspiration with you☺  

I made this Christmas card using the new Holiday Deer die from the 2023 CHRISTMAS RELEASE!  


There are 2 brand new releases in store --- one is Christmas (40 designs)  and the other is Fall (15 designs) --- they are AMAZING --- and the best news, you can get them ALL in the bundles for 50% off!!   But this offer is for a limited time.  If you prefer to pick and choose your favorites, the individual dies in each release are 30% off!  

CUTTING & SCORING:

• Card Base:  (Red) Cut 10" x 7" and score the 10" side at 5"
• (Sand) Cut 4-3/4" x 6-3/4" - embossed with a diamond folder
• (Pecan Pie) Die cut w/ largest Scallop Square
• (Red/Blk Buffalo Check) Die cut w/ smallest Pierced Square and Merry Christmas w/ Friends
• (White) Die cut Holiday Deer and the holly/berries from Ginger Pocket Peeker


DESIGN STEPS:

I layered the Sand/embossed layer onto card front, then I layered the squares and attached to top middle of card.

I used Distress Oxide inks and Copic markers to color up my Holiday Deer and holly berries.  


I forgot (as I often do) to use double sided adhesive sheet to the back of my buffalo check paper before I die cut my sentiment, so... the next best thing!!  I turned it upside down on the sticky side of some low-tac tape, added my glue to sentiment, then I turned it over and used my lamp light to see exactly where to place the sentiment and Wha-La!  Got it on there fairly straight ... and then removed the low-tac tape.  


I added the holly/berries to help fill some empty space around sentiment and done!  ☺


❀ Ink Something Crafty ❀
~Kristine


Sunday, September 24, 2023

Merry Moose in Wonderland


Welcome friends!  I hope you're having a blessed Sunday ☺

It's Kris sharing with you today and I've got a cute Christmas card using the Merry Moose die from the NEW 2023 CHRISTMAS RELEASE

I had this Winter Wonderland paper (6x6) from Doodlebug Designs that has some moose , polar bears, and other li'l critters on it and thought it'd be a great match for this new Merry Moose!  All the patterned papers came from this paper pad.  I followed this week's sketch challenge at SplitcoastStampers, SC976 


HERE'S HOW I MADE IT:

Cutting/Scoring:

White:
-- card base - cut at 4-1/4" x 11" and score at 5-1/2" 
--stamp sentiment, then die cut top and bottom with an edge of the Nested Wacky Stitched Rectangles
-- die cut Merry Moose

• Glittery White:
-- die cut Snowflakes (retired)

• Patterned Paper #1 (blue w/snowflakes) 
--cut at 4-1/4" x 5-1/2"
-- cut a small corner triangle as shown and die cut the top with the side edge of a Nested Scalloped Rectangle die
-- die cut just the hat from Merry Moose

• Patterned Paper #2 (blue with animals) 
--cut 4" x 5-1/4"

• Patterned Paper #3 (pink w/ pink snowflakes) 
--die cut with largest Nested Wacky Stitched Rectangles

• Patterned Paper #4 (white w/ colored snowflakes) 
--cut a corner as shown and die cut the top (diagonally) with the side edge of a Scalloped Rectangles die 
-- die cut just the scarf from Merry Moose

• cut 2 strips from the patterned paper that has rows/borders.


Design Steps:

1.  I added some DO ink to my moose parts and assembled.


2.  Adhere Pattern #1 to card base, then #2 to that, then #3 centered on top.  

3.  Attach snowflakes as shown, then pop up the moose with foam strips.

4.  Attach Pattern #4 to bottom right corner, and attach the 2 border strips at a diagonal in top left as shown.  Then turn over and trim away the strips that are hanging over.


5.  I thought I was done at this point.  But then I thought I wanted to anchor that corner with a darker color and sentiment, so I added the smaller blue corner (cut the same way as the white w/ snowflakes)


6.  And lastly, I stamped a sentiment on white cardstock and added some detail by die cutting the top and bottom with an edge of the Nested Wacky Stitched Rectangles, turned it over and trimmed away what was hanging over.  Now it's done!


Ink Something Crafty!

~Kristine


Friday, November 19, 2021

Peek a boo parcel


Happy Friday Cottagecutz fans.It’s Wendy bringing you the blog today. I hope you’ve had a great week. The weekend is nearly upon us as is Christmas so it’s making sure we are ready for the big day. 

I am bringing you a quick an easy card today. So to begin with I cut the ‘Lift Flaps Stitched Rectangle Slimline’ die to cut the apertures on my silver card. I stuck this onto a white folded card using 1mm foam pads for a bit of dimension. 

Next i cut out the ‘Santa gnome in Present’ 3 times, but I only cut out the gnome once. I wanted to give an affect of the box opening in each step. Once assembled I have attached the presents and Gnome to the card with 1mm foam pads. Here is a closer view for you


Next I printed out the words ‘Do Not Open Until Dec 25’. I split the words up and cut them out using the ‘Nested Stitched Scalloped Squares’ and attached behind each flap


To finish off the card I cut out some gold holly from ‘The Joyful Snowman Die’ and then added some diamantés and we’re done

I hope you enjoyed the card and have a wonderful weekend. Make sure that you have plenty of time to Christmas craft
Wendy


Dies I have used


Don’t forget to check out the latest video tutorial on our YouTube Channel


Tuesday, September 07, 2021

Bugs And Kisses

It's Jeanne sharing with you on the Tuesday edition of the blog.  I hope you had a wonderful Labor Day weekend and got to enjoy yourself.  I got to do a bit of card making and have a fun all occasion card to share.

This card uses one of the NEW DESIGNS from Lil' Bluebird Designs at the Scrapping Cottage - Love Bugs.

I started with a sketch from Splitcoaststampers and then picked my paper in colors that went with bugs and a frog.  I love the expression on the frog's face.  He is too cute!  I stamped the images on a stitched circle and colored them using Prismacolor pencils.  Then I stamped my sentiment and cut it out using the coordinating die.  I love that the sentiments in these stamp sets have dies!  And best yet they are on sale right now!

Included in the sale are the 16 new Lil' Bluebird Designs  Photopolymer Clear Stamp Sets and coordinating dies. There are stamps for so many of your card making occasions and then some. The coordinating dies just make it a perfect fit for your card making designs.

And speaking of recent releases, the CottageCutz Sentiments with Shadows. and Slimline Dies are also on sale!

There is still time to take advantage of the Labor Day Sale at The Scrapping Cottage! Be sure to visit the online store to see what's on sale.  The sale ends September 10 at 9:00 pm Pacific time.

Products used:


Thanks for visiting today!  I hope you have a great week!


Friday, April 17, 2020

Spring Chicken

Happy Friday!  I hope everyone is well.  It's Jeanne today with a birthday card for all the "spring chickens" in your life.  This card uses the Rooster & Chick and Spring Lamb & Chick dies from the Spring collection.
I used the layout from this week's sketch challenge at Splitcoaststampers.  I rotated the sketch and made it square.
https://www.splitcoaststampers.com/forums/card-sketches-f41/sketch-challenge-786-%7B01-29-2020%7D-t632177.html
I first cut all the pieces for the rooster, chick and sun from various colors of scrap cardstock.  I debated about whether to go bright or more realistic for the rooster.  Once I had picked out my background paper I decided on the bright colors. (Ultimately I decided not to use the sun, but I saved it for later.)
I used the second largest of the Nested Scalloped Squares and the third largest of the Stitched Squares to cut the center panels.  Then I cut a 5 inch square from solid yellow and a 4 3/4 inch square from patterned paper.  I picked these papers as I thought they had a "country" feel that went with the rooster.  I stamped my sentiment in the corner of the white square.
Next I used coordinating ribbon for the diagonal stripes.  I glued this to the yellow panel and then that to a top fold 5 inch square card.
In order to raise the square panel above the ribbon I placed foam tape on the back.  I left the corner that would go over the ribbon blank, so the square would lay flat over the ribbon.
After I placed the square and the rooster, I thought it still needed a little something.  And that something was flowers!  The flowers from the Spring Lamb & Chick coordinate perfectly with this paper!
I used the peacock blue and magenta that are in the paper for the flowers.
I love this little rooster!  I have a whole set of "punny" chicken sentiments, so I know this die will be getting a lot more use!

Dies used:
http://www.scrappingcottage.com/cottagecutzroosterandchick.aspx
http://www.scrappingcottage.com/cottagecutzspringlambandchick.aspx
http://www.scrappingcottage.com/cottagecutznestedscallopsquareset.aspx
http://www.scrappingcottage.com/cottagecutzstitchedsquaresetbasics.aspx

Thanks for stopping by today.  Be sure to visit the online store where we have a new Gardening release.  There is a great value bundle and all the individual dies are on sale for a limited time!