Showing posts with label Nativity Camel. Show all posts

Tuesday, March 21, 2023

Empty Tomb (new die)


Hello Scrapping Cottage friends! Thanks for taking the time to stop and visit with us today. It's Mary Marsh here bringing you the Tuesday edition of the Blog.

We have a brand-new Easter release with 17 new designs available in the online store. There is something for every card maker with faith based dies, beautiful floral images, whimsical with bunnies and frogs and several lovely birds and butterflies. 

You will be able to take the images beyond the Easter or Spring season. And for a limited time you can get bundle pricing on the entire release at 65% off or individual dies at 30% off.

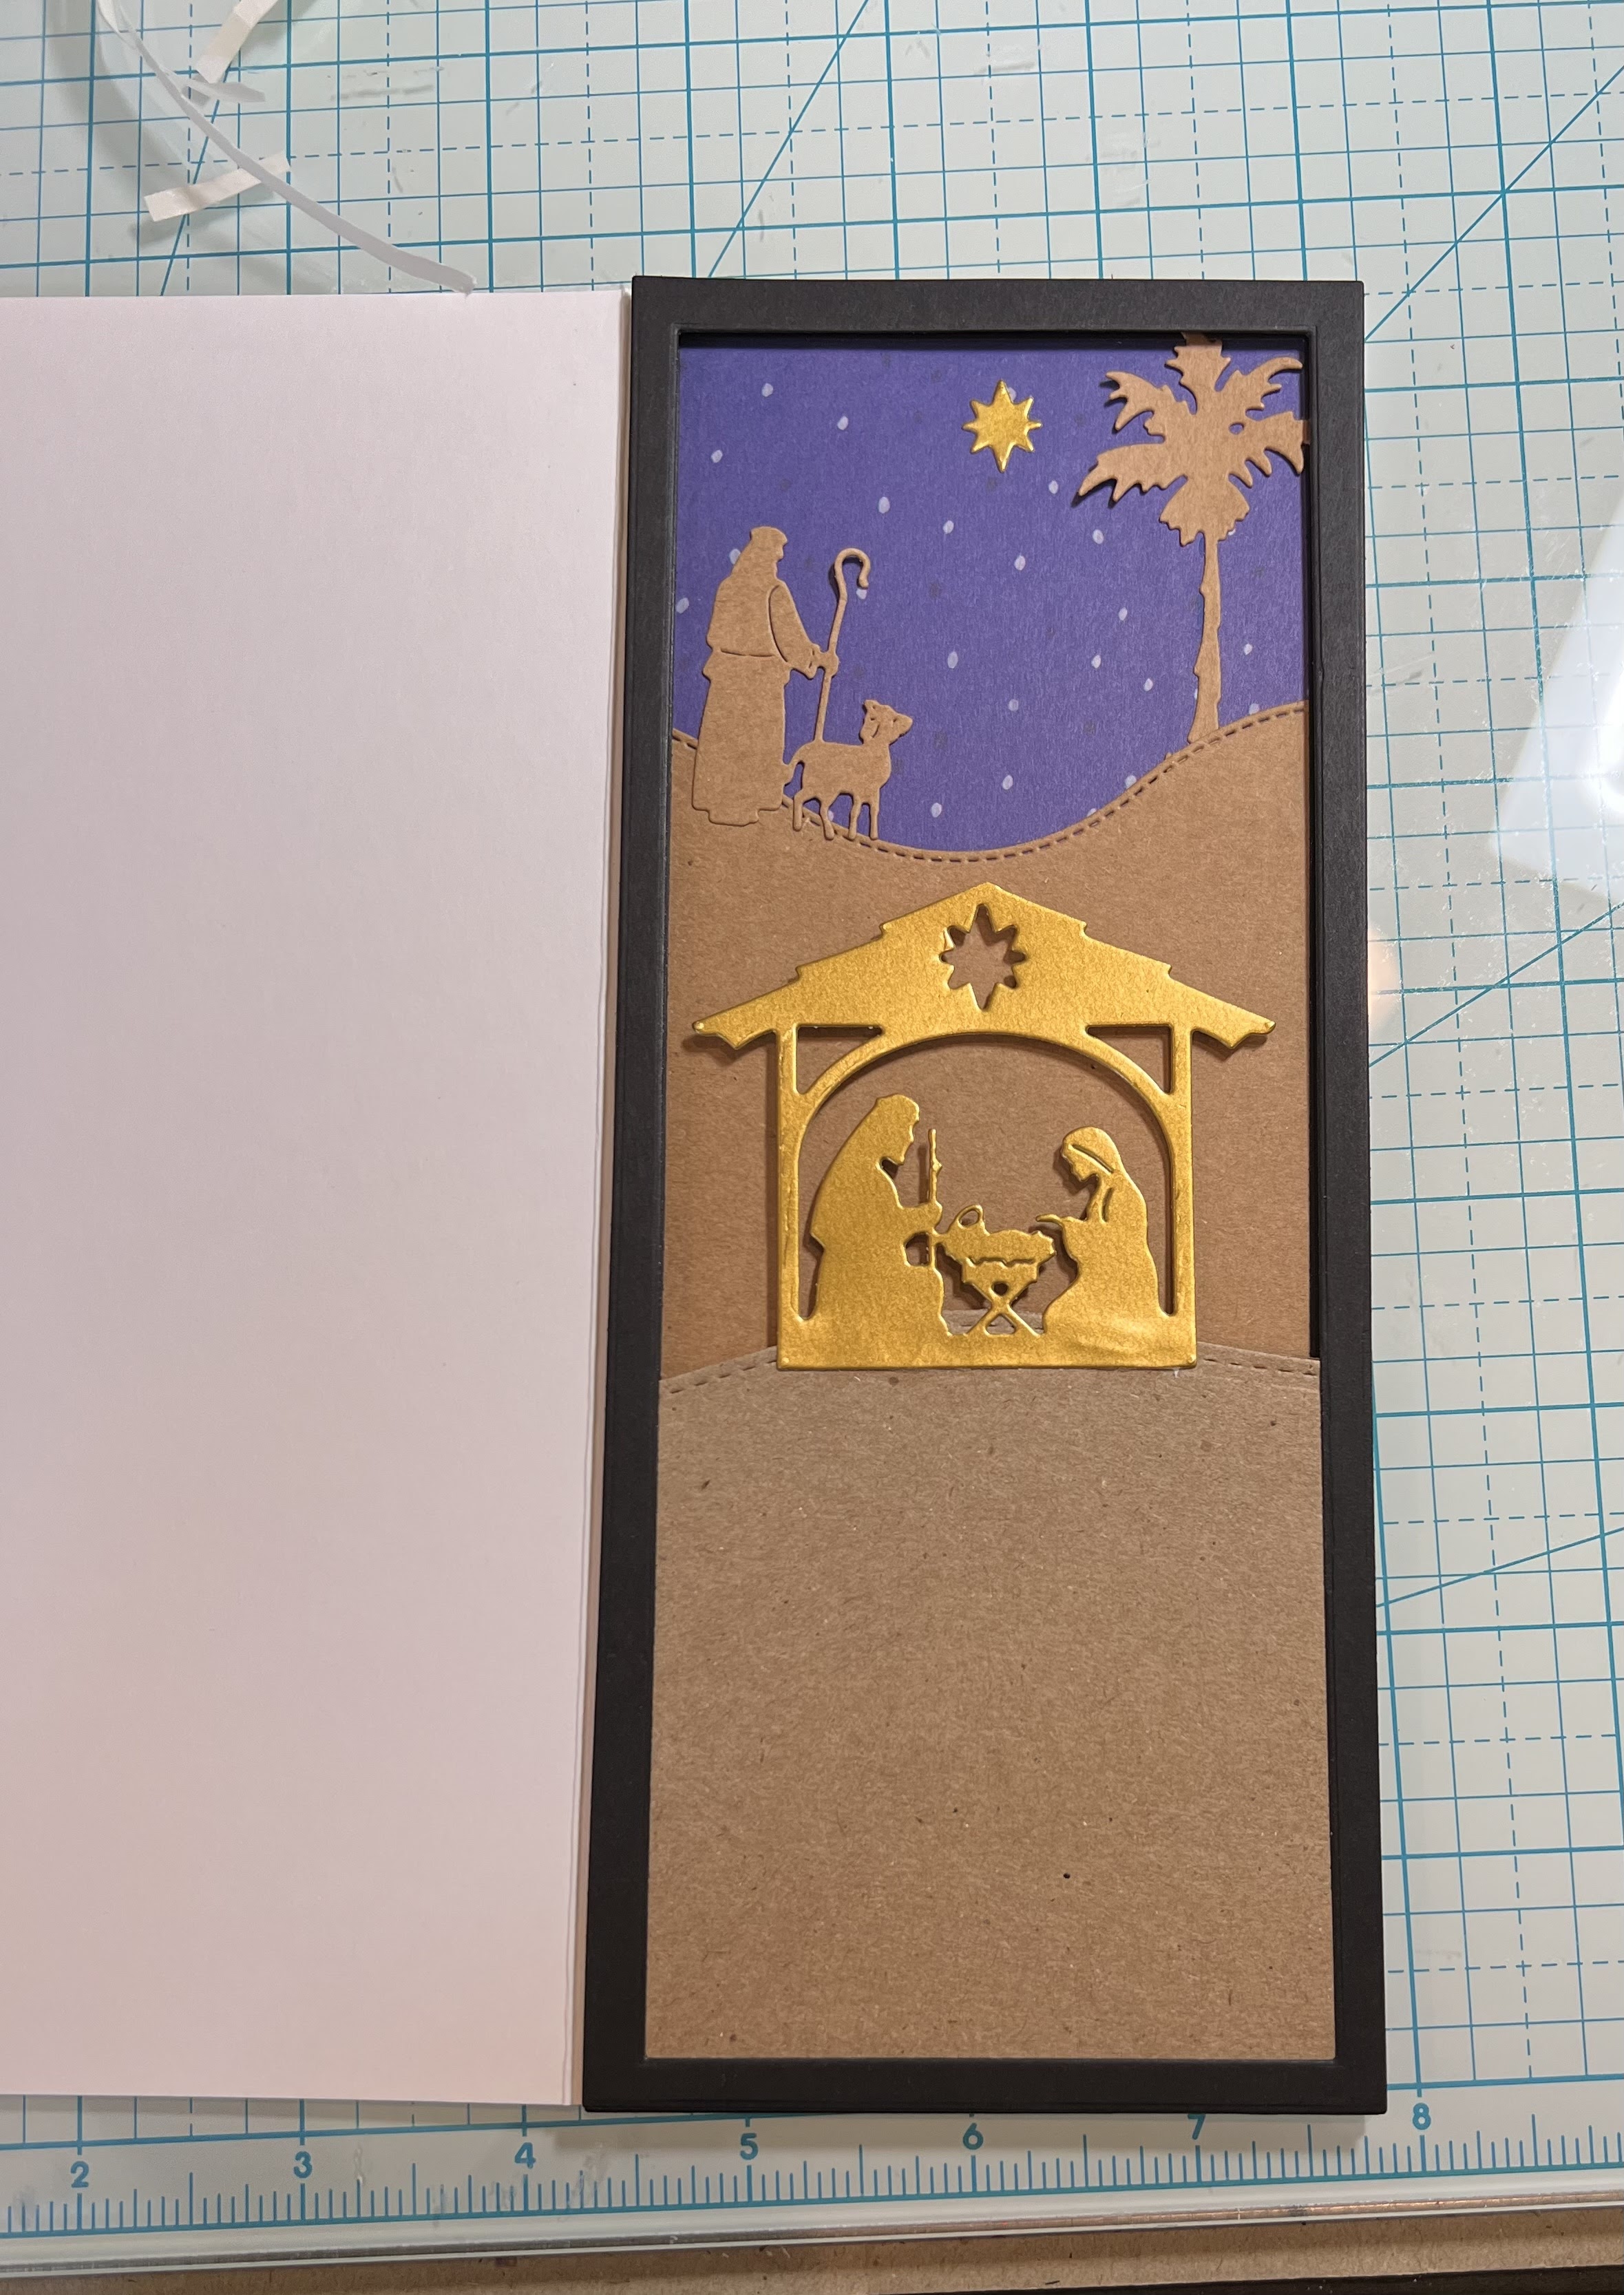
Today for your viewing pleasure I am using the new He is Risen w/Empty Tomb die. 

I started my card using the colors from the Splitcoaststampers color challenge #940. We are to use soft succulent, soft suede and mango melody for our color trio. Neutral shades are allowed in the challenge. 
soft succulent, soft suede, mango melody


I decided to try and create an Easter card with these colorsI thought I could create an outdoor scene with limited colors and use the Empty Tomb die. 

Soft suede card base: 5 1/2" x 4 1/4"
White image panel: 5 3/8" x 4 1/8"

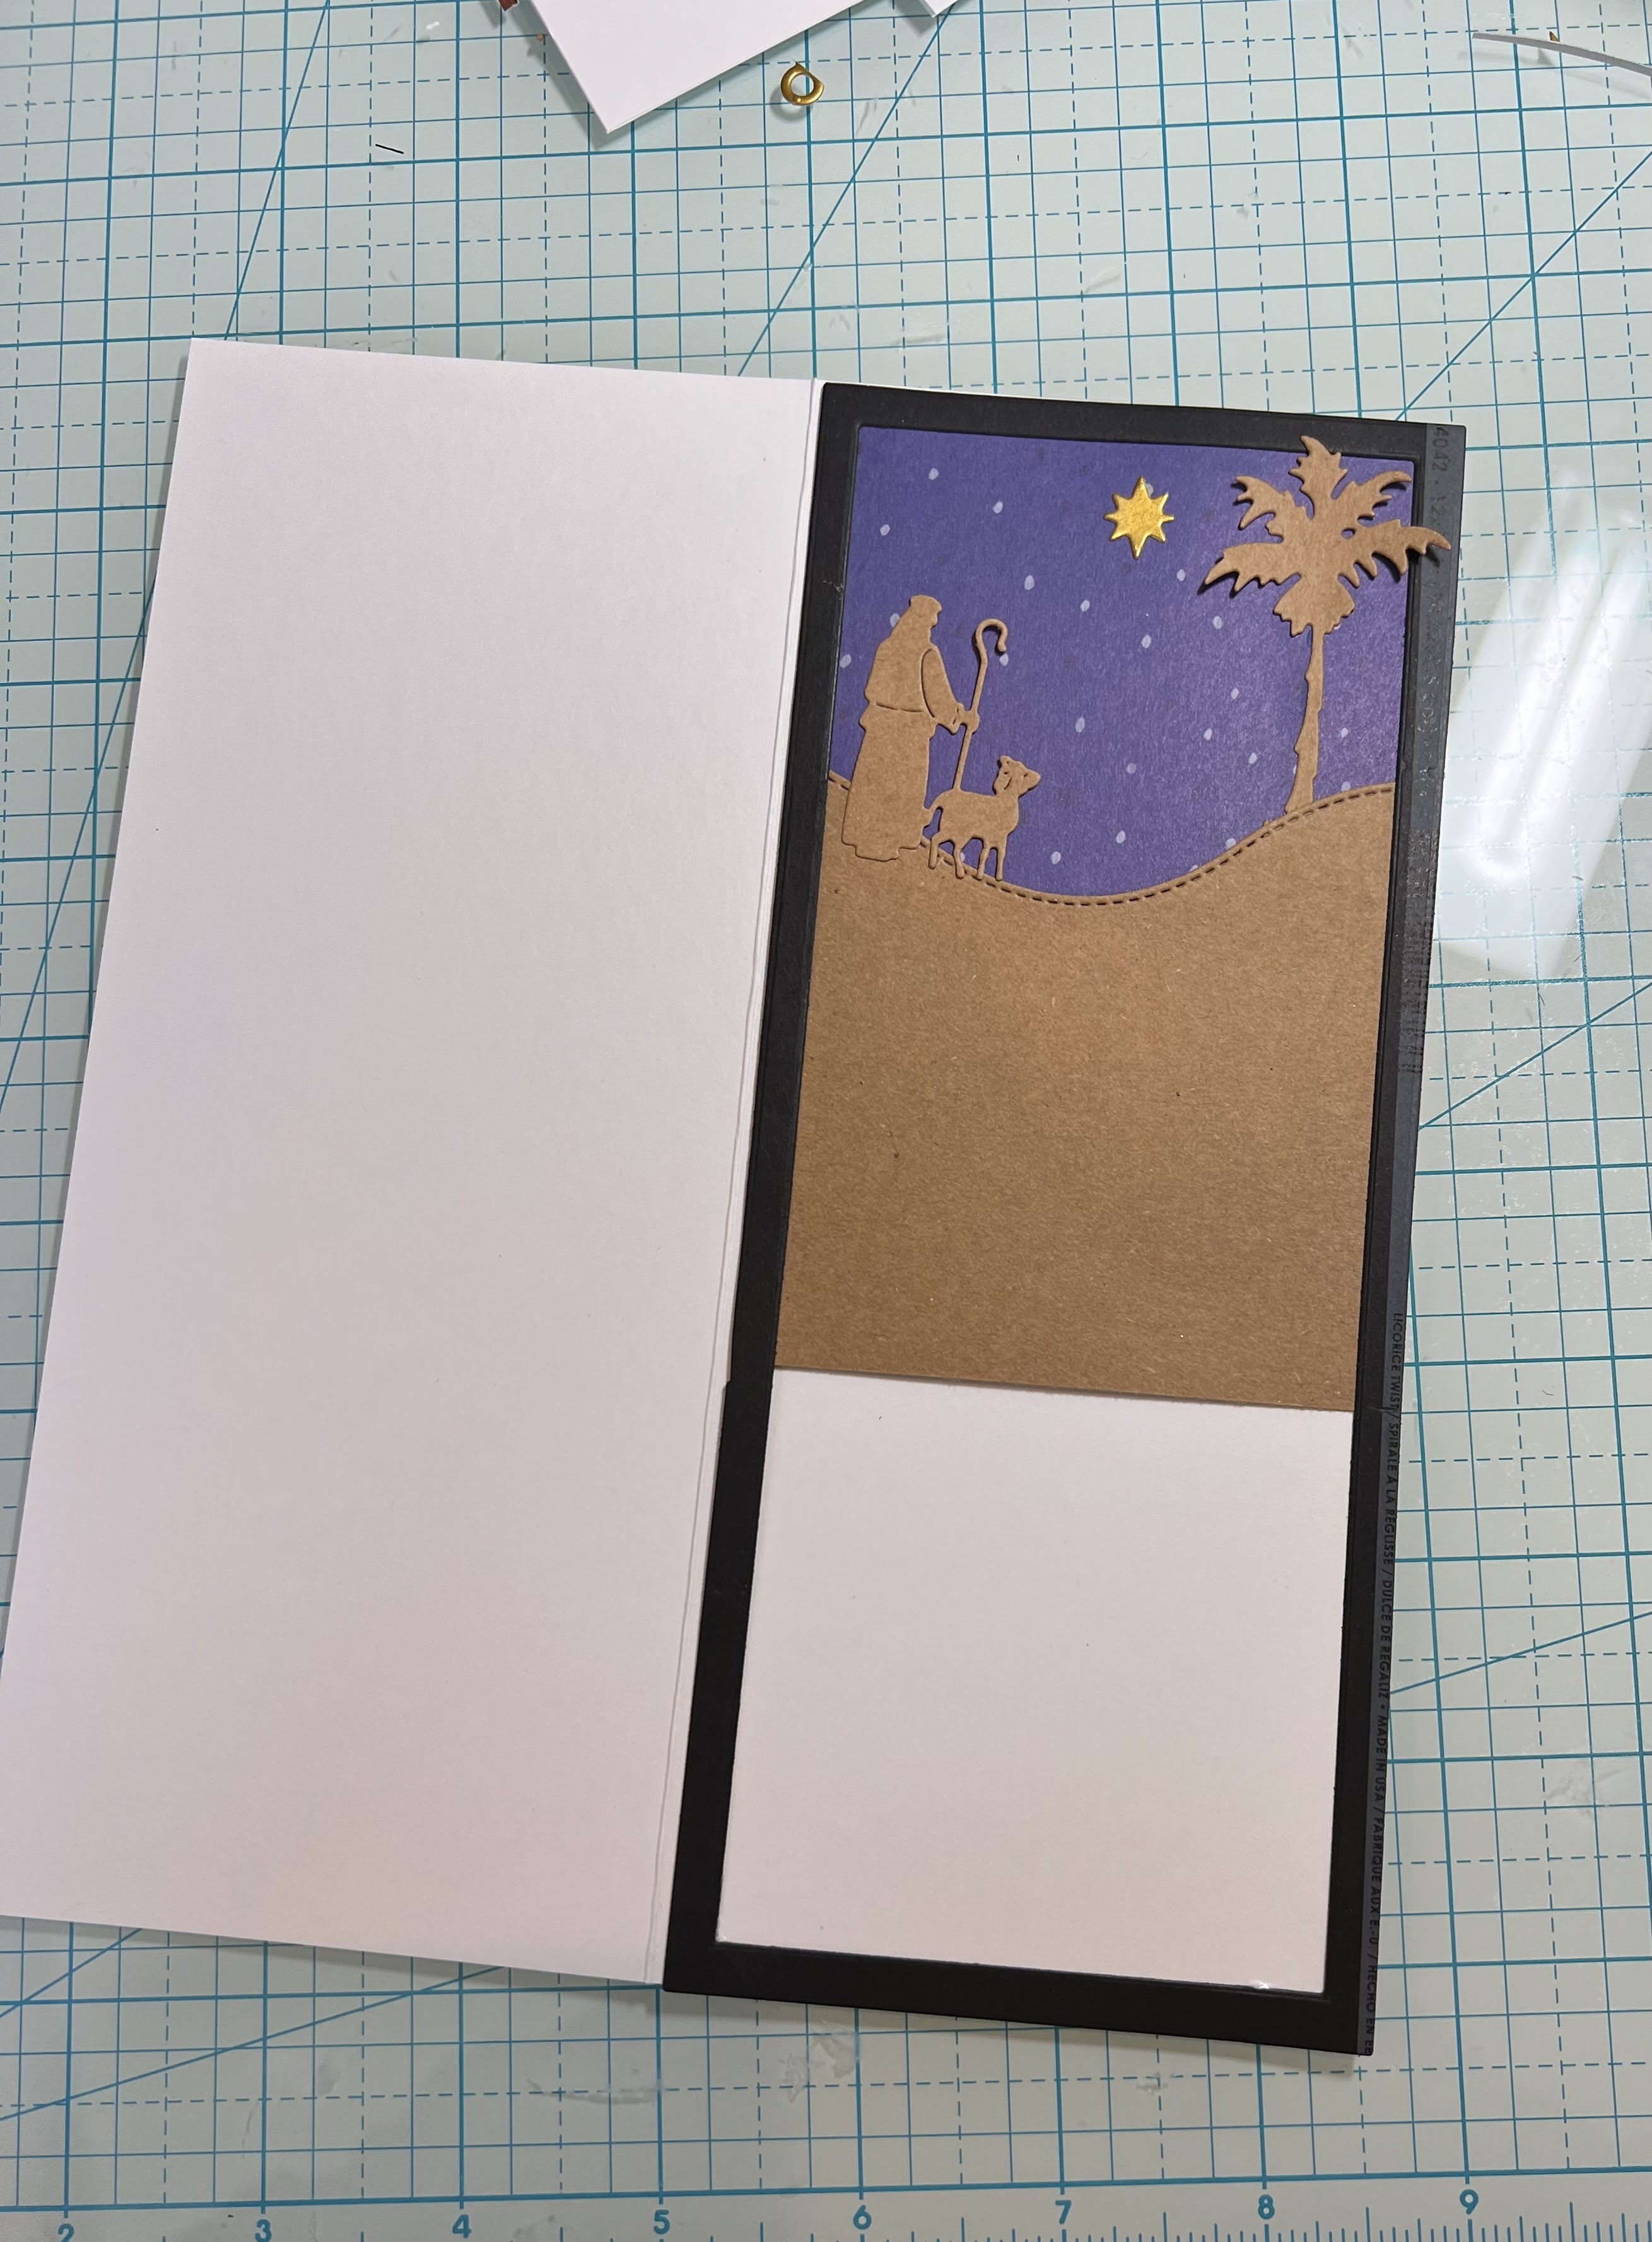
I started by stenciling sun rays with wild honey distress ink. I cut the stone tomb in gray cardstock and sponged with lost shadow distress ink. The greenery around the tomb is cut in soft succulent and then sponged with the same color ink for a darker shade. 

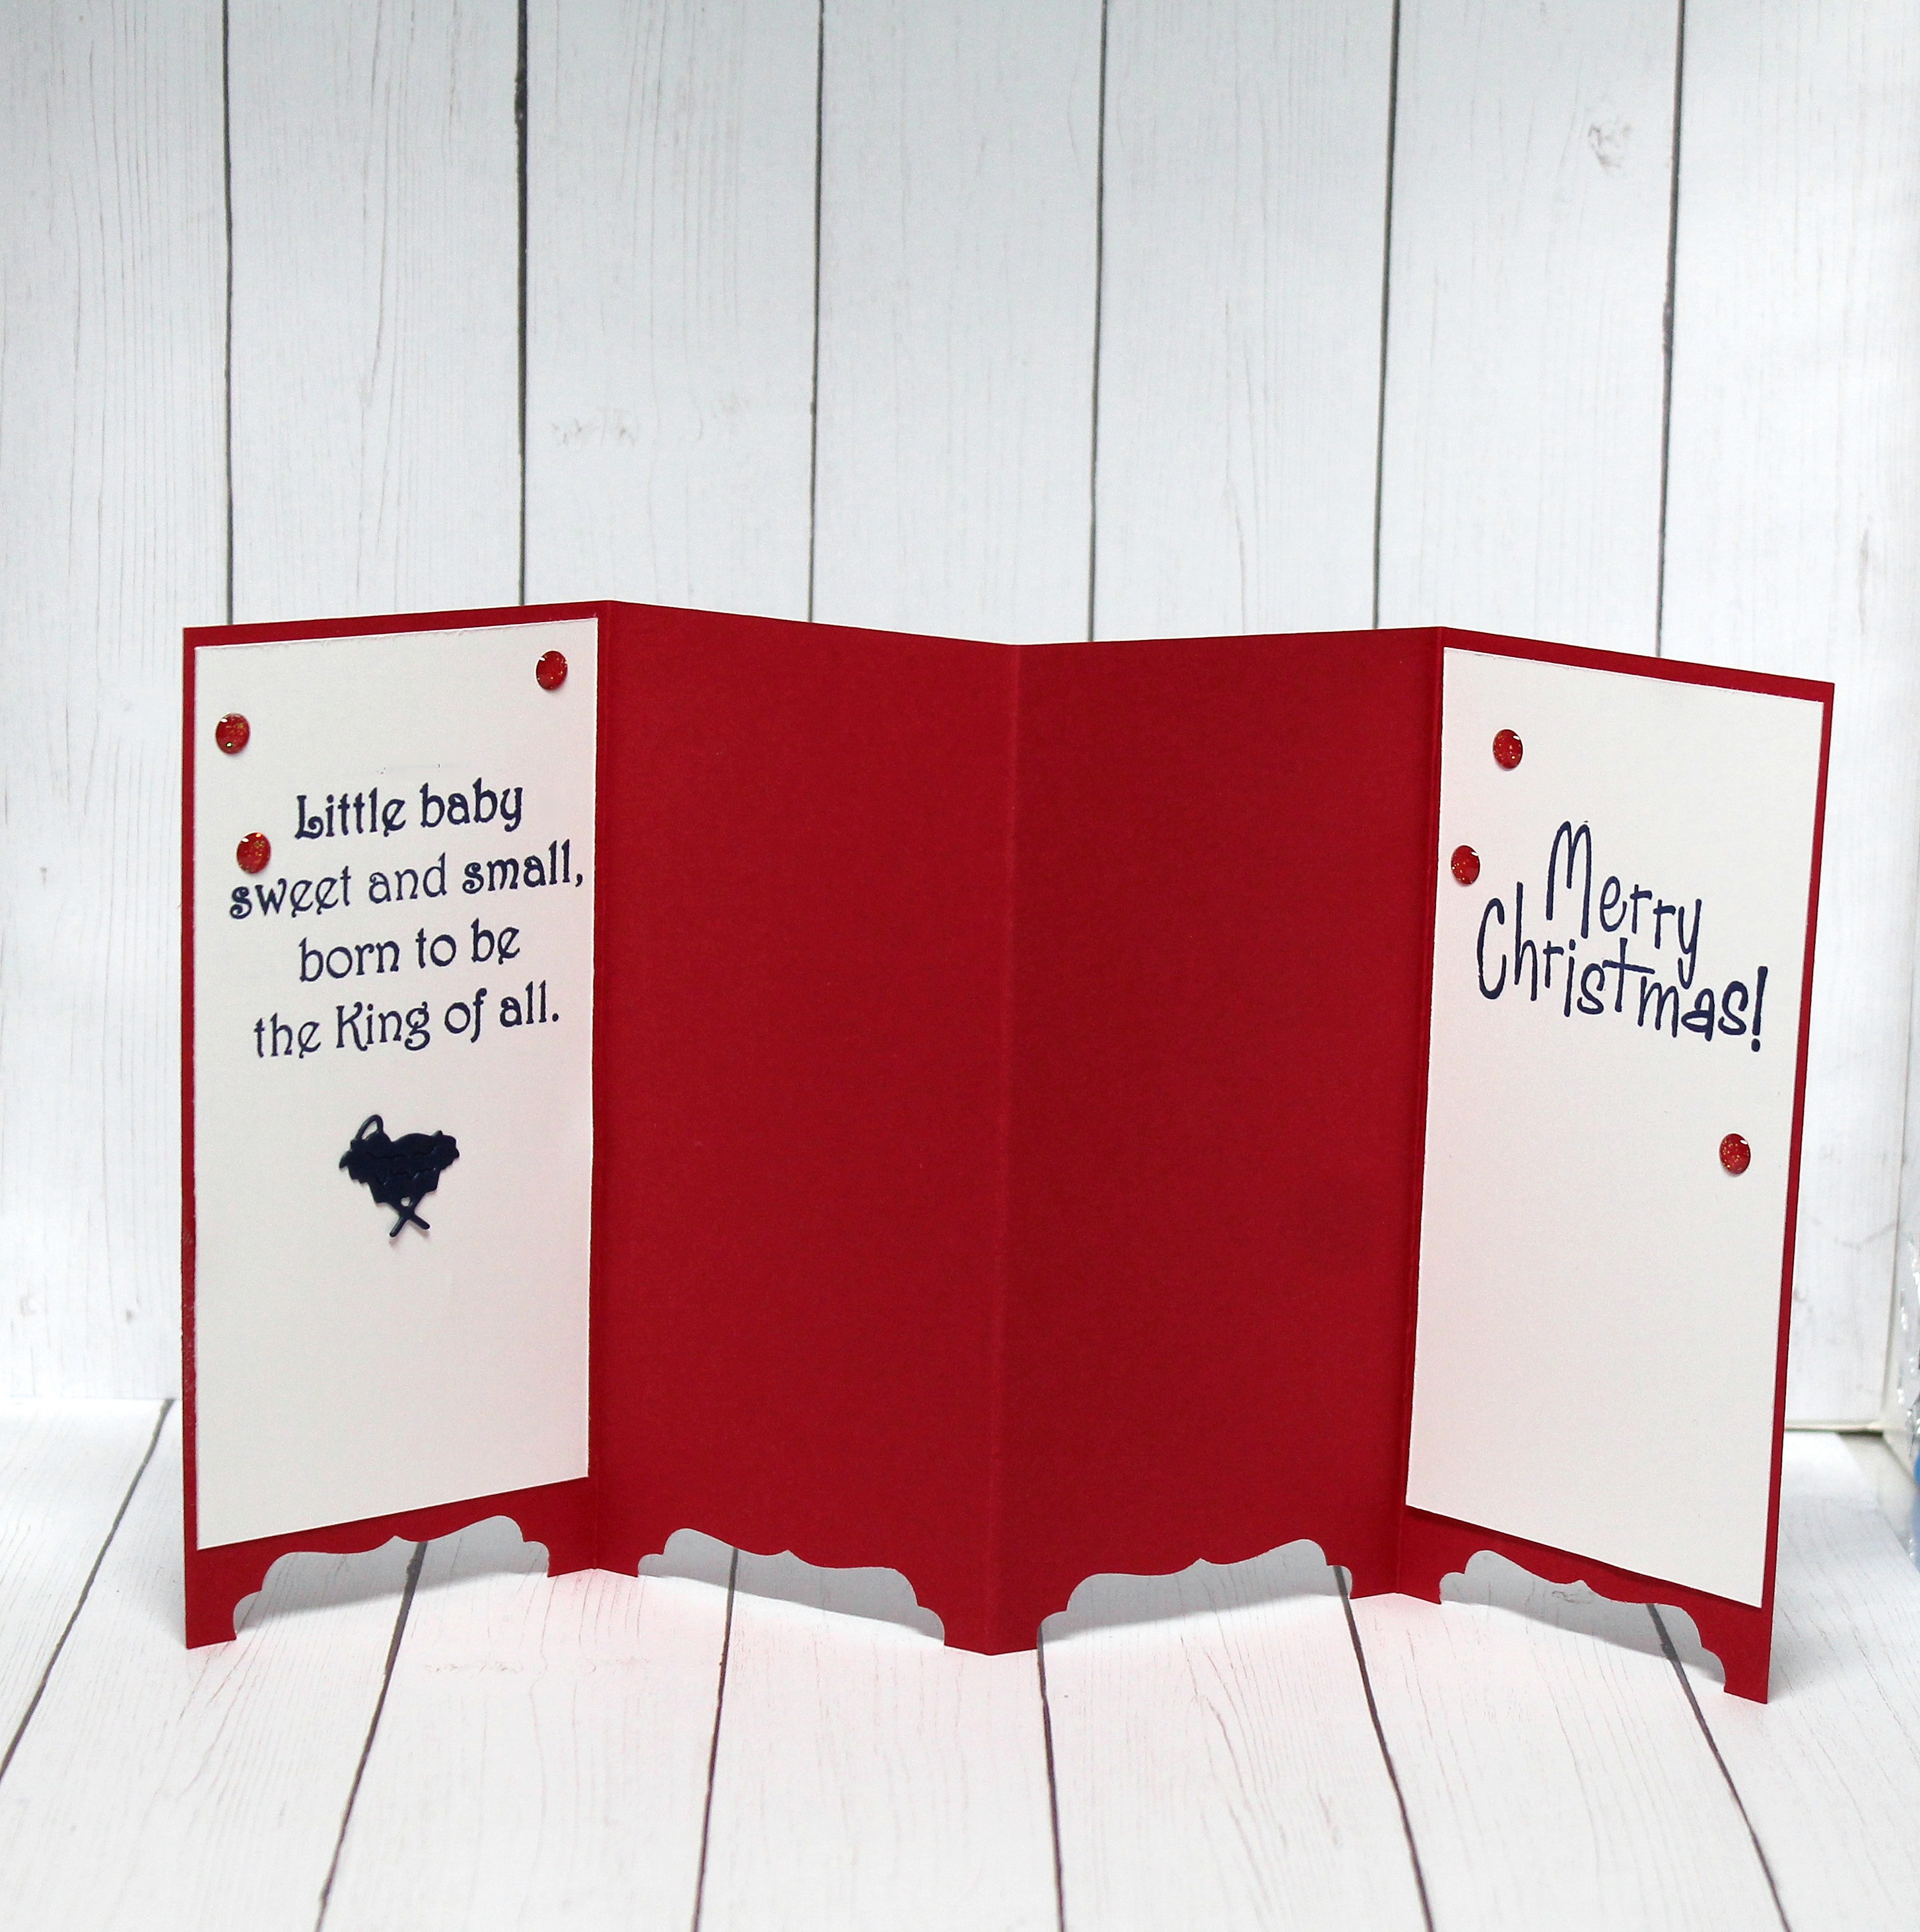
Scripture states that an angel announced that Jesus had risen so I used the Nativity Camel, Palm Tree and Angel die for my angel image. I stamped my sentiment with the idea that the angel is speaking the words. Added a few rhinestones to complete my card. 

See you Saturday with another sample from the new release.

dies I used to create card:


Sunday, September 25, 2022

Nativity Trio

Hello on this sweet Sunday!  Kris here with 3 Christmas cards using the nativity dies from the CHRISTMAS 1 RELEASE.  Before I get to them, here's an announcement:
❄❄❄
We are happy to announce that CottageCutz dies will be available for purchase in a boutique in Southern California. If you're in the neighborhood drop by.
Wild Skyes
42050 Main St.
Temecula CA 92590
❄❄❄
FUN!  My first 2 cards are super easy to create.  Using the same dies, but switching the colors, you can achieve different looks! (the lovely dies do all the work!)


My next card is a Pop Up Stage Card


When you close the card, it forces the popped up elements forward into a flat position so you can tuck this into an envelope ☺


Here is the front of my card.  I added a belly band to help keep the card closed.


THANK YOU for taking time to visit today!  
I hope I inspired you to get crafty with your favorite CotageCutz dies ~ Have a blessed week ☺

~Kristine

PRODUCTS I USED:

Friday, September 16, 2022

Nativity Screen Divider Card

Hello CottageCutz friends! Thanks for taking the time to stop and visit with us today. It's Mary Marsh here bringing you the Friday edition of the Blog.

It's new release time!!! We have new dies in the online store. It's time for our Christmas release and we have 21 new designs for Christmas Part 1. They are currently on sale for 30% off retail.

There is a great selection of religious, whimsical and some super cute birds and animals. All of your Christmas card making ideas are covered in this release. Today for your viewing pleasure, I am using the new Nativity Stable Shepherd & Animals, Nativity Holy Family & Wisemen &  Nativity Camel, Palm Tree & Angel dies. 

I have another fun fold card and this one is a screen divider card. I thought this fold and dies I used tell the Christmas story across the four panels. So, let's get started with some details of how I created my card. 

Design Steps:

I started this card by getting the screen divider cut and scored. The red panel measures 5 1/2" x 11" and is scored at 2 3/4", 5 1/2", 8 1/4". I put a pencil mark at 1 3/8" on the first panel. This is the center of each panel and where I will place my punch to cut the base of the screen card. 
There is a notch on the punch that I aligned with the pencil mark I made. I will make this same punch across each panel. 
I folded the first punched panel back on itself to use as my guide for cutting. I forgot to take a photo of this in the red cardstock. I was going to use blue cardstock originally and then changed my mind. 
I used this same method to cut the other 2 panels. It made lining up the cuts so much easier using this method. 
Next, I cut the image panels. I found this starry night designer paper in my collection and decided to use it as the backdrop for my Nativity images.  

white layering panel: 2 5/8" x 4 7/8"
designer paper layer: 2 1/2" x 4 3/4"
Now for the images I am using. I cut all of them from white cardstock. I like the contrast against the dark blue background. 
For the image panel sentiments I used the Silent Night Forest die. and Joy to the World Tree die (Christmas 2019 collection). I also cut these in white cardstock. 
The last panel is a stamped sentiment. I cut with the 3rd largest Oval die (2 3/8" x 1 3/8") To complement the sentiment I added a Christmas Star from the Journey to Bethlehem (Christmas 2018) die. I cut in yellow cardstock and added some wink of stella. 
 Now that the images, sentiments and panels are prepared, I am ready to start card assembly. I attached the images with a combo of dimensional adhesive and clear drying glue. 
This is an A2 size card does fold flat for mailing. It fits in the regular size envelope I mail my cards in.
For the back of the card, I added white cardstock to two of the panels and stamped 2 additional sentiments. Scattered a couple of red glitter enamel dots and this card is finished. I hope I have given you an idea for a way to use these new nativity dies. See you next Saturday!


Reminder:  Our YouTube Channel has a new video from Marla Harris. There is a giveaway for being a subscriber, liking the video and leaving a comment. Click here.

Dies I used to create card:


Thursday, September 01, 2022

O Holy Night

Hello Scrapping Cottage Friends,

It is Pam sharing with you today!

We have a NEW RELEASE FOR AN EARLY START ON YOUR CHRISTMAS CARDS!!  I am giving you a peek at a number of Nativity dies available in this release and they are just gorgeous.  The release is Christmas Part 1 and has 21 fantastic dies. The release includes everything from Gnomes to Reindeer!! Check it out HERE it is on sale now!!

I have seen a number of scene builder sets lately and I love them!  So I decided to create my own scene builder with the new dies. I am really excited about how it turned out!  Each layer is popped up and there is so much depth.  I wish you could see it in real life!


Design Steps:

1.  Using the following dies: Nativity Camel, Palm Tree & AngelNativity Stable, Shepard & Animals and Stable Nativity Ornament cut out of gold, brown and tan card stock

2.  Use Nested Rectangle slimline dies the largest and the second to the largest.  Tape the two together to create a frame cut out 3 frames.  For the base use white card stock cut 3 1/2 x 8 1/2 

3.  For the top layer use one of the frames.  For the ground I used the Slimline Hills die on a piece of brown card stock which measures 3 1/2 x 1.  Glue the ground to the back of the frame and then add the camels as shown above

4.  For the middle layer use another frame.  For the ground use the Hills slimline die on a piece of kraft card stock 3 1/2 x 3 1/2.  Glue the ground to the back of the frame and then add the Nativity scene on top of the hill

5.  For the bottom layer use the last frame.  For the ground use the Hills slimline on a piece of tan card stock 3 1/2 x 3 1/2.  Glue the ground to the back of the frame making sure it will meet up with the second frame and that no white will show through.  Use a piece of blue DP for the sky measuring 3 1/2 x 3 glue it to the back of the frame.  Add the Shepard, the palm tree and the gold star

6.  Starting with the bottom frame which is the one with the Shepard glue it flat to the white card base. (I wish I would have used a black card base so if I didn't get the frame just right the white would not show)

7.  Place dimension tape on the back of the middle and top layers 

8.  Take the middle layer and tape it down to the bottom layer as shown above.  (You might want to just remove one side of the dimension tape backing and get it lined up then remove the other backing as you go)

9.  Add the top layer and your card is complete.  The card has great depth love how it turned out!


CottageCutz Products


Don't forget to check out all of the new release Christmas dies! You don't want to miss out on the great prices!


We have more inspiration on our YouTube Channel check it out HERE
Thanks so much for stopping by!  And I will see you next Thursday.

Blessings and Take Care