Showing posts with label Mouse with Garden Wagon. Show all posts

Wednesday, May 27, 2020

Plant Seeds of Kindness

Hello!  This is Sukie and today I'm sharing another card with the new Gardening die release.  I used several dies from this charming release.
I found the most darling patterned papers in my stash which inspired the colors for each of the die cuts. I used the Mouse w/Garden Wagon, Garden Hose Mini, Gardening Tools and Garden Border for my card. I only used the watering can from the Garden Border and discarded the remaining pieces.
The 2 sheets of paper were trimmed to incorporate all of the different patterns and floral border on my card base.  I stamped a fun sentiment along the top edge of my card.
After adhering the mouse with his wagon, I simply filled in the bottom half of my card with the hose and gardening tools.
The watering can was the final accent on my card to finish off the happy looking gardening scene.
Here are the dies used on my card, available in the store:

Sunday, May 03, 2020

Garden Wagon


Hello Scrapping Cottage friends! Thanks for taking the time to stop and visit with us today. It's Mary Marsh here bringing you the Monday edition of the Blog.

Hope you are doing ok and had a nice weekend. Since so many of us have the stay at home orders in place, it's nice to have a hobby where we can create beautiful cards. I put on some music and let my creative juices flow!!!

We have a brand new release of dies in the online store. This one is garden themed and has 19 new designs. These new dies are perfect for birthdays, Mother's Day, Father's Day or even a thinking of you card for the person who loves to garden.

For my card today, I am featuring the new Mouse w/Garden Wagon die. This one will be a Mother's Day card for a friend with that greeting on the inside of card.  I make a lot and send them to my family and friends. This year they will especially like the kind thoughts.

I made this card for the color challenge #788 on Splitcoaststampers. Our own Jeanne was the hostess for the challenge and she chose a bold and bright color trio.
lemon-lime twist, berry burst, powder pink
I cut the flowers and pots in the challenge colors. Sponged the lemon-lime twist cardstock with the same color ink to get a bit darker shade. I decided to cut his wagon in a black striped designer paper.

The little mouse is cut in smoky slate (neutral) cardstock and I sponged in the same color ink for depth. For the background of the image panel, I used a cloud stencil and sponged some clouds in spun sugar distress ink. To finish off my card, I scattered a few berry burst glitter enamel dots.

card base: 5 3/4" x 4 1/2"
white layer panel: 5 1/2" x 4 1/4"
designer paper panel: 5 3/8" x 4 1/8"
stitched scallop rectangle: largest die

Well that's it for me for this post. I hop I have given you another idea for a way to use this super cute new die. See you on Saturday!

dies I used to create card:


Friday, May 01, 2020

Flower Pots Thank You

Happy Friday!  It's Jeanne today with a clean and simple card for you.  This card was created for two card challenges this week -  a sketch and a color challenge.
The sketch is at CAS Colours and Sketches:
http://cascoloursandsketches.blogspot.com/2020/04/challenge-368-sketch.html
and the colors are from the weekly challenge at Splitcoaststampers - Poppy Parade, Cajun CRaze and Mango Melody.
https://www.splitcoaststampers.com/forums/color-combinations-f43/cc789-parade-crazy-melodies-04-28-20-a-t633225.html
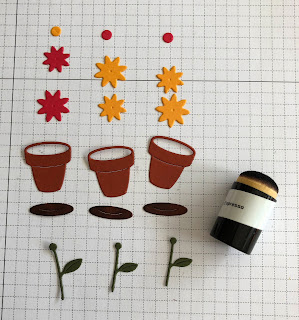
To begin my card I cut the pieces using the flowers from Mouse w/ Garden Wagon and the pots from Potted Plans in the appropriate colors of cardstock.  For the dirt color I used Early Espresso ink to color the pieces that were cut in Cajun Craze.  I used Mossy Meadow for the stems.
I assembled the pots.
I cut a top fold A2 card base in white, a strip of Poppy Parade 5 1/2 x 1 inches and a Mango Melody patterned piece 5 1/2 x 2 inches.  For the box on the sketch I used the second smallest die from the Stitched Scallop Rectangle set.
I used white embossing powder to heat emboss my sentiment.  Then I cut the strip so it was about 5/8 inches high.  I usually emboss or stamp my sentiments on a strip larger than what I want to use so that I can adjust if I don't stamp quite in the center.
Next, I glued the posts to the rectangle leaving the tops of the flowers hang above the box.  If you start with the center first it is much easier to get the placement right.  Then you just need to center each side.
I adhered my patterned piece to the bottom of the card and added my strip 1 3/4 inches from the bottom.
Using foam tape, I added the box with the pots to my card.

Dies used:
http://www.scrappingcottage.com/cottagecutzmousewgardenwagon.aspx
http://www.scrappingcottage.com/cottagecutzpottedplants.aspx

http://www.scrappingcottage.com/cottagecutznestedstitchedscalloprectangleset.aspx

Thanks for visiting today.  I hope you have a fun and creative weekend!  Be sure to visit the online store to check out the adorable new Gardening release!