Showing posts with label Magic Dragon. Show all posts

Sunday, May 26, 2019

Fantasy Tags

Hi!

It's Anja here. Today I don's have a card for you. Instead of the card I made three tags, that can be used with birthday gift bags for kids. I used cute images from Magical Fantasy Release.


For this project I used:
- Cottage Cutz dies (Magic Dragon, Unicorn Kitty, Magical Fairy, Mail Tag Set),
- Distress Inks (Spun Sugar, Worn Lipstick, Pumice Stone, Tumbled Glass, Shabby Shutters, Mowed Lawn, Forest Moss, Mustard Seed, Antique Linen) and Oxides (Broken China, Worn Lipstick),
- white cards stock for die cuts,
- stencil - clouds,
- water spritzer,
- heat gun,
- black pen,
- white pen,
- scissors,
- adhesive foam pads,
- paper glue,
- ribbons in different colors.

First I cut and colored the dragon. I used black and white pen for the eyes. I cut the tags along with the images. I cut the biggest of the tree tags.


Second I colored the fairy.


And I colored the kitty last. I used Distress Inks for all tree. And black pen for the eyes.


Next, I colored the tags. I used Distress Oxides for coloring. I used a plastic stencil to color the clouds on the first one. Then I spritzed the tag with water and then dried it with the heat gun.


I colored the second tags with two shades of Oxides. I again used water drops to add a little dimension.


And the last tag I just colored around the edges. And forgot to take a picture. Sorry for that.

And when I had all three images and tags ready, I used glue and adhesive foam pads to adhere the images on the tags. And the last thing I did was putting the ribbons on the tags. I used pieces of ribbon from my stash. And my fantasy tags were done.


That's all from me for today. Sending greetings from Amsterdam :)

See you again next week.

Anja Z.


Cottage Cutz dies I used for the project:


Wednesday, May 22, 2019

May Your Day Be Magical

Hello!  This is Sukie and today I have a sweet card to share for my design team post. I'm still loving all of the dies from the Magical Fantasy die release, they are perfect for those whimsical projects!
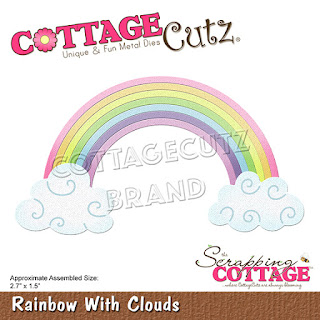
All of my pieces were die cut in white card stock and then shaded with my Oxide Inks.  I went with a soft color palette for both the Rainbow with Clouds and the Magic Dragon.
To create my background I cut out several of the clouds from the Rainbow with Clouds die and used it as a stencil at the bottom of my card base.  The top of my card base was inked with some Mustard Seed Oxide Ink and splattered with a bit of water.
I heat embossed a sentiment from the Scrappy Moms (retired) Happily Ever After stamp set and anchored the rainbow next to the sentiment.  The sweet dragon was adhered above the clouds, he appears to be floating.
For a finishing accent, I adhered some sequin stars on the upper half of my card.  This card is perfect for any special occasion!
Here are the dies used on my card available in the store:


Saturday, April 27, 2019

Been Dragon My Feet (new die)


Hello Scrapping Cottage friends! Thanks for taking the time to stop and visit with us today. It's Mary Marsh here bringing you the Saturday edition of the Blog.

We have a new release of dies in our online store. If you haven't seen the Magical Fantasy release yet, you have to drop by the store and check it out. These new dies are all so cute and whimsical. There are 27 new designs and I am in love with everyone of them.

A friend asked me if I could make a card that would say "sorry" for something she didn't get done as promised. Well, I just happen to have one of those "punny" sentiments mentioning a dragon and our new sweet dragon die. So, today I am featuring the new Magic Dragon die.  Let's get started on some details of how I created this card.

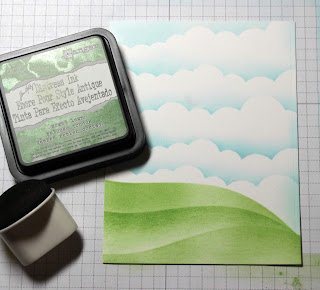
Step 1: I decided to sponge a cloud and grassy slopes on the background with distress inks. I used a stencil for both. On the clouds I used tumbled glass distress ink and on the hilly slopes I used mowed lawn distress inks.


Sponged Image Panel: 4 1/8" x 5 3/8"

Next, I cut the dragon from 2 shades of green and mango cardstocks.
I wanted my sentiment on the top right of the image panel. I used a cucumber ink and with the help of my MISTI it stamped perfectly.

Step 2: Now that everything is sponged, cut and stamped, I am ready to start card assembly. I decided to add some cucumber thick bakers twine to the image panel. Just for a little added interest.
To attach my cute little dragon I used dimensional adhesive. I wanted him lifted off the image panel a bit and have his feet just touching the grassy slope.
To finish off my card I added a small twine bow with a epoxy heart and scattered a few enamel dots. The epoxy heart is clear and didn't show up very well in the photo. But irl you can see it so I will leave it on the card. Attached the image panel to the cucumber card base with double sided tape.
I hope I have given you an of a way to use this magic dragon die. We have been showing samples of these new dies all week so if you haven't seen them look back on the blog. We are also on Facebook, Instagram and Pinterest.

See you next Saturday!

die I used to create card: 


Tuesday, April 23, 2019

Knight and Dragon

Hi, Janja is here with you.
Above the dragons and knights, boys are always excited. I made two cards for all the little boys who dream that they are brave knights who overcome the dragon.
I used dies from the new release - Magical Fantasy.


- CottageCutz dies: Knight, Royal Horse, Magic Dragon, Fairytale Castle, Rainbow With CloudsRetro Alphabet
- white card base: 4.25 x 5.5" (10,8 x 14 cm), folded
- white cardstock: 4 x 5,2" (10,2 x 13,2 cm)
- scrapbooking glitter paper
- colored cardstock
- colored ink pads
- embossing folder
- glue, double side adhesive tape, self adhesive foam pads

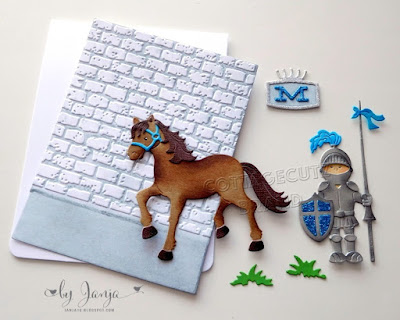
For the first card, cut out the knight and horse. Then darken all the pieces with colored ink pads along the edges and fasten them together.


For the brick wall use embossing folder and distress ink - Iced spruce.


The first letter of the boy's name is cut out of blue and silver scrapbooking glitter paper.


Completed card.


Repeat the process on the second card and cut out the central motive first. 
Cut the hill with scissors.


I used an oval brush and a plastic stencil for the cloudy background. Very simple and the result is flawless.


Now we have everything ready. We finish the card as shown.


Have a nice day.
Janja