Showing posts with label Joy of Giving. Show all posts

Friday, December 21, 2018

Celebrate!

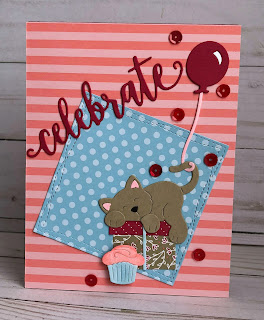
Happy Friday Cottage Cutz fans.  It's Jeanne posting today.  Christmas is just around the corner and I've made a card for you that could easily be adapted to Christmas or other celebration just by changing the colors and paper.  Today I made it a birthday card.
This card goes together very quickly.  I cut most pieces from white card stock.  For the cat, balloon and present I used colored or patterned paper.
I used alcohol markers to color the white pieces to match the colors in the patterned papers and glued the pieces together.
I chose some coordinating paper and cut an A2 panel and a square from the second largest of the Nested Wacky Stitched Squares along with the word Celebrate in red.
I angled the square in the lower right corner and added the cat, present, balloon and sentiment.
Finally, I popped the cupcake up using a foam dot and added some sequins.

Dies used:
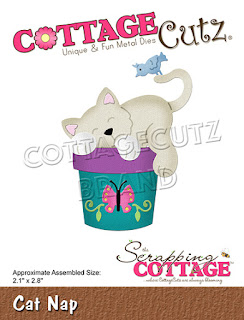
http://www.scrappingcottage.com/cottagecutzcatnap.aspx
http://www.scrappingcottage.com/cottagecutzjoyofgiving.aspx
http://www.scrappingcottage.com/cottagecutznestedwackystitchedsquareset.aspx
http://www.scrappingcottage.com/cottagecutzexpressionspluscelebratephrase.aspx
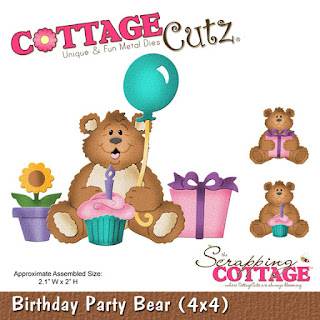
http://www.scrappingcottage.com/cottagecutzbirthdaypartybear4x4.aspx

Thanks for visiting today!  I hope you have a wonderful weekend and a happy holiday!


Thursday, December 20, 2018

Christmas Tree

Good Morning Scrapping Cottage Friends!

It is Pam on the blog with you today!

I have one more Christmas card for you!  I used two of our new dies to create this fun card.
Designer Steps:


1.  Use an A2 card base and cut the front flap in half
2.  Cut a piece of red checked DP 4 x 5 1/4, piece of tree DP 3 3/4 x 5, green card stock 5 1/4 x 2, red checked DP 5 x 1 3/4, cut 2 white oval using the Stitched Scalloped Oval die
3.  Glue the green card stock and the red checked DP to the front flap as shown
4.  Glue the red checked DP to the inside and then glue the tree DP to the red checked DP
5.  Using the Handmade Tree and Presents die cut out the tree in green and the trunk in brown shade with TH inks.  Assemble the tree and glue to the white oval.  Cut out the packages in the DP, assemble and pop to the oval
6.  Glue the oval to the front flap only putting glue on the left side of the oval
7.  Add the star and rhinestones to the tree.  Use the Joy of Giving die to cut out the sentiment and package and then glue to the oval on the inside of the card
CottageCutz Products


Thanks so much for stopping by and I would like to take the opportunity to wish you a very Merry Christmas and Happy New Year!
Blessings
Pam