Showing posts with label Joy Nativity. Show all posts

Sunday, September 25, 2022

Nativity Trio

Hello on this sweet Sunday!  Kris here with 3 Christmas cards using the nativity dies from the CHRISTMAS 1 RELEASE.  Before I get to them, here's an announcement:
❄❄❄
We are happy to announce that CottageCutz dies will be available for purchase in a boutique in Southern California. If you're in the neighborhood drop by.
Wild Skyes
42050 Main St.
Temecula CA 92590
❄❄❄
FUN!  My first 2 cards are super easy to create.  Using the same dies, but switching the colors, you can achieve different looks! (the lovely dies do all the work!)


My next card is a Pop Up Stage Card


When you close the card, it forces the popped up elements forward into a flat position so you can tuck this into an envelope ☺


Here is the front of my card.  I added a belly band to help keep the card closed.


THANK YOU for taking time to visit today!  
I hope I inspired you to get crafty with your favorite CotageCutz dies ~ Have a blessed week ☺

~Kristine

PRODUCTS I USED:

Saturday, December 02, 2017

Joy Nativity in a Z-Fold Card

Hello Scrapping Cottage friends! Thanks for taking the time to stop and visit today. It's Mary Marsh here bringing you the Saturday edition of the Blog. Hope you were able to jump in on some of the huge savings with our Black Friday sale that was held on the online store.

Today, I am back to Christmas cards. The time is getting shorter and I need to finish up my cards for this year. That is my plan for this weekend. For this post, I decided to make a Z-Fold card and feature the Joy Nativity and Angel Trio dies. So lets get started with some details on this card.

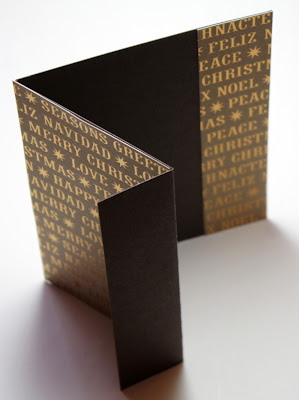
Step 1: this week I started my card with the fancy fold I wanted to use. I like the Z-Fold and thought it would work well with the dies I wanted to showcase. This fold makes a very nice card presentation and is not difficult at all to make.

Dark Brown Card Base: 5 1/2" x 8 1/2"
Step 2: Cut 2 pieces of patterned paper- one is 3" x 5 1/2" and the other is 1 1/4" x 5 1/2".
Attach the 3" piece to the cardstock between the scored lines.
Turn the card over and line-up the 1 1/4" patterned paper to the corner of the card.
Used my bone folder and reinforced the scores that I made on the cardstock. I folded back the score line on the 1 1 /4" panel and now I have my Z-Fold card.
 
 
Step 3: I created the front panel for my card. I used one of the angels from the Angel Trio die and on the square panels I used the Stitched Square (4th largest) and the Square Set (3rd largest) dies.
Assembled the square panels and attached the angel with dimensional adhesive.
I used doubled sided tape and attached the panel to the 1 1/4" panel.
Step 4: Now onto the inside of the card. I used the Joy Nativity die for the inside panel. I also used another of the angels from the Angel Trio die.
Attached the pieces to the card inside with glue dots and Ranger Multi medium matte adhesive. After I attached the kneeling angel I decide to add a few pine sprays to ground the image. I also added some stars to this panel. I used the stars from the Snowglobe Friends die.
I also added stars to the front image panel to complete my card. That's it for me for this week. I hope I have given you an additional idea for a Christmas card. Especially if you bought these dies when the big sale was going on. See you next Saturday!
 
 
Dies I used to create card:


Saturday, September 30, 2017

Christmas Joy Nativity

Hello Scrapping Cottage friends! Thanks for taking the time to stop and visit today. It's Mary Marsh here bringing you the Saturday edition of the Blog.

CottageCutz has a new release of Halloween & Christmas dies that are now available in the online store for ordering.  So if you have made a wish list, now is the time to get it fulfilled.

The DT has been showing lots of great samples and will continue to show them over the next couple of months to get your creativity flowing. There are plenty of beautiful new Christmas dies. Something for everyone's tastes.

I love Christmas time and making Christmas cards. Today, I am using one of our new dies Joy Nativity. To me this die represents the essence of Christmas. I love the bold Joy word as well as how the Holy Family is nested in the letter "O".  So let's get started with some details on how I created my card.

Step 1:   This week I started off with a sketch. I found this perfect one on Splitcoaststampers. It wasn't too fussy and it allowed the Joy word to be the center focus.
Step 2: I looked through my paper stash for patterned paper that wouldn't take the focus away from the Joy word and at the same time have a touch of elegance to it. I found this red and gold paper that I thought would work for the elegant look I was after. I paired it up with a red card base that was almost a perfect match.
Maraschino Red Card Base: 5 1/2" x 4 1/4"
Patterned Paper Layer: 5 3/8" x 4 1/8"
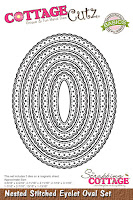
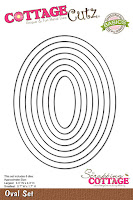
Step 3:  For the oval elements #3 & #4) of the sketch I used the largest nested stitched eyelet die and the 2nd largest oval die. It nested quite nicely in the eyelet die and the eyelet die kept with the elegant look I wanted for this card.
 
Step 4: I cut my Joy word in a gold cardstock. There is such detail in this die. If you click on this photo or any of them really, it will allow you to see the detail I am talking about. Attached to the oval shapes with dimensional adhesive. Being raised a bit from the ovals will give it nice depth.  
 
Step 5: Attached the oval panel to the striped patterned paper layer. For the #2 layer of this sketch I decided to use ribbon. Looked through my ribbon stash and found this pleated ribbon that is a good match for the card base.  I really like adding ribbon on Christmas cards. I think it dresses them up nicely. 

Attached my image panel to the card base and scattered a few sequins to complete this card. I hope I have given you an idea for using this new Joy Nativity die. By keeping your card simple, you could easily mass produce this one for Christmas. See you next Saturday!!!

Dies I used to create card:
http://www.scrappingcottage.com/cottagecutzjoynativityelites.aspx
 
http://www.scrappingcottage.com/cottagecutznestedstitchedeyeletovalset.aspx

http://www.scrappingcottage.com/cottagecutzovalsetbasics.aspx