Hi everyone!
This is Anja again. Valentine's day is in a few days. I have one more Valentine's card for you today, before I move on Easter and Spring themed cards. This time I used another holiday die. I like dies that can be used on different occasions. This car die is definitely one of those.
For this card I used:
- Cottage Cutz dies (Holiday Car, Phrase Love),
- Distress Inks (Black Soot, Fired Brick),
- craft paper for card base (two 15x15 cm squares),
- red, black and white card stock for die cuts,
- Versafine Onyx black ink pad,
- Versamark embossing ink pad,
- clear embossing powder,
- alphabet stamps,
- background stencil,
- silver pigment ink,
- white pigment ink,
- hole punch,
- split pin,
- blue and yellow brush pen,
- scissors,
- Glossy accents,
- heat gun,
- paper glue.
First I cut and colored the car. This time I used colored card stock and just added a bit of Distress Ink around the edges. I used silver pigment ink for metal parts of the car. I colored the headlights with brush pens.
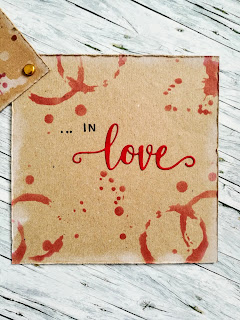
I cut two rectangles from craft card stock and colored them, using stencil and white and red ink.
First I used white pigment ink and then added the red. I colored the inside i the same way.
Then I stamped the sentiment, using alphabet stamps and black ink.
I decided to distress the edge of the paper. I used the scissors to do it.
Afterward I decided I wanted the glass marks to look more realistic. That's why I used embossing ink and powder to make them look "wet". I did this only on the front side of the card.
I made holes on the both squares and put in a split pin for the card to slide.
Then I just glued the car and the love phrase on the front and in the inside of the card. I used Glossy Accents for the windows and the lights of the car.
This all from me for today. Have a nice Sunday and don't forget to check the store for the latest dies.
Anja Z.
I used:


