Showing posts with label Hatching Bunny. Show all posts

Wednesday, April 17, 2019

DT Samples w/Spring and Magical Release dies


Hello Scrapping Cottage friends! Thanks for taking the time to stop and visit today. We are sampling DT cards for the next 4 days from our Spring release and also our the brand new Magical Fantasy release.

There are 27 new designs in the Magical Fantasy release. And for a limited time the individual dies are on sale at 25% off.
 We want to  give you some creative ideas for using the dies. So let's get started with the cards for today.

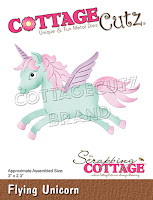
Card 1:  Our first sample today is from Sukie Dhillon. She is featuring the new Flying Unicorn die. She created a shaker card that is sure to brighten someone's day. The sweet Flying Unicorn is at the focal point of the card and is accented with the stars and clouds in the background. The inspirational sentiment finishes off this magical scene. To create this polaroid style shaker card she also used the Fairytale Birthday, Unicorn Floral and Square Set dies.
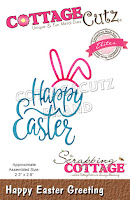
Card 2: Our next sample today is from Anja Zurga. She used the sweet Hatching Bunny and Happy Easter Greeting dies to create her colorful Easter card.  Anja always gives us such beautiful backgrounds for her cards and she didn't disappoint with this card.
 
She stenciled with a bright blue distress ink so perfect for this cute little hatching bunny. The Happy Easter greeting was cut in white cardstock and sponged with a bright pink ink. The Hatching Bunny dies would also work well for a new baby card or even as baby shower invitations. Think out of the box with seasonal dies.
Card 3: Our last sample for today is from Janja Albreht. She used the cute Spring Frog w/Lilypad die to create a great card of encouragement for a friend. It's a perfect mix of a fun card and a way to show a special friend that we understand.  The water underneath the lilypad is from the Fishing Pole and boat die.  Her sentiment is so spot-on when a friend needs a pick me.
Well that's our samples for today. I hope the team has given you some fresh ideas for a way to use the dies. Stop by the Blog again tomorrow for more team samples.
 
dies used to create cards: 
http://www.scrappingcottage.com/cottagecutzflyingunicorn.aspx
 
http://www.scrappingcottage.com/cottagecutzfairytalebirthday.aspx
http://www.scrappingcottage.com/cottagecutzunicornfloral.aspx
http://www.scrappingcottage.com/cottagecutzhatchingbunny.aspx

http://www.scrappingcottage.com/cottagecutzhappyeastergreetingelites.aspx
http://www.scrappingcottage.com/cottagecutzspringfrogwlilypad.aspx


Saturday, March 16, 2019

Hatching Bunny (new die)

Hello Scrapping Cottage friends! Thanks for taking the time to stop and visit with us today. It's Mary Marsh here bringing you the Saturday edition of the Blog.

We have a new release of 36 Spring dies in the online store. There are a variety of designs so perfect for Easter or Spring card making. Take a look in the store you definitely won't be disappointed.

For my card today I am using the new Hatching Bunny die. He is just too cute peeking out of the cracked egg. I couldn't resist using him on an Easter card. So let's get started with some details on how I created my card. 

Step 1: Having a layout in mind at the card start is always a big boost for me. That way I can just choose the card colors and designer paper and I am good to go. I liked this week's sketch #740 on Splitcoaststampers because of the somewhat simplistic design. I thought the stacked diamond shapes would be perfect as a background for this little bunny.  
I looked through my designer papers to get one that had some soft Spring like colors to it. I settled on this one that I have had since 2012. It had all the colors that I wanted. 
Soft Blue card base: 4 1/4" x 5 1/2"
Designer Paper layer: 4 1/8" x 5 3/8"

For the diamond shapes I used the Stitched Square set (5th largest) die set and cut in Primrose cardstock. For the vanilla layers I used the Square Set (5th largest) die. I sponged background clouds on the top 2 diamonds with tumbled glass distress ink. On the bottom diamond I sponged mowed lawn distress ink. 
The Hatching Bunny and other elements from this die are all cut from cardstock. I used a cocoa shade for the bunny, a medium green for the grass, primrose for the tulip and a soft blue patterned paper for her little bow. 
I decided to stamp a sentiment on the egg as well as the top diamond shape. A "Easter Hello" phrase seemed right for this card. 


Now that all the elements are cut I am ready to start card assembly. 

Step 2: I secured the designer paper to the card base using double sided tape. 
The diamonds are secured with the same medium. 
Started layering my Bunny image from the grass up on the diamond shapes.
 I kept looking at my card and thought it just needs something else. So I decided to add a small sun image on the top panel and scattered some blue sequins around the card. And, that did it for me. Card is complete and so is my post for this week.

I hope I have given you some inspiration and an idea for a way to use this cute new die. Have a great week and I will see you next Saturday.

Dies I used to create card:


Wednesday, March 06, 2019

Easter Wishes Card

Hello!  This is Sukie and today I'm sharing another card for my guest designer post. I used a combination of dies from the Spring release for this project.  These dies are currently on sale too! It's been a very, rainy few weeks here in Northern California which makes me eager for Spring.
I reached for sunny yellow and aqua inks for my die cuts.  I also incorporated some pinks, purples and greens which all remind me of Spring. The little bunnies in the collection are absolutely adorable.  I combined the Hatching Bunny, Peeking Egg Bunny, Spring Bunny w/Cart and the Bunny Kisses and Easter Wishes die sets for my card.
I created a polaroid type frame with the Stitched Square Set. A larger square was cut with my paper trimmer and inked.  The blue square was adhered inside of the frame and layered on the card base.
The bed of grass was adhered from one side of the frame to the other and the bunny eggs were tucked into the corners.  I slightly trimmed the bunny ear for a better fit on my card.
The bunny and cart were popped up on foam dots for added dimension.  A few flowers were tucked amongst the bed of grass and also popped up.
The "Easter Wishes" sentiment was stretched across the top of my card.  The whimsical color combination plays off the Spring color theme.
Here are the dies used on my card, available here: