Showing posts with label Handmade Tree w/presents. Show all posts

Thursday, December 20, 2018

Christmas Tree

Good Morning Scrapping Cottage Friends!

It is Pam on the blog with you today!

I have one more Christmas card for you!  I used two of our new dies to create this fun card.
Designer Steps:


1.  Use an A2 card base and cut the front flap in half
2.  Cut a piece of red checked DP 4 x 5 1/4, piece of tree DP 3 3/4 x 5, green card stock 5 1/4 x 2, red checked DP 5 x 1 3/4, cut 2 white oval using the Stitched Scalloped Oval die
3.  Glue the green card stock and the red checked DP to the front flap as shown
4.  Glue the red checked DP to the inside and then glue the tree DP to the red checked DP
5.  Using the Handmade Tree and Presents die cut out the tree in green and the trunk in brown shade with TH inks.  Assemble the tree and glue to the white oval.  Cut out the packages in the DP, assemble and pop to the oval
6.  Glue the oval to the front flap only putting glue on the left side of the oval
7.  Add the star and rhinestones to the tree.  Use the Joy of Giving die to cut out the sentiment and package and then glue to the oval on the inside of the card
CottageCutz Products


Thanks so much for stopping by and I would like to take the opportunity to wish you a very Merry Christmas and Happy New Year!
Blessings
Pam


Saturday, November 24, 2018

Christmas Joy

Hello Scrapping Cottage friends! Thanks for taking the time to stop and visit with us today. It's Mary Marsh here bringing you the Saturday edition of the Blog. 

Hope all of our American friends had a great Thanksgiving. Then there was all the Black Friday sales and now today it's small business Saturday. Speaking of sales have you checked out the big sales we are having over in the online store. There are savings of up to 80%. Just in time to purchase dies for your Christmas card making. 

And we also have a brand new Black Friday release bundle. There are 16 new Pet designs in this release. You can purchase the entire bundle at an incredible price of  $99.95. It's a 60% savings over purchasing the dies separately. The DT will begin showing samples next week.

For my card today, it's all about Christmas. I am using the Holiday Mantel and Handmade Tree w/Presents dies. You can get these on sale at an amazing 40% off. So let's get started on some details on how I created this card.
Step 1:  I started off my card this week with my layout. I used the Splitcoaststampers sketch #721. I thought it was a good layout to showcase the dies I am using.
I then chose my card colors using the traditional Christmas colors of red and green. The background patterned paper carries through the Christmas theme nicely.
cherry card base: 4 1/4" x 5 1/2"
Patterned paper layer: 4 1/8" x 5 3/8"
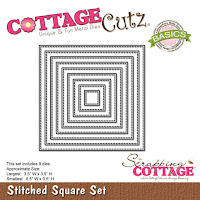
Small image squares: used the 4th largest stitched & square set dies.
Step 2:  Started my die cutting using the small tree, stockings and garland dies from the Holiday Mantel set.

I used the tall present from the Handmade Tree w/Presents die.
I used the Stitched Alphabet die to cut my Joy phrase in cherry cardstock. This die is also currently on sale at 50% off.
 Step 3:  Now that all the pieces are cut, I can start the card assembly. I stamped the Merry Christmas sentiment on the square with the present. I "hung" the garland on the square with the stockings. The Stitched Joy phrase was placed at an angle for added interest.
To complete my card, I added some red and green sequins. And, that's a wrap for me this week. I hope I have given you some inspiration on a way to use these Christmas dies. Remember, they are currently 40% off in the online store. See you next Saturday!
dies I used to create card:
 
http://www.scrappingcottage.com/cottagecutzhandmadetreewpresents.aspx
 
http://www.scrappingcottage.com/search.aspx?find=stitched+alphabet
 
http://www.scrappingcottage.com/cottagecutzsquaresetbasics.aspx
 
http://www.scrappingcottage.com/cottagecutzstitchedsquaresetbasics.aspx


Saturday, November 03, 2018

Present Under the Tree

Hello Scrapping Cottage friends! Thanks for taking the time to stop and visit with us today. It's Mary Marsh here bringing you the Saturday edition of the Blog. 

We have a new release of dies over at the online store. Our Autumn 2018 dies are here with 10 new designs. They are currently 25% off for a limited time.

This week the design team has been featuring cards using the exclusive Dakota the Husky die. If you missed those cards your can see them here, here and here. The die is only available in our online store. You won't be able to buy him at any retailers who may sell CottageCutz dies.

So let's get started on some details of how I created my card.

Step 1:  When I saw this die, I thought how cute it would be to have a puppy under the tree on Christmas. So that's where I went with my card. I created an indoor scene. I chose some striped patterned paper for wall paper and a woodgrain paper to resemble wood flooring.

Step 2: I started my die cutting. The Handmade Tree w/Presents die was used for my tree. It is part of the Christmas Part 3 release. I just love these stitched dies. They are very detailed and so on trend with the farmhouse look that is all the rage right now.
I wanted the sentiment to read from Santa. I thought the Stitched Alphabet die would work for some big Santa lettering and then the from phrase would be stamped.  I die cut the letters in a medium green cardstock (gumball green).
I stamped the "from" phrase with the help of my MISTI on the same gumball green cardstock.
Dakota the Husky was cute with white and gray cardstock. I thought the Santa hat would be so right for him since he is a present.
Step 3: Now that all my card elements are cut and stamped, it's time for card assembly. I started with the card background and attached with double sided tape.
 
I attached my images with dimensional adhesive. I wanted more of a 3D look and have them lifted off my faux wallpaper background.
I attached the Santa Phrase on an angle for interest. Used Ranger multi medium matte as the adhesive. The from phrase sentiment was attached with dimensional adhesive.
And that's my card for this week. I hope I have given you an idea for using our new Dakota the Husky die.
Tune in again tomorrow because Anja will have another really cute sample for your viewing pleasure.
 
See you next Saturday!

 
dies I used to create card:
http://www.scrappingcottage.com/cottagecutzdakotathehuskyexclusive.aspx
 
 
http://www.scrappingcottage.com/cottagecutzstitchedalphabet.aspx