Showing posts with label Grass Border Die. Show all posts

Thursday, April 06, 2017

Spring Bunnies!

Good Morning to All of Our Scrapping Cottage Friends!

It is Pam with an Easter card to share with you today.  I have created a card using inlays from the die called Spring Bunny Egg.


1.  Begin by cutting the Spring Bunny Egg die and removing all the pieces. Be careful to put them in a place where the piece will not get lost.  I actually place them in a small box until I am ready for them

2.  Trace the egg to make a back so that you can glue down the inlaid small pieces after you are finished coloring them set aside

3.  Mask the top half of the egg using green ink sponge the bottom half of the egg.

 4.   Then mask the bottom of the egg using blue ink sponge the top part of the egg

5.   Gather all the inside pieces and begin coloring them with your copic markers or any coloring tools you may enjoy using

6.  After you are finished coloring glue the back to the egg and then start adding the colored inlay pieces
7.  Next using the largest Double Stitched Rectangle die center a piece 5 1/4 x 4 inch piece of yellow checked paper to make a frame

8.   Using the second largest Double Stitched Rectangle die cut 5 1/4 x 4 inch piece of yellow card stock
9.   Glue the yellow card stock directly under the checked paper
10.  Using the Grass Border die cut a strip of grass and glue it behind the frame on the yellow card stock

 11.  Glue the entire frame to the front of an A2 card
 12.  Center your Spring Bunny Egg in the frame under the grass
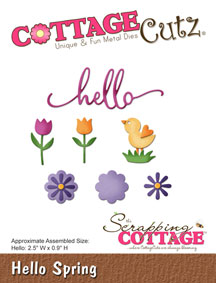
 13.  Cut two more bunnies using the Spring Bunny Egg and color them plus cut 3 orange flowers using the Hello Spring die
 14.  Add the bunnies and flowers as shown and for a final touch add a small bow to the top left of the frame
Cottage Cutz Products used:


I hope you enjoyed this Spring tutorial and that you will give it a try!!

Thanks for stopping by today! I am always so glad you did!!

Blessings
Pam


Monday, September 15, 2014

Tree as symbol of growing and learning

Hi all! Vladka here with you again! 

Today I would like to show you, what I made for my very good friend. She lives in America now and she is a teacher to three years old kids. This is why she needed something to hang on the class door. And I came up with idea to create a tree, because for me it is symbol of growing, learning... So I made this one first. Tree´s ladder is created so, that it looks like inches. There is a lot of animals on the top of the tree and under it: butterflies, little bear and the bigger one, lion, bird, hedgehogs and owl. I added also leafs, grass, mushrooms, nest and birdhouse.


I made also another one with months on it. She will add children´s names on it. So they will  all  know when children have their birthdays. Both trees are cut out with scissors and all pieces are colored with Distress Ink. It is really cute, although it is pretty big.

My list of all used dies is today really long, but I really had fun to play with all this cute dies.

Friday, March 16, 2012

CottageCutz Elegant Easter

Good morning, CottageCutz fans!!!  It's TGIF, another weekend is upon us, and I hope you have plans for making it a great one.  Today, I'm sharing a card I created for Easter, using some really wonderful and oh, SO EASY CottageCutz dies.  I call this one an elegant Easter card, because that's exactly what comes to my mind when I see these beautiful Filigree Easter Egg CottageCutz dies.  These amazing designs afford you the opportunity to make positively gorgeous creations with very little effort.  With some beautiful patterned paper, glitter card stock, and just the right embellishments... VOILA!  Something that looks like you spent hours!!!  Now, THAT'S what I'm talkin' 'bout!!  Here's my card in several views so that you can take in all the wonderful detail of these dies.
 I used DCWV glitter card stock to cut these beautiful Easter eggs.
 A close up view of all the gorgeous detail and sparkle.  Just a few strategically placed pink pearls were just the ticket! 
 You can see that I nestled the eggs into three layers of grass that I cut using the CottageCutz Grass Border die.  This die is a MUST HAVE staple in any collection.  I use mine for so many projects!  I LOVE IT!!
The banner for the sentiment was cut by hand, and the patterned paper is from my scrap stash.  I loved the muted colors with just the pop of pink and burgundy in the paper.  It's very Victorian, and again... SO elegant!

I'm so glad you could join us today.  I wish you a wonderful day, and  weekend filled with everything you love.  If you're lucky, maybe there will be some crafting with CottageCutz in it for you!!  Happy crafting!!