Showing posts with label Golf Cart. Show all posts

Saturday, August 27, 2022

Fun Fold Golf Card

Hello CottageCutz friends! Thanks for taking the time to stop and visit with us today. It's Mary Marsh here bringing you the Saturday edition of the Blog.

It's new release time!!! We have new dies in the online store. It's our Baseball and Golf release with 16 new designs and currently on a 30% off sale. These new dies are so perfect for a masculine themed card.

Or for the kiddos (boys and girls) who are baseball or softball players. Don't forget about the golfers either. If you are a scrapbooker and are putting together the summer season of your child's baseball season, we have you covered.

My card today is featuring the new Golfer Silhouette, Putting GreenGolf Cart  and Golf Bag & Clubs dies. I made this for my hubby's friend. He has a September birthday and is also an avid golfer. So, let's get started with some details of how I created my card.

Design Steps:
I love trying different fun fold techniques. I ran across this one while perusing Pinterest one night. You know how that can be! I thought the fold would be great to show off some of the golf dies. 

I started by selecting my card colors and designer papers. I decided on these ones that had a masculine appeal and also the one pattern looked like golf balls. At least that's what I thought (LOL)!!!
Here is a diagram of the cardstock size and where it's to be scored. 
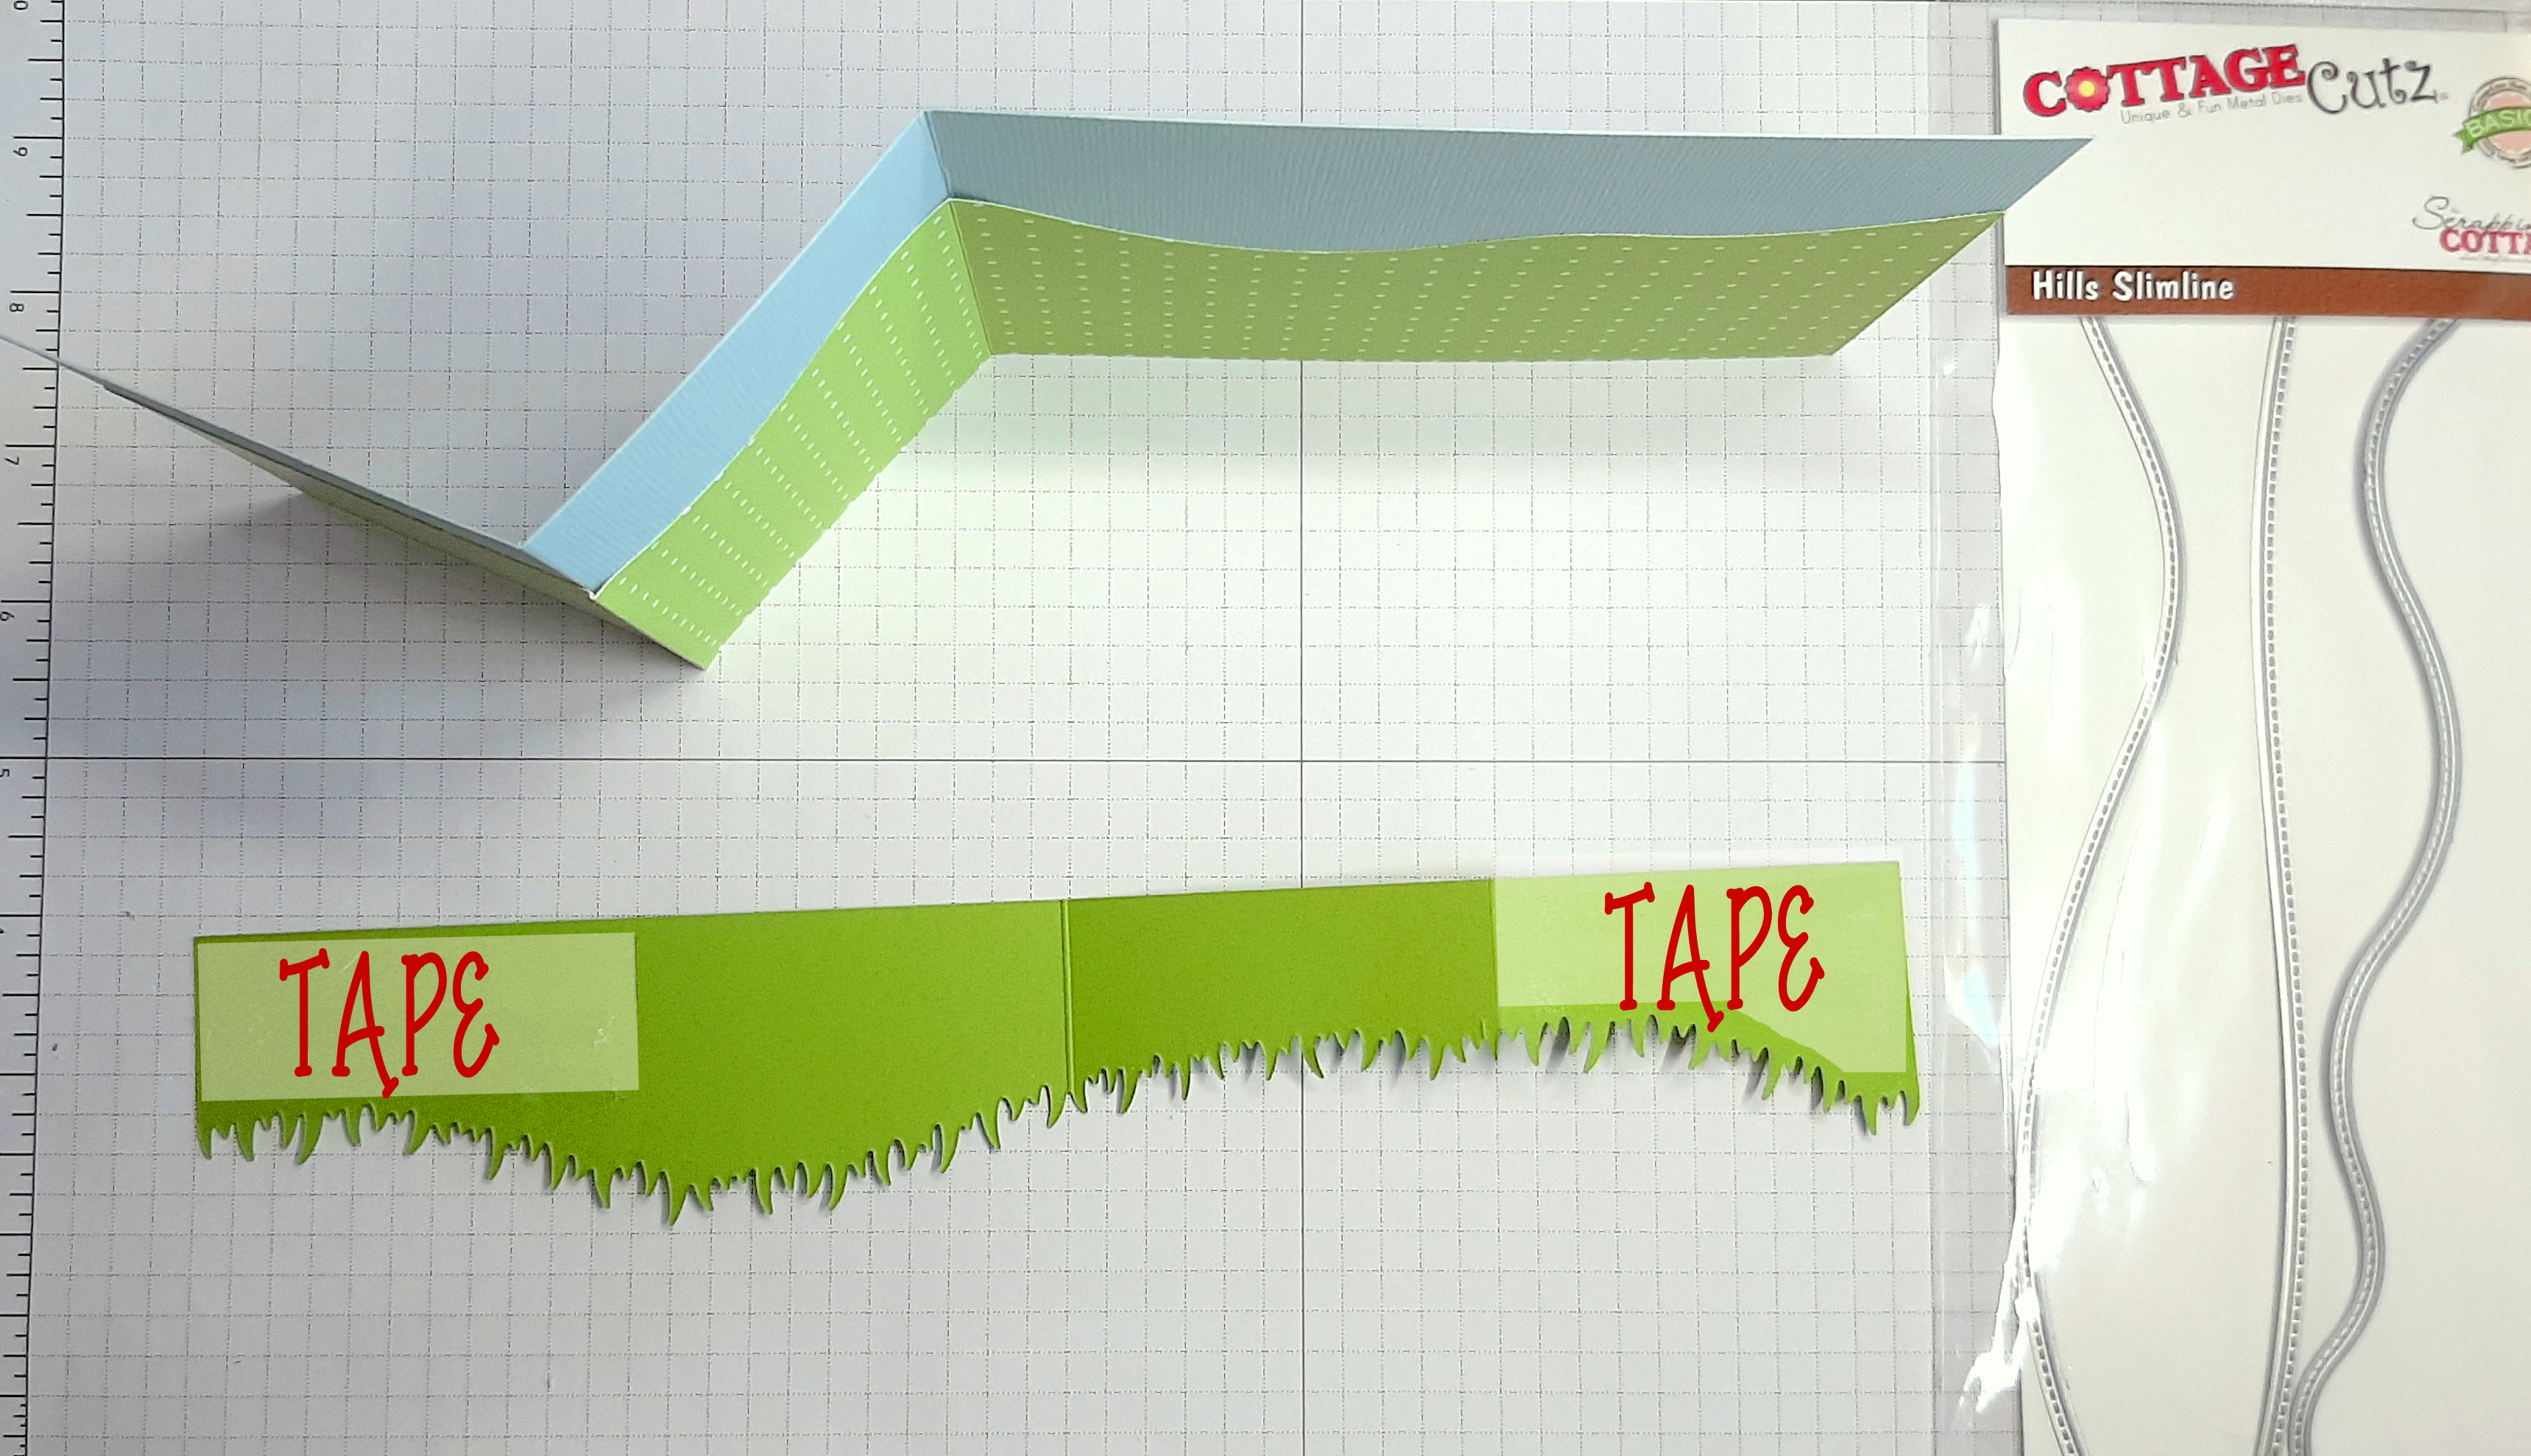
Fold both these panels into the center and burnish on the folds. Added a piece of white cardstock measuring 4 1/8" x 5 3/8" to inside of card. This will be decorated as well. 
Next, I cut the designer paper for the front panels. On the lower panel I used the striped paper and cut it at 2" x 4".  The top panel I used the "golf ball" paper and I cut it at 3" x 4".

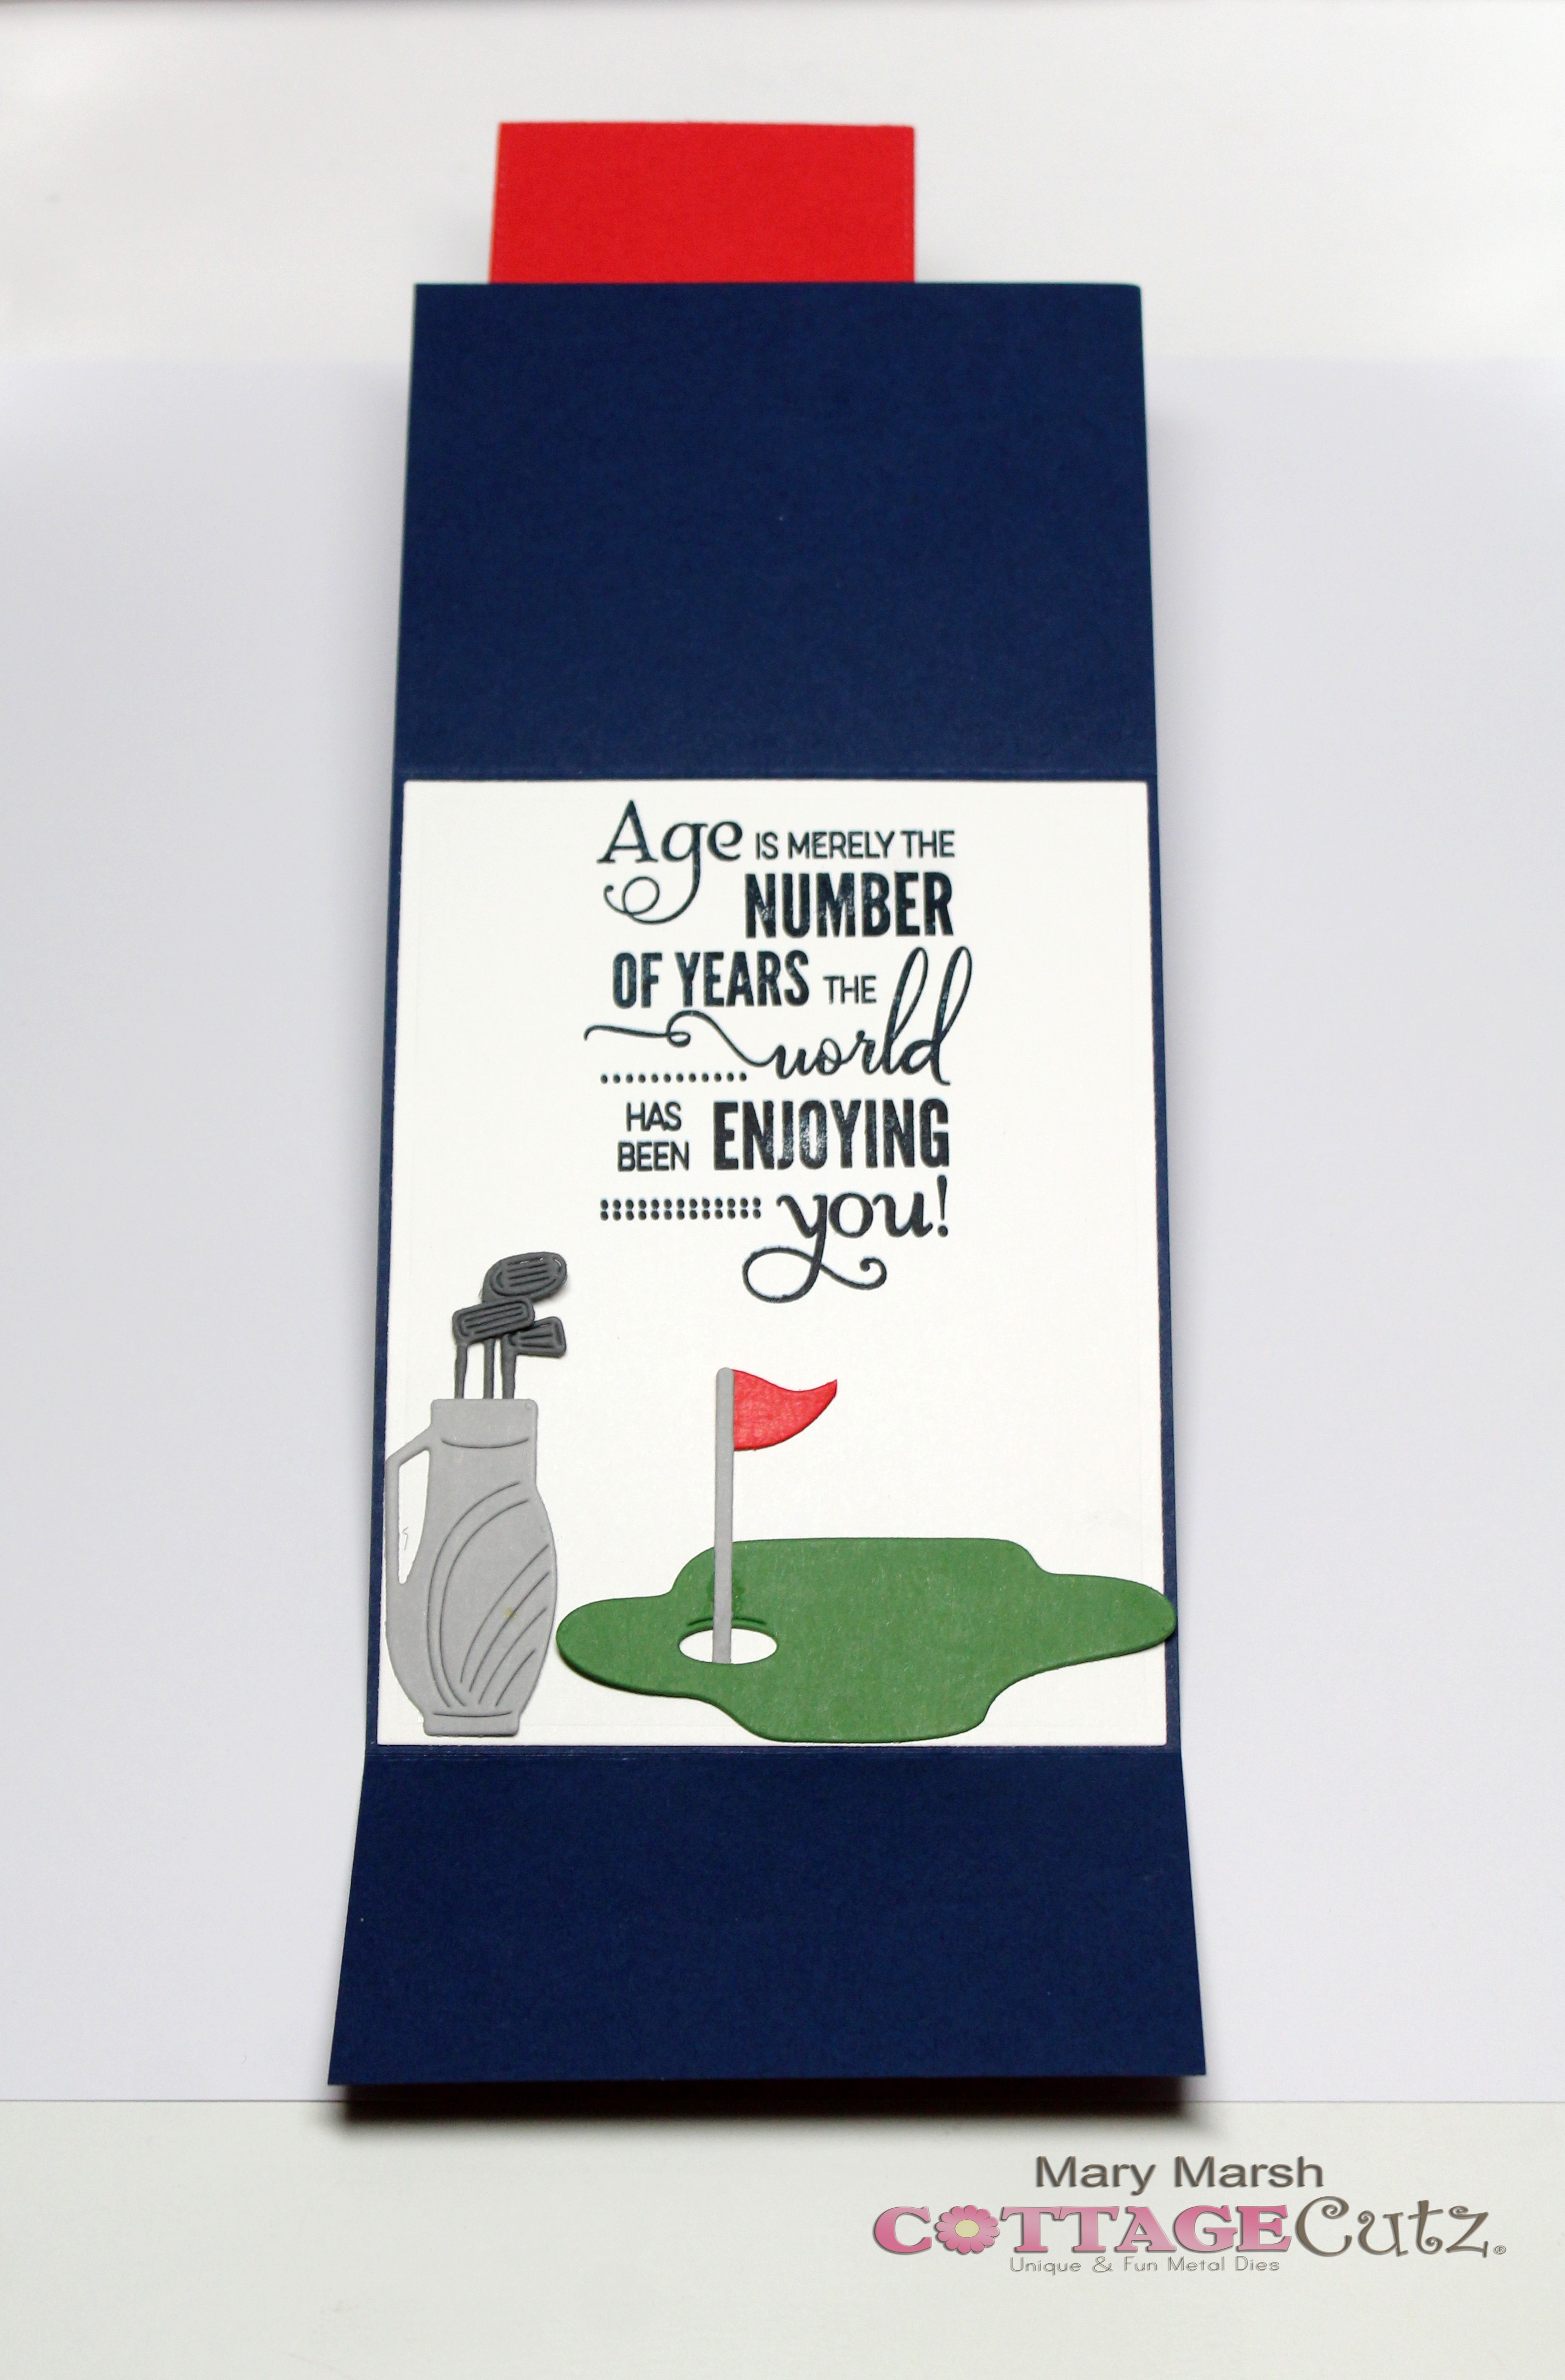
For my image panel I used the 2nd largest (2 1/2" x 3 1/2") Stitched Rectangle Die and cut it in red cardstock. I used the 3rd largest (2 1/4" x 3 1/4") Rectangle Die and cut in white cardstock. I stenciled some clouds and added some grass using the Spring Grass die.  It's an older die but still available. 
I cut my golfer silhouette in navy blue cardstock and used dimensional adhesive to secure to card. On the image panel, only use adhesive to the top part of the panel to allow the card to open. 
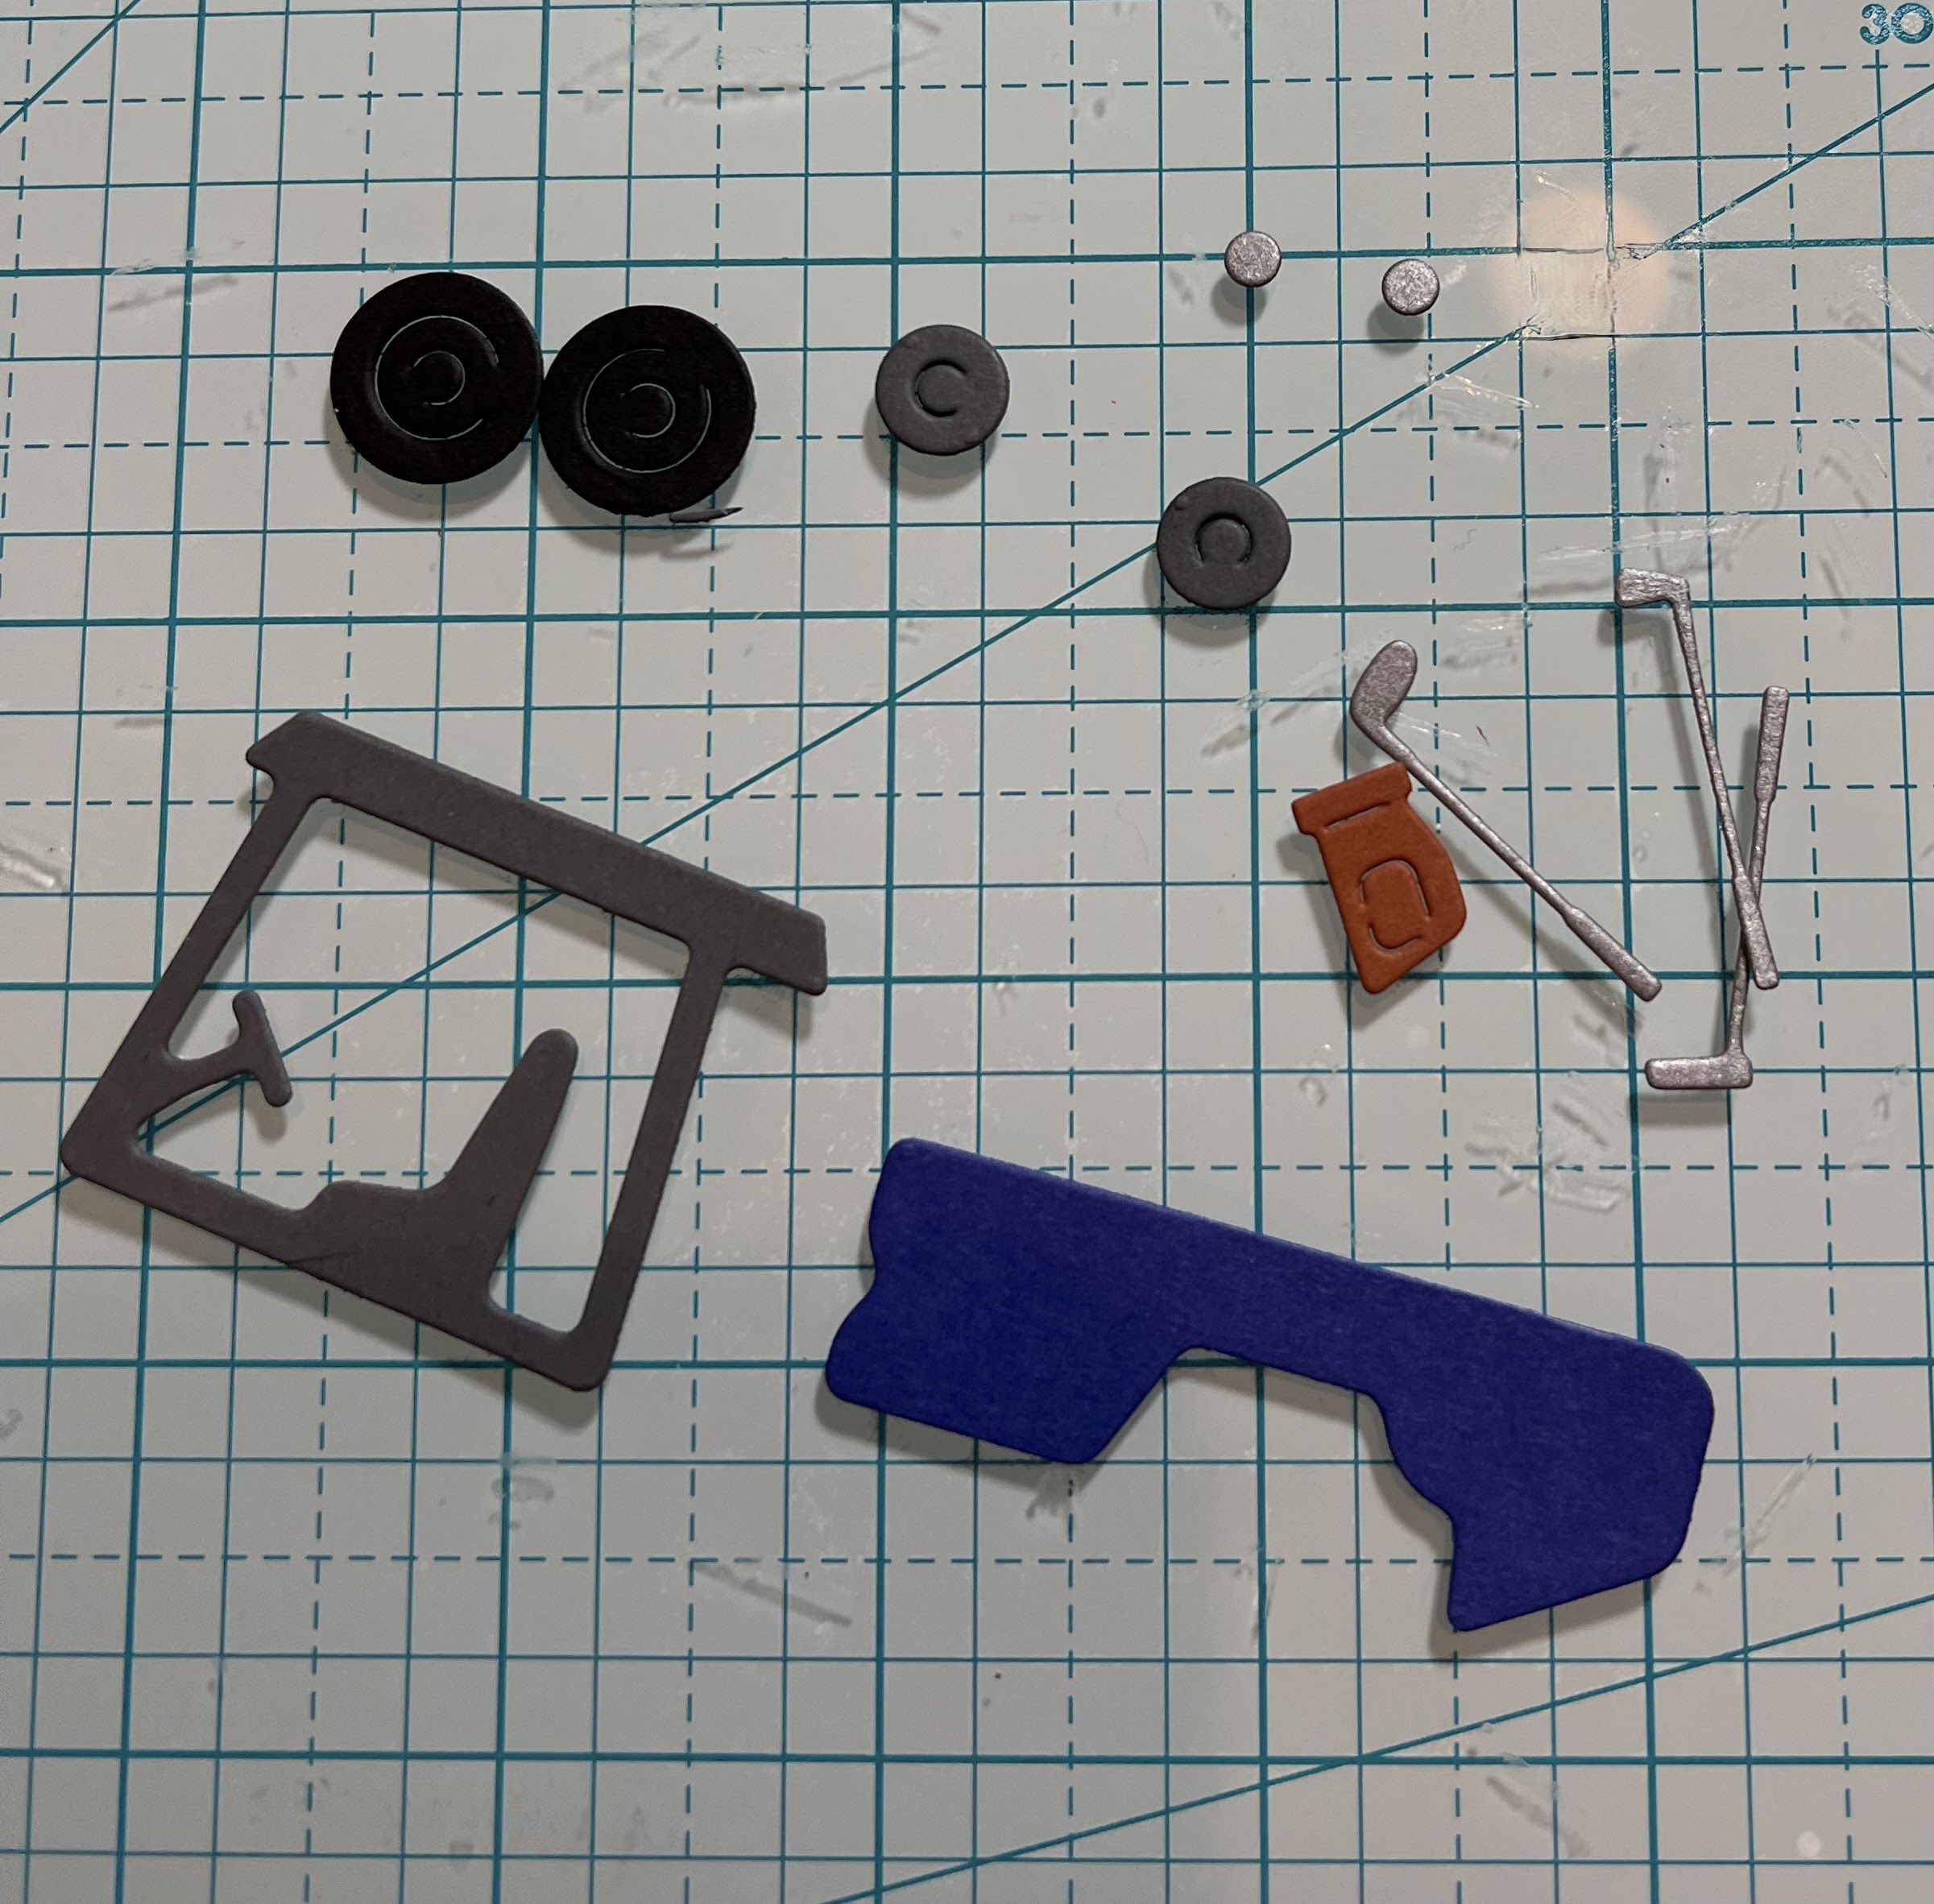
Now to the card inside, I used the Putting Green & Golf Bag & Clubs dies. I stamped the sentiment in navy ink to complete this part of the card. 
Normally I don't do anything to an envelope, but I am not mailing this card. It will be hand delivered. I already had the golf card die cut and it didn't work on the inside of the card. So, I decided to use it on the envelope and also added the word phrase "par". It was cut from the Stitched Alphabet die. 
To complete the front of my card, I added a "happy birthday" phrase. I stamped on white cardstock and then added blue and red flags for interest. Well, that's it for me for this week. see you next Saturday. 


Dies I used to create card:


Friday, August 26, 2022

Golfing Joy Fold Card


Hi everyone! Linh here and I have a new video up on the Cottage Cutz YouTube channel. This is an easy joy fold card, which I love because it gives you so much more additional space to decorate but still folds down to a compact US A2 size. If you struggle with making cards for the men and sports lovers in your life, the Baseball & Golf collection for you!


Thursday, August 18, 2022

Par-fect Day

 Hello Scrapping Cottage Friends,

We have a NEW RELEASE which is perfect for all those sports fans in the family! It is called Baseball & Golf! It has 16 fantastic dies which will make your card making and scrapbooking pages look great! The release has special pricing right now so go and check it out HERE!

My husband is a golfer so I am really going to enjoy creating with the golf dies.  I used the Putting Green and Golf Cart for this card.  I mixed it with a few of the slimline dies for the background.


Design Steps:

1.  I used the Golf Cart die and cut gray, silver, red, blue, rust and black card stock.  I then assembled with a fast drying, fine tip glue

2.  I used the Putting Green die and cut brown, red and green card stock.  I will assemble the putting green on the card. You will see on the card I added a little piece of white on the back side of the hole

3.  For the background of the card I used an A2 white base, blue DP for the sky 2 1/4 x 5 1/4, dark green card stock cut with Mountain & Trees Slimline, a piece of green measuring 3 x 5 1/4 cut with the Hills Slimline and not pictured a piece of white 2 x 5 1/4 cut with the Clouds slimline
4.  Glue the sky down first to the white card base. Glue the tree line to the green hills and then glue to the card
5.  Glue the putting green to the green hills as pictured above
6.  Pop up the golf card, add the clouds to the top and your sentiment to the bottom.  Your card is complete

CottageCutz Products


Here is the new release so please check it out in our store today!!


We have more inspiration on our YouTube Channel check it out HERE
Thanks so much for stopping by!  And I will see you next Thursday.

Blessings and Take Care


Monday, August 08, 2022

Golfing Double Z-Fold


Happy Monday ~ I hope you all had a craft-astic weekend!  Guest Designer Kris here with a Double Z-Fold Box Card FORE you!  I love a good pun!  Today I have used 7 dies from the new AUGUST RELEASE!  This release is so great for those masculine cards - especially if they like golf or baseball!  And for a limited time you can get the whole release bundle at 50% OFF!!  Individual dies from this release are 30% off! 


The Z-Fold card is so easy to make, and this one is a step up because I added "shelves" in the li'l corner box to adhere even more images/die-cutz to!  

HOW I MADE IT:

1.  I cut a piece of light blue cardstock at 4-1/4" x 11" - then scored at 2-3/4" (mountain fold) and 5-1/2" (valley fold)

2.  I cut a green strip (for the front Z) at 2-1/4" x 11" and scored at 2-3/4"(valley fold) and 5-1/2"(mountain fold)  See photo below.

3.  I used the die pictured below from the Grass Slimline set to cut the top of the green Z strip.  The strip will be a bit longer than the die, so I cut to one of the score lines, then moved the die down to cut the rest.


4.  Next, I cut a piece of patterned green paper to 3-1/4" x 11" and scored at 2-3/4" and 5-1/2".  

5.  I used the die pictured below from the Hills Slimline set to cut all the way across the top of that strip, by doing the same technique.... cutting to one of the score lines, then moving the die down and cutting the remainder.  (see photos below)


6.  I attached the patterned paper to the blue card base, aligning edges at sides and bottom.  


7.  Next, I added tape to the sections pictured below on back of the green grassy strip.  You don't want tape to extend past that first score line on your card base, so if it helps, you can place a pencil mark on the backside of your grassy layer at 2-3/4" so you know where to stop taping.  ☺


8.  Adhere to card as pictured below.


9.  Cut 2 or 3 shelves to insert in that "box" that the short Z creates.  I cut (3) at 1-1/4" x 3-3/4" and scored at 1/2" in from each end.

10.  Miter the top of the side flaps.  Then cut the tops using the straightest section of the grass die.


11.  I added glue to the side flaps and (I tried to) evenly space them from back to front of the "box"


12.  If you want, you can cut a piece of cardstock to 4" x 5-1/4" for the back side of card for writing a message.

13.  All that's left is die-cutting my pieces. gluing them together and adhering to my card!  
  • For all the front Z panel die-cuts, I added foam dots to the backs to adhere them
  • For the elements on the shelves inside the "box" I glued them to strips of heavy acetate so I could place them up a li'l higher and provide more stability to them.  
  • For the words and silhouette golfer, I glued them directly onto the card base. 


PRODUCTS I USED:


I hope you enjoyed my card today!  
Have a craft-astic week :) 

~Kristine