Showing posts with label Gardening Mouse. Show all posts

Friday, June 19, 2020

Gardening Mice Slimline Card

Happy Friday!  It's Jeanne sharing today.  I've been seeing slimline cards everywhere and I've been wanting to make one.  So I thought I'd combine some of the mice in this release and create a fun gardening scene.
I did some research into sizes of slimlines and there are slight variances.  I went with a card that is 8 1/2  x 3 1/2 inches.  It is easily made by using an 8 1/2 x 11 inch piece of card stock, cutting it at 7 inches and then scoring it at the 3 1/2 inch point.  I cut 1/2 inch off the remaining 4 inches of cardstock, giving me a panel 8 1/2 x 3 1/2 inches that I could use to stencil and assemble my dies on.  When finished it gets adhered to the card base.  One sheet of card stock gives you one card with little waste.
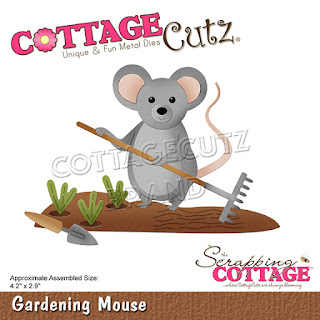
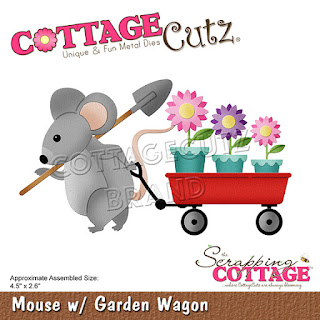
I cut my pieces from the Gardening Mouse, the Mouse w/ Garden Wagon and the Gardening Cat w/ Wagon dies in white cardstock and then colored them with the inks shown below.
I used Distress Oxide ink for the animals, dirt and wagon.....

...and Stampin' Up! dye ink for the flowers and stenciling.

The stencil I have for grass is double edged, so that after you have colored the grass, the opposite side can be used to mask off what you have just colored.  It works quite well and I was even able to align it to repeat since it is not as long as the slimline panel.
I used a cloud stencil for the sky.  This one was a bit trickier to get to line up to the extended length, but much of the sky is covered by the mice and sentiment.
I worked from left to right to lay out the elements.
The flowers are tucked into the holes in the garden bed.
The hedgie looked like he needed something, so he got his own flower to hold.  The wagon in this die can be made to go either left or right!

I love the bright colors of this card and used sequins in matching colors for sparkle and whimsy.  My daughter said they look like seeds so I'm going with that!

Dies:
http://www.scrappingcottage.com/cottagecutzgardeningmouse.aspx

http://www.scrappingcottage.com/cottagecutzmousewgardenwagon.aspx
http://www.scrappingcottage.com/cottagecutzgardencatwwagon.aspx

 Thanks for joining me today!  I hope you have a fun and creative weekend!


Saturday, June 06, 2020

Plant A Garden


Hello Scrapping Cottage friends! Thanks for taking the time to stop and visit with us today. It's Mary Marsh here bringing you the Saturday edition of the Blog.

We have a brand new release of dies in the online store. This one is garden themed and has 19 new designs. These new dies are perfect for Father's Day, birthdays, thank you, or even a thinking of you card for the person who loves to garden.

For my card today, I am featuring the new Gardening Cat die and created a thinking of you card for a friend who loves to garden. I am trying to send cards that have a message of hope with all that's going on in our world. So let's get started with some details on how I created my card. 

Design Steps:
I started this card with my sketch. I had one saved on my computer that I thought would work well with this die image. It's an older one from Splitcoaststampers #696. I used this sketch a couple of years ago and created this card. I linked it just to give you an idea of how you can get a different look from a sketch just by changing up the images.
Before I chose the card colors, I cut the images from various colors of cardstock. The cat is cut from smoky slate cardstock and I used the same color ink to sponge around for depth. I lightly sponged pink on her ears and cheeks. I also used the garden plot from the Gardening Mouse die. 

Next, I looked through my designer papers and found this floral one. It caught my eye almost immediately. I liked the flowers and soft pink background. 

Sweet Sugarplum card base: 4 1/4" x 5 1/2" 
Olive layer 2 + White layer 3 of sketch:  used largest Pierced Rectangle die (4 1/4 x 3 1/4")
For the background layer instead of stenciling clouds, I decided to use a sun rays stencil and sponge the corner with wild honey distress ink. It helped to fill in the white space on the card. 

The sentiment was the next to be completed. I recently bought some garden sentiment stamps and thought this one would work well with the Gardening Cat image. I didn't intend to stamp who the quote was from, but I forgot to tape it off when I inked the stamp. Audrey Hepburn was an actress in the 50's & 60's. It's stamped in chocolate chip ink. 
Now that all the elements of the sketch are cut, stamped and sponged, I am ready for card assembly. 
I attached the images to the white panel with double sided tape.

I did take some liberties with the sketch. I moved element 4 of the sketch to the bottom of the image panel. My garden plot is covering that part of the sketch. 
I finished off my card by attaching the remaining panels to the designer paper and then the card base. Added a couple of heart enamel dots and my card is finished.  
Well that's it for me for this week. I hope I have given you an idea for a way to use this new die. See you next Saturday!

dies I used to create card:


Tuesday, May 26, 2020

For a gardener

Hi Janja here. Welcome to the blog.
I have another card on the topic of gardening to share with you today.


- card blank: 4 1/4 x 5 1/2" (10,8 x 14 cm)
- patterned paper: 4 1/4 x 3" (10,8 x 7,6 cm)
- different colors of cardstock
- different colors of ink pads
- cloud stencil
- glue, double-sided adhesive tape, self-adhesive foam pads

Start making a card by cutting all the elements out from different colors of cardstock. Overshadow them with ink pads for more depth.


Cut out the grass border twice. Glue the lawn to white cardstock which is the same size as the card blank.


Create a cloudy sky with a stencil and a light blue ink. Paste the background on a blank card.


Gradually paste all the cutouts as shown.


Thank you for stopping by. And don't forget to check the Memorial Day Sale!
Janja


Sunday, May 24, 2020

Wishing You A Harvest Of Blessings

Hi!

It's Anja here. For today's post I used this adorable mouse die and made a simple card.


For this card I used:
- Cottage Cutz dies (Gardening Mouse, Gardening Hat & Gloves),
- Distress Inks,
- white card base (15x15 cm),
- white card stock for die cuts,
- silver pigment ink,
- sentiment stamp,
- acrylic block,
- scissors,
- Versafine black ink,
- black pen,
- white pen,
- brush,
- paper glue.

First I cut and colored the mouse and all the tools. I used silver pigment ink for all the metal parts of the tools.


Next I colored the hat. 


The hat was too big for the mouse, so I trimmed it.


Then I did the background. I colored directly to the card base using a brush.


Then I added the sentiment.


And last I adhered the mouse and the hat. And my card was done.


Before I go I invite you to the store to check the Memorial Day Sale.

Have a great week and see you again next Sunday.

Anja Z.


Cottage Cutz dies I used for this card: