
Hi, Janja here!
Small notepads are always useful for writing or drawing. They can also be a nice gift.
I prepared one today and decorated it with lovely bear Chloe.

Supplies:
- CottageCutz stamp & die sets: Chloe with Kitty, Garden Gnomes 2 (butterfly and flowers), Victorian Fence, Square set, Stitched Square set
- white cardstock (2x): 5.3 x 5.1" (13,5 x 13 cm)
- patterned paper: 4.9 x 4.9" (12,5 x 12,5 cm)
- white cardstock: 4.7 x 4.7" (12 x 12 cm)
- white blank sheets: 5.1 x 5.1" (13 x 13 cm)
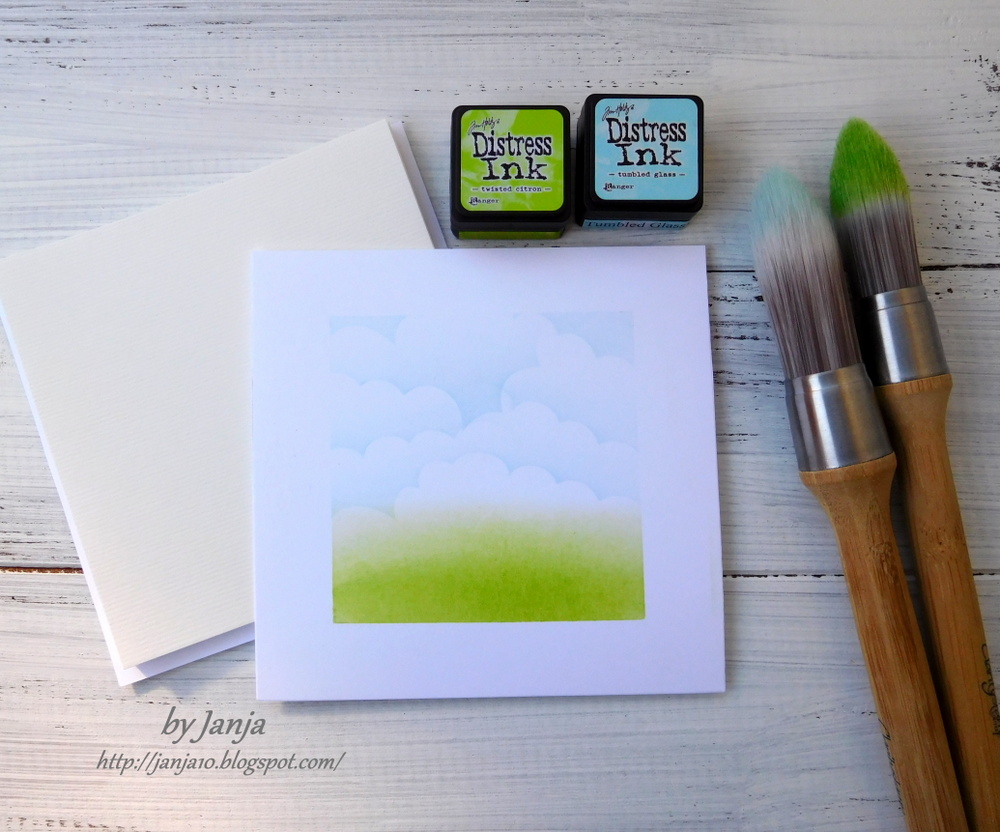
- Distress ink: Worn Lipstick, Mustard Seed, Tumbled Glass, Twisted Citron, Antique Linen, Vintage Photo
- watercolor brushes
- clouds mask
- stencil brushes
Stamp Chloe with black Archival ink on watercolor paper, and color her.

Cut out all the elements with dies.

Fasten masking tape on white front page, and shadow background.

Trim white and patterned paper. Cut out square in the middle of both with a dies. Use the largest dies from both sets.

Cut off the lower corners on both cardstock and frame with a corner puncher. Glue both frames to each other.

Fasten frame to the front page and decorate it partially.

Bind the sheets with a spiral, and complete the front page of notepad.


Small notepads are always useful for writing or drawing. They can also be a nice gift.
I prepared one today and decorated it with lovely bear Chloe.

Supplies:
- CottageCutz stamp & die sets: Chloe with Kitty, Garden Gnomes 2 (butterfly and flowers), Victorian Fence, Square set, Stitched Square set
- white cardstock (2x): 5.3 x 5.1" (13,5 x 13 cm)
- patterned paper: 4.9 x 4.9" (12,5 x 12,5 cm)
- white cardstock: 4.7 x 4.7" (12 x 12 cm)
- white blank sheets: 5.1 x 5.1" (13 x 13 cm)
- Distress ink: Worn Lipstick, Mustard Seed, Tumbled Glass, Twisted Citron, Antique Linen, Vintage Photo
- watercolor brushes
- clouds mask
- stencil brushes
Stamp Chloe with black Archival ink on watercolor paper, and color her.

Cut out all the elements with dies.

Fasten masking tape on white front page, and shadow background.
Trim white and patterned paper. Cut out square in the middle of both with a dies. Use the largest dies from both sets.

Cut off the lower corners on both cardstock and frame with a corner puncher. Glue both frames to each other.

Fasten frame to the front page and decorate it partially.

Bind the sheets with a spiral, and complete the front page of notepad.


Thank you for joining me today. See you again at next Tuesday.


