Showing posts with label Flower 3. Show all posts

Saturday, May 27, 2023

Flowers 3 - Hugs Card

Hello CottageCutz friends! Thanks for taking the time to stop and visit with us today. It's Mary Marsh here bringing you the Saturday edition of the Blog.

We have a brand-new release in the online store. It's our Folk Art release with 19 new designs. For a limited time, you can pick up the entire bundle for 65% off. The individual dies are 35% off

The folk-art designs are so perfect for cardmaking, journaling, and scrapbooking. They allow you to add a beautiful touch of folk art to whatever you may be creating.  The team will begin showing ideas in the next week. 

We are also having a Memorial Day sale with savings of up to 70% off.  Check out the store early for the best selections. The sale ends Wednesday.

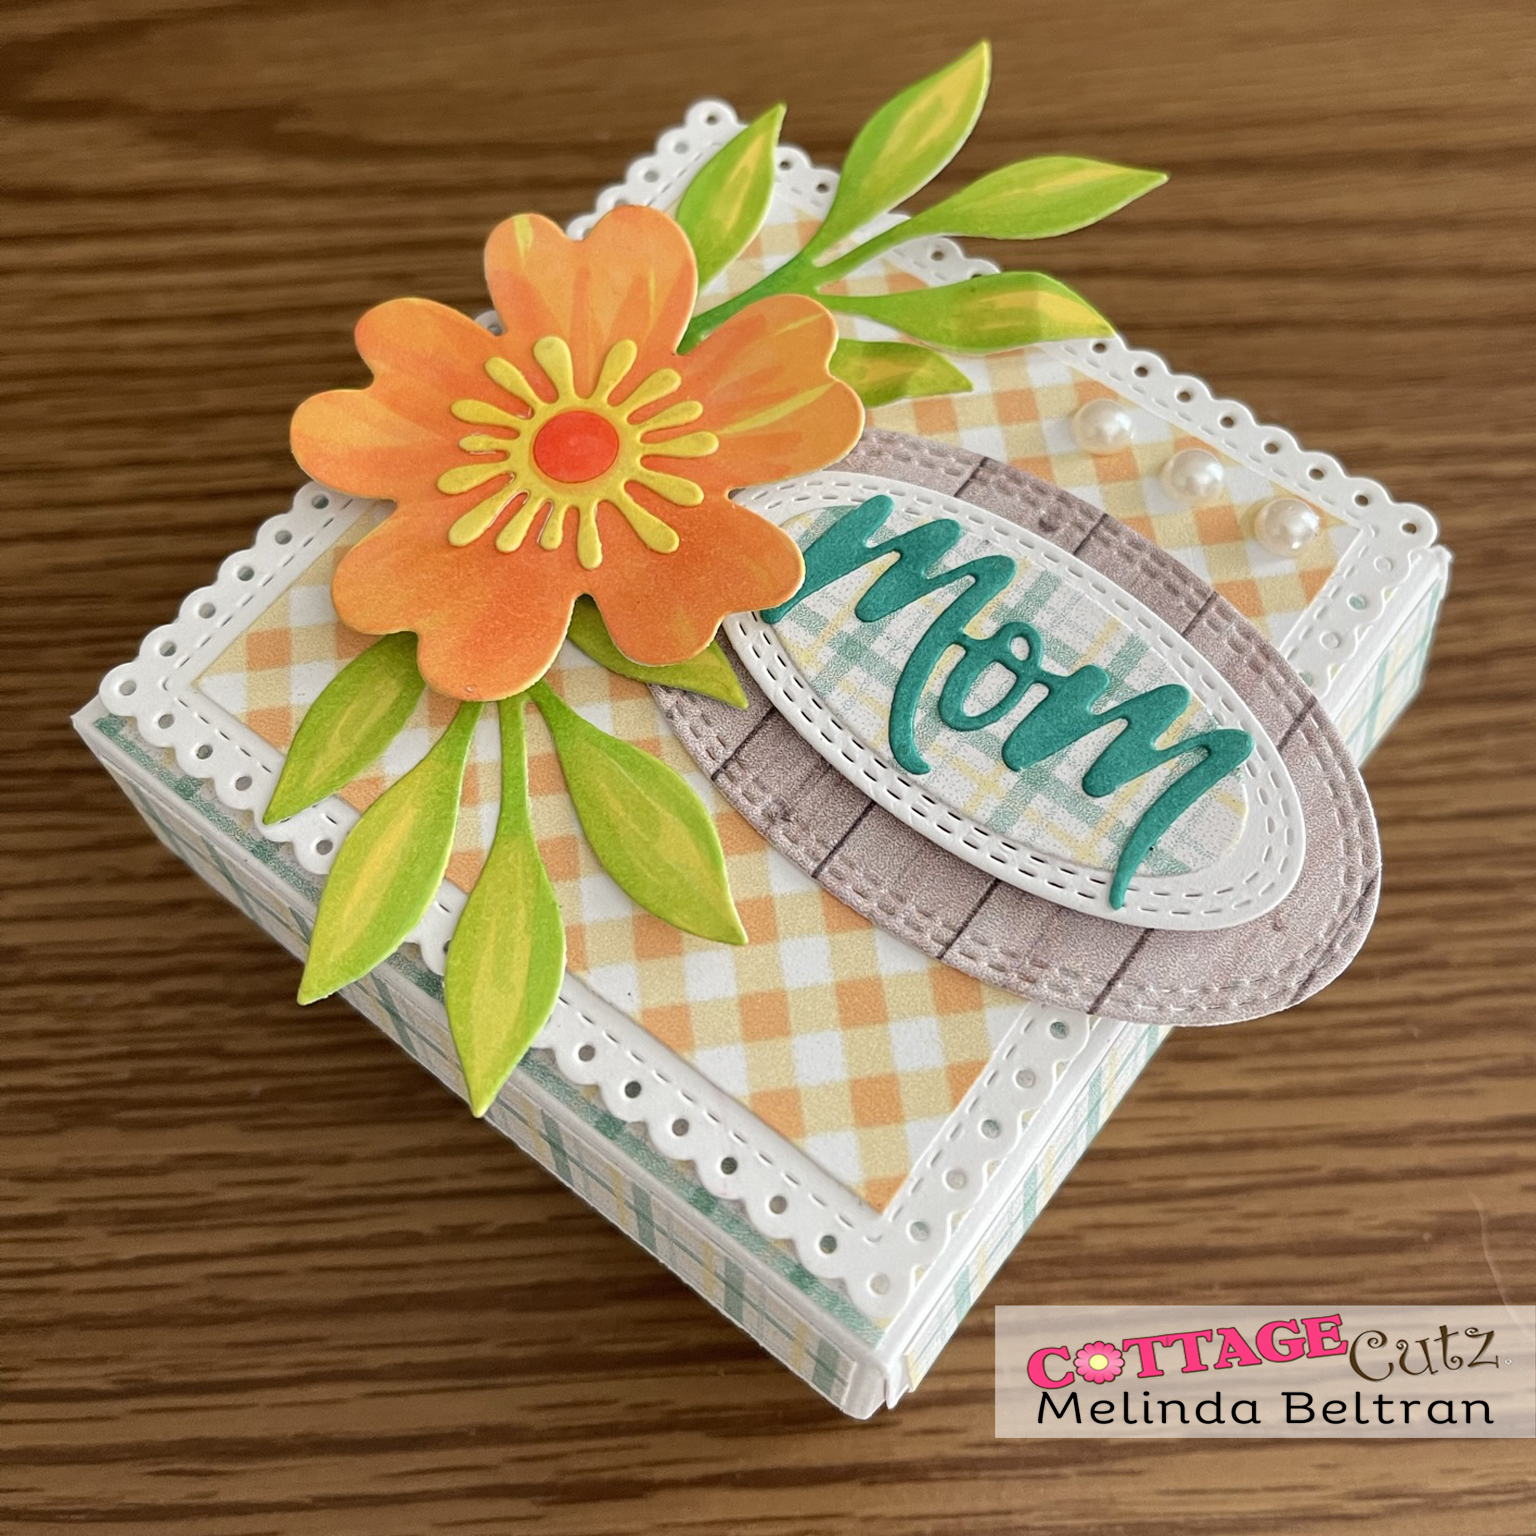
Today for your viewing pleasure, I am featuring the Flower 3 and Leafy Branch 3 dies. I created a card for my good friend who just received some not so good health news on her hubby. 

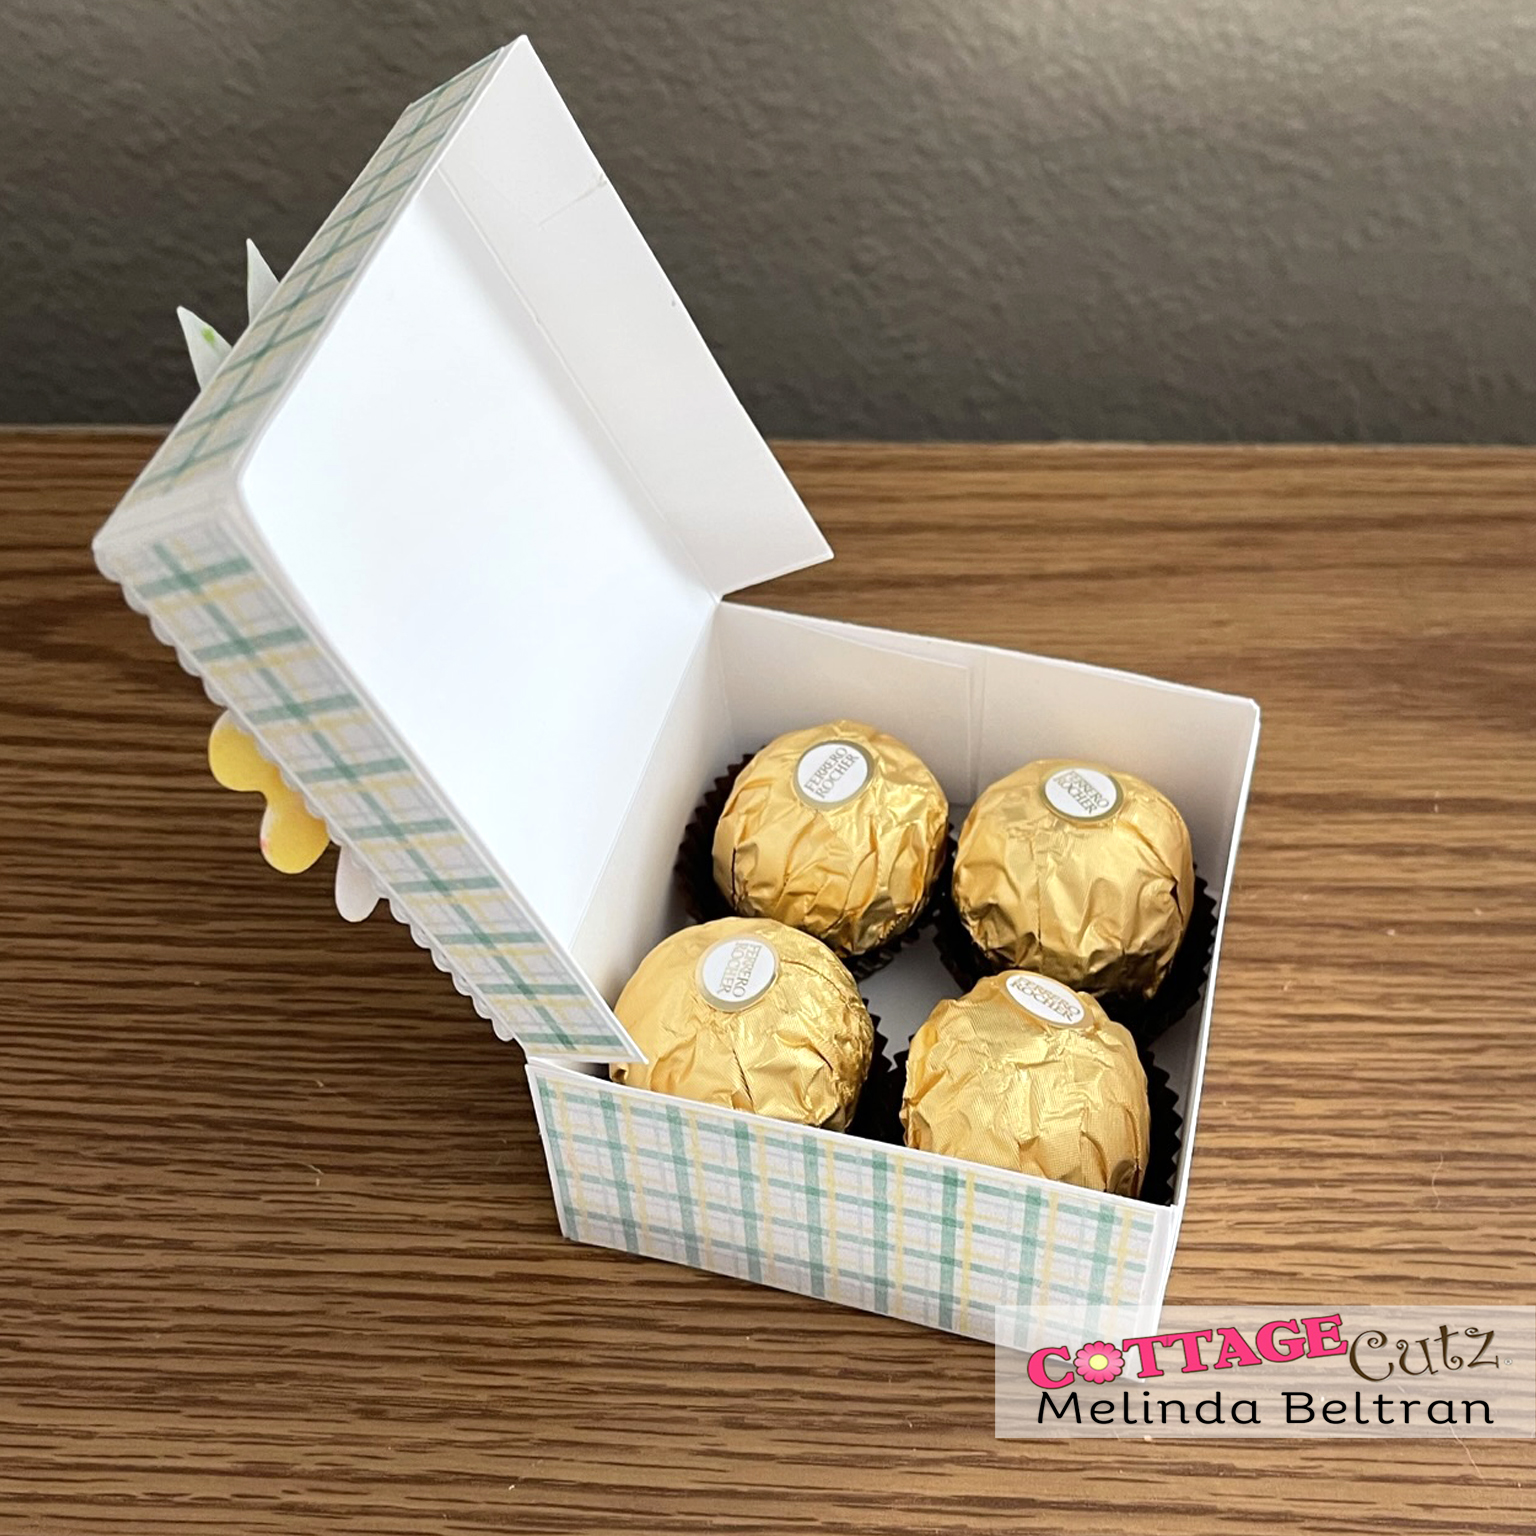
I started my card with my background. I had this envelope in my stash and decided to cut it apart and use it as designer paper. I just thought it was too pretty to use as an envelope. I layered it with an espresso cardstock and then my card base is a powder pink shade.
Powder Pink Base: 4 1/4" x 5 1/2"
Espresso Layering Panel: 4" x 5 3/8"
Designer Paper Panel: 3 7/8" x 6 1/4"
I cut the Flower 3 images in powder pink cardstock and the pistil in a bold pink cardstock. I used a yellow enamel dot for the centers. The Leafy Branch 3 is cut in olive cardstock.
I cut my Hugs w/Shadow die in the 2 shades of pink cardstock. 
Now I am ready to start card assembly. I attached the designer paper panel to the layering panel with double sided tape. 
For the images I wanted them lifted slightly off the background, so I used dimensional adhesive to attach them. For the leaves I used a clear drying glue.
To finish off my card I attached the Hugs phrase, added a few enamel dots to the card corners and then secured everything to the card base. 
Well that's it for me for this week. See you next Saturday.

Reminder: We are having a design team call. If you like working with dies and cute images, you have until Wednesday, May 31st to send in your application. Click here for all the details. 

Dies I used to create card:


Wednesday, May 17, 2023

Card and Ferrero Rocher Treat Box DIY Template Set

Hello crafty friends,
Melinda here with you and today I am sharing a pretty card and box set I created.The beautiful flowers and foliage are from CottageCutz.com. Here is a look at my set.
The set features a top folding A4 sized card and a matching box. The box will fit 4 Ferrero Rocher chocolates and measures 3" square by 1.5" high.


Here's a look at the finished box.


Here's a template of the measurements, Your base piece of paper is 9.75 x 6.
You can follow the template above to make your score lines. You will cut away the parts indicated by the green squares. You will also cut up to the green lines.
PLEASE NOTE: You will need to score at .75", 1.5", 4.5" and 5.25" along the 6" side. See the measurements in white boxes. 


Here is what your box base should look like once you have scored and trimmed it. You see that I snipped a little angle piece off the "tabs". This is so assembly will be easier.


After cutting out my template, I created the patterned paper and printed it out. I then cut the pieces into mats. I then put adhesive on all the tabs and assembled the box. 


This is a photo of what the box looks like when assembled and closed. The lid simply flaps over the base piece.


Here is what the box looks like opened. Super simple but a perfect fit for the 4 pieces of candy. There is even enough room if you wanted to put a little sentiment on the inside of the lid flap.


Here is a closer look at my box. I added a scallop stitched square die cut from the set. I then created and printed out my diagonal plaid paper and cut it out for a mat. I then cut out several of the flower 3 dies in white cardstock along with the leafy branch 2 in white cardstock. I used my markers to color them in. I cut out an oval from the wood grain patterned paper I made and a smaller one from white cardstock. I cut one the same size as the white one from the patterned paper. I trimmed off the stitches to make it a mat. I then die cut the Love You Mom Die from White cardstock and then colored that in as well. I added three little flat back pearls for an extra touch. I also used my Nuvo Drops Clear for the centers of all my flowers.


Following are a few more photos of the finished card. It is a top folding A2 sized card base. To that I added a mat of some plaid paper I created. I also created the wood paper. I created a border of that and added some pretty organza yellow ribbon to it. For the sentiment, I used a scallop stitched rectangle die cut in white cardstock. I then created a mat from the same diagonal plaid paper I created and printed out. Then I glued the sentiment onto that. I used foam tape to give it all a lot of lift and dimension.


Here is one last look at my set. I think it turned out super cute and am excited to give it away.


Well that about covers it for today. Be sure to head over to CottageCutz.com to pick up these wonderful dies while they are available! 

Don't forget to also check out the Cottage Cutz YouTube Channel for some great crafty videos!

Until the next time, have a wonderfully crafty day!
-Melinda

Monday, February 20, 2023

Heartfelt Sympathy

Hello and Happy President's Day crafty friends! 

Kris here sharing some inspiration with you, but first.... we have a HUGE President's Day Sale going on right now thru Friday, 24th!!  Save up to 70% OFF on selected CottageCutz dies in the store! Shop early for best assortment!


Today's card features flowers & leaves from the new Flowers & More Release -- which are still 30% off -- a great deal and these are a must-have for your all occasion stash!  All the CottageCutz products I've used on this card are pictured and linked at the end of my post.

CUTTING & SCORING:
  • Sand-colored Card Base = Cut 9-1/2" x 6" - then score the longest edge at 4-3/4"
  • Patterned Paper (Teal) = Cut 4" x 5-1/4"
DESIGN STEPS:

1.  I embossed my teal patterned paper with a Parisian 3D embossing folder, and attached to Suede card panel (4-1/4" x 5-1/2")


2.  I stamped a sentiment on my white circle, then sponged some Gathered Twigs distress ink to tone down the white.  I glued it onto the scalloped circle, then onto my card front, over to the right edge.

3.  I die cut Flower 3, Flower 5, Leafy Branches 1, 2, and 3, and the Butterfly Kayla from white cardstock and then added distress inks to color them; Gathered Twigs for branches & butterfly body.... Peacock Feathers for the blossoms and butterfly wings... Broken China for smallest blossom center.  


4.  I figured out placement of everything and glued in place, then adhered to center of my sand-colored card base. 

5.  I then spattered some metallic gold acrylic paint over my leafy branches (mostly).  I love the look this gives for a nice finishing touch.  


Here's one more look of the finished card...


COTTAGECUTZ PRODUCTS USED:


Want to watch CottageCutz designers in action? 

Follow the CottageCutz YouTube channel here.

~Kristine