Showing posts with label Film Strip Slimline. Show all posts

Tuesday, February 07, 2023

It's Your Birthday

Hello Friends

IT'S NEW RELEASE TIME!  The collection is called Flowers and More.  The whole set is on sale at a bundle price of 50% off and individual dies are at 30% off.  The unique thing about this release is that there are not as many pieces in each of the dies.  So they go together really quick and easy!

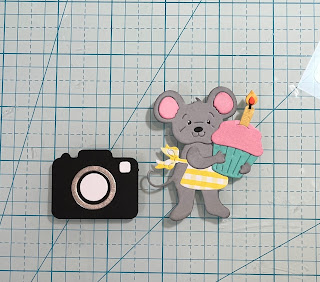
I have a number of birthdays on the way.  So I decided to make a happy little card using the new Camera die mixed with a few older dies.


Design Steps:

1. Using the following dies: Camera, Mouse w/Cupcake, Film Strips, and Slimline Filmstrip Oh Snap cut them out in the following colors of card stock as shown above: black, silver, white, pink, yellow, checked yellow DP, orange, gray, blue, and black
2.  Assemble the pieces I inked the little mouse around the edges.  To make the picture frame I cut a rectangle 3 x 2 3/4 and then took the 4th from the largest Pierced Square and cut out the opening slight above center
3.  The base is a white A2
  • Pink card stock cut 4 1/8 x 5 3/8
  • Mint polka dot DP 4 x 5 1/4
  • Glue mint DP to the pink
4.  Stamp the white frame with It's Your Birthday.  Lay out your pieces as shown but before you glue.  I cut part of the film and glued it under the popped up camera.  Everything else is glued flat and then glue the pink panel to the white card base
5.  Add a few sequins to your card and it is complete

CottageCutz Products


Here is just a peek at the new release to see it all click HERE

We have more inspiration on our YouTube Channel check it out HERE

Thanks so much for stopping by!  And I will see you next Thursday.

Blessings and Take Care


Thursday, May 05, 2022

Aussie Smiles

Hello CottageCutz Friends,

It is Pam sharing with you on the blog today!

I have created a slimline card today featuring a number of the Australian Friends dies.  This sweet card uses the WombatDingo and the Echidna dies.  There are 14 different dies in this release and all of them are just as cute as they can be!!  If you haven't checked out the Australian Friends Release click HERE. 

Design Steps:
1.  Using these dies: DingoWombat and Echidna cut out the following colors of card stock: rust, tan, brown, dark brown, white and black.  Assemble the critters with a fine tip, fast drying glue
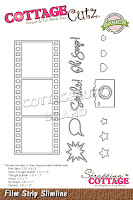
2.  For the white card base use a slimline measuring 8 1/2 x 3 1/2 (folded) Cut a piece of black card stock with the Film Strip Slimline.  Also with the same slimline cut out the Smile which is included in the Film Strip Slimline.  Cut a piece of blue DP 3 1/4 x 2 1/4 glue to the center of the white card base
3.  On the card front glue down the film strip and the smile as shown in the picture above
4.  For a little added decoration use the Spring Grass die and cut it 3 times out of green card stock.  Cut the pieces to fit inside of the film strip sqaure and glue down.  Use the Koala Bear w/Floral die and cut out 4 green leaves and 2 yellow flowers.  Glue the leaves and the flowers in the corners of the top and bottom film strip squares as shown above
5.  Add the remaining critters and some small rhinestones to the flowers centers.  I decided to do the inside of the card by adding one film strip square and some leaves with yellow flowers.  I stamped inside of the square to complete the card

CottageCutz Products


We have more inspiration on our YouTube Channel check it out HERE
Thanks so much for stopping by!  And I will see you next Thursday.

Blessings and Take Care


Thursday, April 21, 2022

Sassy Croc!

  Hello CottageCutz Friends

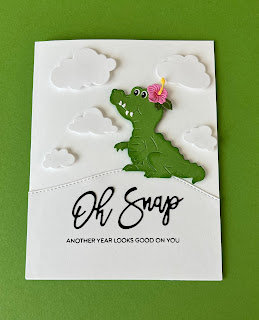
I have a sassy little birthday card today.  I made it using the new release die called the Crocodile.  There are 14 different dies in this release and all of them are just as cute as they can be!!  If you haven't checked out the Australian Friends Release click HERE.


Design Steps:

1.  Using the Crocodile die and the following colors of card stock: green, pink, white, black, yellow and dark green cut out the pieces.  After the pieces are cut shade with different colors of inks and a small applicator.  After shaded glue the crocodile together usings a fine tip, fast drying glue
2.  Cut a piece of white card stock 4 1/4 x 2 1/2.  Next use the Hills Slimline die and cut the top of the card stock to create the hill.  Use a piece of black card stock and cut out Oh Snap which is included in the Film Strip Slimline die.  Glue the Oh Snap as shown above and then stamp the sentiment just under it in black ink
3.  The base of the card is an A2 white.  Using the Cloud Horizontal Slimline die cut out a variety of different size cloud.  Glue the hill with the sentiment to the bottom of the card and pop up the clouds as shown making sure to leave room for the crocodile
4.  Place pop squares on the back of the Crocodile and then pop him to the front of the card as shown below.  Your card is complete

CottageCutz Products


We have more inspiration on our YouTube Channel check it out HERE
Thanks so much for stopping by!  And I will see you next Thursday.

Blessings and Take Care


Wednesday, September 08, 2021

There's a Scare in the Air!

Hello! This is Sukie and today I'm sharing a Halloween card for my design team day.  All of the products used on my card are part of the huge Labor Day sale going on in the store

I used the Lil' Bluebird Designs Home Sweet Home stamp and die set for my card and changed it up to create a Halloween theme.  I pulled out my Distress Inks to watercolor all of the stamped images.  I cut out a couple of grass strips from the Spring Grass die set.
The film strip and stars are from the Film Strip Slimline die set.  I used some Oxide Inks to ink blend the rectangles by masking off my card base.
Once I adhered the film strip onto the background, I inserted the grass along the bottom edge of each of the frames.  The little Halloween houses were placed along the grass.
I continued to build the spooky but cute scene by adding the remaining colored images.
To complete the Halloween scene, the little stars were scattered inside each of the frames.
The final touch on my card was a Halloween themed sentiment from one of the stamp sets in my stash.
Here are the products used on my card: