Showing posts with label CottageCutz Square Set. Show all posts

Wednesday, October 25, 2023

Let Us Give Thanks

Hello CottageCutz friends! Thanks for taking the time to stop and visit with us today. It's Mary Marsh here bringing you the Wednesday edition of the Blog.

It's new release time!!! We have our Christmas 2023 release in the online store that has 40 designs. It's an old-fashioned Christmas theme. You can pick up the individual dies at 30% off for a limited time.

We also have a new Fall 2023 release in the online store with 15 designs. You can also pick up these individual dies at 30% off for a limited time.

Today for your viewing pleasure, I am featuring the new Fall Wagon Wheel, Autumn Friends (Fox) and the Fall Barrel (Sunflowers) dies and I created a Thanksgiving card. So, let's get started with some details of how I created my card. 

Design Steps:

I started my card this week using the colors from the Splitcoaststampers color challenge #791. We are to use pretty peacock, crushed curry and cajun craze for the color trio. As a plus neutrals are always allowed. 
crushed curry, pretty peacock, cajun craze

I cut my images in the challenge colors and some neutral shades. . 
I had designer paper in the pretty peacock color so I used that for my background. It's from the Stampin' Up "come to gather" collection. I stamped my Thanksgiving sentiment on the image panel in the cajun craze ink color.

Pretty Peacock card base: 4 1/4" x 5 1/2"
Designer Paper Layer: 4 1/8" x 5 3/8"
Espresso Panel: Largest Stitched Square die - 3 1/2" x 3 1/2"
Image Panel: Largest Square Set die - 3 3/8" x 3 3/8"

I am now ready to start card assembly. I attached the images to the kraft panel with clear drying glue and dimensional adhesive. 
Attached the designer paper to the card base with double sided tape.
 
To complete my card, I attached the image panel with double sided tape. I also added a pair of acorns from the Autumn friends die. I didn't like the green stem that's holding the sunflowers so very carefully I was able to lift the images and add a new stem cut in pretty peacock. I placed it over top of the green one. I like it better.
Well, that's it for me for this post. See you again next week.


Saturday, March 20, 2021

Some Bunny Loves You

Hello Scrapping Cottage friends! Thanks for taking the time to stop and visit with us today. It's Mary Marsh here bringing you the Saturday edition of the Blog.

We have a brand new release of dies in the online store. It's our Spring Release with 22 new designs. Everything you need to create Spring, Easter, Birthday, Mother's Day, Father's Day, Thinking of you cards and so much more.

The Design Team has been showing samples using these new dies. So if you haven't seen them check back on the blog for lots of great ideas. The dies are currently on sale at 25% off so check all the new designs in the online store for some great selections. The Safari & Circus releases are still available at 25% off as well.

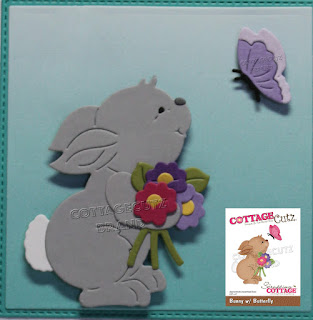
Now onto my card for today. I am featuring the new Bunny w/Butterfly die and created an Easter card for the two little ones that live next door to me. So let's get started with some details on how I created my card. 

Design Steps:
 I started my card this week with my layout. I found this sketch #845 over on Splitcoaststampers and decided to use it. The layers would allow me to use designer paper to create a festive Spring card. 
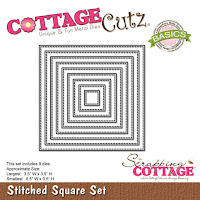
I looked through my designer papers and decided on these two coordinating patterns. I used the largest Stitched Square die for layer #2 and the largest Square die for layer # 3. For the background layer #1 I found this piece of light card patterned paper. I cut it to 4 1/4" x 5 1/2" and secured it to a white card base. 
For layer # 4, I used the 3rd largest stitched rectangle die. The width was fine but the height needed to be re-sized to 1 3/4".  I forgot to take a photo during the cutting process of the designer paper. So I repeated the process for you to see with cardstock. I cut the shape first 
and then measured at the 1 3/4" mark 
and placed it back in the die and ran it through my BigShot.
Here is the finished size. 
For layer #5 I used this piece of light purple cardstock and resized it to 3/4" x 3 1/2"using the same method.  I stamped my sentiment in a grape ink on this panel using my Stamp-a-ma-jig to get the placement.  
Next, I cut the bunny and butterfly images. I used colors that complimented my designer paper.
Now that all the card elements are prepared I am ready to start assembly. I secured the gray patterned paper to the card base first with double sided tape. Next, I attached layers 2, 3 and 4 secured to the card base. 
Added the sentiment strip with double sided tape.
I attached the bunny image using dimensional adhesive. I scattered a few enamel dots to finish off this card. 
I hope I have given you an idea with the image + the sketch for this new die.  See you next Saturday!

dies I used to create card: 


Saturday, November 24, 2018

Christmas Joy

Hello Scrapping Cottage friends! Thanks for taking the time to stop and visit with us today. It's Mary Marsh here bringing you the Saturday edition of the Blog. 

Hope all of our American friends had a great Thanksgiving. Then there was all the Black Friday sales and now today it's small business Saturday. Speaking of sales have you checked out the big sales we are having over in the online store. There are savings of up to 80%. Just in time to purchase dies for your Christmas card making. 

And we also have a brand new Black Friday release bundle. There are 16 new Pet designs in this release. You can purchase the entire bundle at an incredible price of  $99.95. It's a 60% savings over purchasing the dies separately. The DT will begin showing samples next week.

For my card today, it's all about Christmas. I am using the Holiday Mantel and Handmade Tree w/Presents dies. You can get these on sale at an amazing 40% off. So let's get started on some details on how I created this card.
Step 1:  I started off my card this week with my layout. I used the Splitcoaststampers sketch #721. I thought it was a good layout to showcase the dies I am using.
I then chose my card colors using the traditional Christmas colors of red and green. The background patterned paper carries through the Christmas theme nicely.
cherry card base: 4 1/4" x 5 1/2"
Patterned paper layer: 4 1/8" x 5 3/8"
Small image squares: used the 4th largest stitched & square set dies.
Step 2:  Started my die cutting using the small tree, stockings and garland dies from the Holiday Mantel set.

I used the tall present from the Handmade Tree w/Presents die.
I used the Stitched Alphabet die to cut my Joy phrase in cherry cardstock. This die is also currently on sale at 50% off.
 Step 3:  Now that all the pieces are cut, I can start the card assembly. I stamped the Merry Christmas sentiment on the square with the present. I "hung" the garland on the square with the stockings. The Stitched Joy phrase was placed at an angle for added interest.
To complete my card, I added some red and green sequins. And, that's a wrap for me this week. I hope I have given you some inspiration on a way to use these Christmas dies. Remember, they are currently 40% off in the online store. See you next Saturday!
dies I used to create card:
 
http://www.scrappingcottage.com/cottagecutzhandmadetreewpresents.aspx
 
http://www.scrappingcottage.com/search.aspx?find=stitched+alphabet
 
http://www.scrappingcottage.com/cottagecutzsquaresetbasics.aspx
 
http://www.scrappingcottage.com/cottagecutzstitchedsquaresetbasics.aspx