Showing posts with label Cottage Cutz Nested Stitched Scallop Rectangle Set. Show all posts

Tuesday, December 12, 2023

Window and Plants Card

Hey crafty friends,
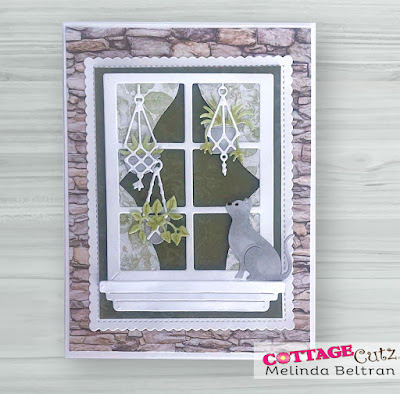
So glad you stopped in today! I am sharing another card with the fun Black Friday release from Cottage Cutz. Here is my card.

I created a top folding card. It is an A4 size. It is of white cardstock.  

I started by using the new window die cut. I wanted to make a curtain so I turned the die cut around and just made a quick outline.

I mirrored it and then cut them out.

I put the window on top of the curtain cut out. I then added that to a dark green paper mat and then placed those on the scallop stitched rectangle mat. I then added three of the cute hanging plants from that die cut. I added the cute little kitty die cut to the right of the window sill. 

I then added a stone paper mat to the base of the cardstock. I think that paper choice pulled it all together. I purposely left the card with no sentiment. I am either going to use this as a congratulations on your new home or a thinking of you for someone who loves plants.


Dies Used For This Project

Garden Window


Hanging Plants

Nested Scallop Rectangle Set
The one I have is currently out of stock. 
This is a great alternative.

Well, that about covers it for today. Be sure to come back real soon. You will want to keep up with my crafty adventures! Until the next time, have a wonderfully crafty day!
Melinda


Tuesday, August 15, 2023

Fall Floral Card

Happy Terrific Tuesday crafty friends!
I hope you are doing well and staying cool! Here in the south, in the United States, it has been very hot! Plus our schools are now back in session, so the hustle and bustle is in full swing! It is hard to be thinking about the fall season already but alas, as crafters, you always want to be a bit ahead of the season!So here is a lovely card I created with a wonderful fall theme.
Melinda Beltran Fall Die Cut Card
I created this top folding A4 card with a festive fall theme. I used a Christmas die called Christmas Farmhouse Floral as my main focal piece. I did use the flowers from the Deer Floral Spray die instead of the Poinsettia's that come with the Christmas Farmhouse Floral die. I started by cutting all my die cut pieces from White cardstock.

I started by takin the white can and dressing it up. First I splattered my can with some gray ink. It gave the can a nice speckled look. 

Next, I blotted some gray onto the can with my finer paint bruch. This gave the can the appearance of an authentic milk can.


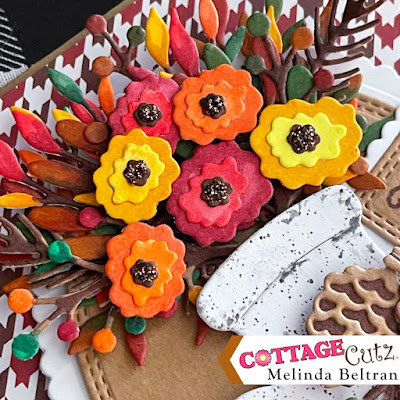
I then turned to my leafy branches. I had cut several out in Kraft cardstock. I set about coloring in the leaves with some vibrant fall colors.

Here's a photo as I am coloring the stems a darker brown,.

here is a closer look at the cute flowers that I used. They are so very cute.


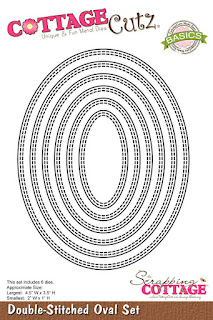
here is another view of my completed card. Once I finished creating and coloring all my pieces, I assembled my can onto a double stitched oval cut from some Kraft cardstock. I layered all that onto a scalloped oval die cut from some white cardstock. For the sentiment, I used a double stitched rectangle and then a scalloped white rectangle. I hand wrote For You with a brown fine tip marker. I used a little foam tape to give it some lift and adhere it and then added all that to a base of Kraft cardstock with a piece of patterned paper for a mat.


Dies Used


Well, I hope this gave you a little fall insp in spite of the heat! It is never too early to start on your fall decor and cards! While I am a Spring girl, my whole family loves fall so we really do it up here!

Don't forget to check out the CottageCutz.com You Tube Channel! You will find some great inspiration there too!Until the next time, have a wonderfully crafty day!

Monday, June 19, 2023

Patriotic Banner

Happy Tuesday crafty friends,
Today I am sharing a project with some of the new Cottage Cutz Patriotic dies. Here is what I made.
This fun Patriotic banner. God Bless The USA.

Here is a look at the banner hanging on my office desk. 

I started by using the USA Flag die, the USA Phrase die and the Fireworks dies. I cut them all out of white cardstock and then colored the flags with my markers. For the bases of the banners,  used wo layers of the scallop stitched rectangles. For the words God and Bless, they came from the Baptism Die and the word THE came from the Berry Phrases die set.


I used some digital papers I created to print out and make some mats for the bases. I used some foam tape to give the smaller layer a little lift and set it on an angle. 

I assembled the banner by adding some glitter tulle between the mat and the flag die. I then layered the words God Bless and The onto a double stitched rectangle die with some more digital papers I created and printed for a mat, on top. I also added some stars that were from the Fireworks die I cut out.

I also added a banner from the Patriotic Pennants die and some little stars to each. I colored the pennants alternating colors of red and blue. I then added a star to the center of each and a dot of glitter. For each corner I added one of the bows.

Here's a closer look at the A and Firework banner - pennant.

Here's a closer look at the firework. I added foam tape to give each layer a little lift.


Here's a closer look at the letter S. You can see for each letter,  I used several layers stacked to give them some depth. I layered each onto the bottom portion of each flag.

Here is a closer look at the U.


Here is a look at the banner hanging on a wall. I just adhered each pennant to some thin ribbon. I decided not to make holes on each corner to thread the ribbon throug because I wanted to use those cute little bows from the Patriotic Pennants die.

Here is one last look at my banner. It is hanging on my office desk and I get to enjoy it there until I put it out with the rest of my patriotic decor this weekend!


I actually used the scallop stitched set, however it is currently out of stock.
This one is a great alternative.

Be sure to head over to the Cottage Cutz YouTube Channel! You will want to see what great crafty inspiration our designers share!

Well that about covers it for today. Thank you so much for stopping by and spending some of your crafty time with me. Until the next time, have a wonderfully crafty day.

Melinda

Wednesday, May 17, 2023

Card and Ferrero Rocher Treat Box DIY Template Set

Hello crafty friends,
Melinda here with you and today I am sharing a pretty card and box set I created.The beautiful flowers and foliage are from CottageCutz.com. Here is a look at my set.
The set features a top folding A4 sized card and a matching box. The box will fit 4 Ferrero Rocher chocolates and measures 3" square by 1.5" high.


Here's a look at the finished box.


Here's a template of the measurements, Your base piece of paper is 9.75 x 6.
You can follow the template above to make your score lines. You will cut away the parts indicated by the green squares. You will also cut up to the green lines.
PLEASE NOTE: You will need to score at .75", 1.5", 4.5" and 5.25" along the 6" side. See the measurements in white boxes. 


Here is what your box base should look like once you have scored and trimmed it. You see that I snipped a little angle piece off the "tabs". This is so assembly will be easier.


After cutting out my template, I created the patterned paper and printed it out. I then cut the pieces into mats. I then put adhesive on all the tabs and assembled the box. 


This is a photo of what the box looks like when assembled and closed. The lid simply flaps over the base piece.


Here is what the box looks like opened. Super simple but a perfect fit for the 4 pieces of candy. There is even enough room if you wanted to put a little sentiment on the inside of the lid flap.


Here is a closer look at my box. I added a scallop stitched square die cut from the set. I then created and printed out my diagonal plaid paper and cut it out for a mat. I then cut out several of the flower 3 dies in white cardstock along with the leafy branch 2 in white cardstock. I used my markers to color them in. I cut out an oval from the wood grain patterned paper I made and a smaller one from white cardstock. I cut one the same size as the white one from the patterned paper. I trimmed off the stitches to make it a mat. I then die cut the Love You Mom Die from White cardstock and then colored that in as well. I added three little flat back pearls for an extra touch. I also used my Nuvo Drops Clear for the centers of all my flowers.


Following are a few more photos of the finished card. It is a top folding A2 sized card base. To that I added a mat of some plaid paper I created. I also created the wood paper. I created a border of that and added some pretty organza yellow ribbon to it. For the sentiment, I used a scallop stitched rectangle die cut in white cardstock. I then created a mat from the same diagonal plaid paper I created and printed out. Then I glued the sentiment onto that. I used foam tape to give it all a lot of lift and dimension.


Here is one last look at my set. I think it turned out super cute and am excited to give it away.


Well that about covers it for today. Be sure to head over to CottageCutz.com to pick up these wonderful dies while they are available! 

Don't forget to also check out the Cottage Cutz YouTube Channel for some great crafty videos!

Until the next time, have a wonderfully crafty day!
-Melinda