Showing posts with label Christmas Mice. Show all posts

Thursday, January 10, 2019

Mice Love!

Good Morning Scrapping Cottage Friends

It is Pam creating with you today on the blog!

I am continuing to make my Valentine cards.  I don't make as many Valentines as I do Christmas Cards and I usually make a lot of different ones verse the same card.  I used the Christmas Mice die for this darling card.  I love it when you can use our fantastic dies in multiple ways and for different occasion.

Design Steps:
 1.  Cut out all of the pieces using the Christmas Mice die. I used a variety of card stock and designer papers
 2.  Shade the mouse with TH inks and then assemble the boy mouse
 3.  Shade the girl mouse with TH inks and then assemble the girl mouse
 4.  Using gray inks to shade the bench
 5.  Glue the mice to the bench as shown
 6.  Use a white card base and cut red card stock slightly smaller then the base.  And then cut the DP 4 x 5 1/4
 7.  Glue the DP and the red card stock together and then glue down the mice

8.  Using the Hugs & Kisses die cut out of red card stock.  Glue the Hugs & Kisses to the card as shown


CottageCutz Products
We appreciate you stopping by today!  Hope you have a wonderful week of crafty fun and I will see you next Thursday on the blog!

Blessings
Pam

Tuesday, September 25, 2018

Christmas Mice

Hi, Janja here!

You've already started to think about your Christmas cards. Today I have another Christmas card for you. Let's see how it's made.


Supplies:
- CottageCutz dies: Christmas Mice, Little Angel (stars)
- white cardstock for a center step card
- white and colored cardstock
- patterned paper
- colored ink pads
- glue, double-sided adhesive tape, self-adhesive foam pads

For the cutouts we will use colored cardstock. So first prepare colored cardstock and ink pads.
Then cut out the individual cutouts, ink the edges, and fix them to each other.


Now cut and fold the card base. Center step card tutorial.
This is my card base.


Cut the patterned paper and attach it to the card base. The paper is colored on the edges.


Stamp a sentiment and complete the card as shown. Last, add some small stars. 
I borrowed them from a little angel.


I would like to remind you that the new Christmas dies (Part 3) and the new Halloween dies are already in the store. They are currently on sale for 25% off.

I hope you enjoyed it. Have a nice day.


Wednesday, September 19, 2018

September Group Post Part 2

Hello Scrapping Cottage friends! Thanks for taking the time to stop and visit today. We are sampling DT cards from Part 2 of the 2018 Christmas release. There are 29 new designs in this release. 

And, speaking of new releases Christmas Part 3 has just been released along with some new Halloween dies. You will find these in the online store at a 25% off sale. There is also an exclusive die that can only be purchased through the online store. Check out the sweet Dakota the Husky die.

The DT will be showing samples soon with these new dies. Today, we have a group post showing samples from the recently released Christmas Part 2 dies.

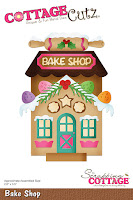
Card 1:  This first sample is from Jeanne Knobbe. Using the ever so cute Bake Shop die and pairing it with the Baking Gnomes die, she created a fabulous Christmas side step card. The Gnomes are busy stirring their batter and giving us an idea of what could be taking place inside this bake shop. How perfect would this card be for your baker friend or your child or grandchild?
Card 2:  The next sample is from Pam MacKay and she has also created a fancy fold card. Her technique is a Z Fold or Bridge card. This fold packs a lot of wow and it lays flat for mailing. She used the Holiday Pickup Truck die for her card.
 This 2nd photo shows the bridge section of her card. She has created a wintry scene for her truck and placed it on a "road" that continues with the addition of the bridge. You can see the dimension it adds to her card with this extension piece.
Card 3: This next sample is from Janja Albreht. She used the cute Nordic Gnomes die to create these stunning Christmas tags and placed them on a background of beautiful designer paper. Wouldn't one of these look awesome on that special Christmas gift you are giving. The lamppost and bow are from the Christmas Mice die.  
Card 4: Our last sample for today is another is from Janja Albreht. She used the loveable Peeker Snowmen die to create this charming Christmas card. Her snowy background was created with a stencil and 3D texture paste. She has her snowmen peeking over a big icicle for a creative touch.  
That's our samples for today. Hope the team has given you some new ideas for using these dies. 
 
Dies used to create cards:
http://www.scrappingcottage.com/search.aspx?find=bake+shop

http://www.scrappingcottage.com/search.aspx?find=holiday+Pickup+Truck

http://www.scrappingcottage.com/cottagecutzpeekersnowmen.aspx

http://www.scrappingcottage.com/cottagecutznordicgnomes.aspx

http://www.scrappingcottage.com/search.aspx?find=christmas+mice

http://www.scrappingcottage.com/search.aspx?find=baking+gnomes


Saturday, September 08, 2018

Joyful Christmas Mice


Hello Scrapping Cottage friends! Thanks for taking the time to stop and visit with us today. It's Mary Marsh here bringing you the Saturday edition of the Blog. 

Our  Christmas Part 2 dies are available, and on a 25% sale,  in the online store.  There are 29 new designs in this release. The Christmas Part 1 dies are still on sale as well for a limited time. 

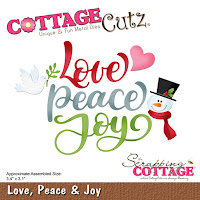
For my card today, I am using two  of the new dies from Christmas Part 2. It's the ever so cute Christmas Mice and the Love, Peace & Joy dies.  So let's get started with some details on how I created my card.

Step 1: I started off by die cutting all the pieces that are part of this die set. I use various colors of cardstock. But you could cut them in white cardstock and then color the pieces with pencils, alcohol markers or water color. 
I simply followed the package coloring and used similar cardstocks. Our artist does such a great job of coloring the images, and I always love the colors she uses.

My Joy word is cut from the new die Love, Peace & Joy. I cut it 2x in red cardstock to give it a bit more dimension on my card.
Wanted just a bit of snow in my outdoor scene so I cut a snowbank in white glitter cardstock from the Snowman Lane die. Click here to see another card I made using this die.

The last item for my card prep is the background clouds. I wanted this to be a daytime scene. Although with the lamp pole you could certainly make a nighttime sky and have a great night scene. 
I used a mini-cloud stencil and distress ink to sponge in some clouds. I stenciled right on the white card base, making this more of a one layer card.
Step 2: Now that all the pieces of the card are ready, it's time for card assembly. I started with the snowbank.

Then I attached the Christmas Mice die cut pieces with a combination of glue dots and double sided adhesive.
The Joy sentiment was attached with Ranger multi matte medium to complete my card. I don't often do one layer cards because I like the addition of designer paper and layers but I like how this one turned out. I plan on making several more of these for Christmas. 
Card Base: 4 1/4" x 5 1/2"

Well, that's it for me for this week. See you next Saturday!

dies I used to create card: 
http://www.scrappingcottage.com/cottagecutzchristmasmice.aspx

http://www.scrappingcottage.com/cottagecutzlovepeaceandjoy.aspx

http://www.scrappingcottage.com/cottagecutzsnowmanlane.aspx