Showing posts with label Christmas Car & Trailer. Show all posts

Friday, January 03, 2020

Adventure Awaits!

Happy New Year Cottage Cutz fans!  I hope your year has started off great!  Mine has been quite nice although having a day off in the middle of the week has thrown me off a bit.

For today's card, I'm using new dies from the Arctic Friends and 2019 Christmas release.
This card would be perfect for anyone who loves to camp or go on road trips.
To start, I cut all the pieces from various colors of cardstock and vellum, and assembled.  I used Distress Oxide inks in Vintage Photo to give some shading to the edges.
Next I cut two sets of mountains in two shades of gray using the Snowy Mountains dies.  To give variety, I used the snow portion in gray for one set.  I decided that if I were camping, it probably wouldn't be in the winter, so I wanted my mountains "snow free".  I used the DO ink on the edges here as well.
For the sky I used a cloud stencil and a light blue ink.
I created the grass by blending three colors of green ink.  After these were done I began assembling the card on a top folding A2 card base.
I first layered the cloud panel, then the grass and finally placed my mountains.  I cut off the over hanging edges of the mountains.
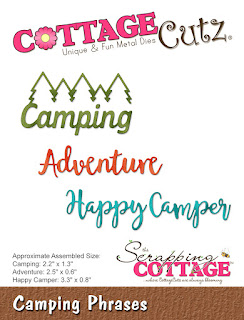
I placed washi tape that looks like a road about 3/4" from the bottom and adhered the word Adventure from the Camping Phrases die.
Using foam dots, I popped up the card and trailer.  I'm very pleased with how this card came out - it may be my husband's birthday card!  However that's not for a several months and I'll probably make him ten more cards by then!  ;)

Dies used:
http://www.scrappingcottage.com/cottagecutzchristmascarandtrailer.aspx
http://www.scrappingcottage.com/cottagecutzsnowymountains.aspx
http://www.scrappingcottage.com/cottagecutzcampingphrases.aspx

Be sure to visit the online store where these and other select dies are on sale for a very limited time!

Thanks for stopping by - I hope you have a fun and creative weekend!


Saturday, November 09, 2019

Moose in Forest

Hello Scrapping Cottage friends! Thanks for taking the time to stop and visit with us today. It's Mary Marsh here bringing you the Saturday edition of the Blog. 

We have the new release of Christmas Part 2 in the online store and they are all in stock and available for delivery. There are 34 new designs in this release. 

This release has something for everyone. So if you prefer a more religious tone to your cards- we have you covered. If you like a more whimsical design featuring Santa, reindeer, gnomes, moose or even a hot chocolate theme you will find some really cute dies.

I actually do a combo of religious and whimsical for my Christmas cards. Today, for your viewing pleasure, I am going whimsical with the new Moose in Forest die. So let's get started with some details on how I created this card. 

Step 1:  As I have said so many times before, having a layout in mind at the start of my card is always a big boost for me. It jump starts my creative thought process. I love working with the sketches that are out there in the online world. That way I just choose the colors and designer paper and I am good to go.

 I had this sketch pinned to one of my Pinterest boards and I thought I could make it work with this moose image. 
Tranquil Tide card Base: 4 1/4" x 5 1/2"
Designer Paper: 4 1/8" x 5 3/8"
Kraft Angled Rectangle: 3rd largest Cross Stitched Rectangle die 
Kraft Designer Paper Square: 3rd largest Square Set die. 
I cut the Moose and Pine Tree from cardstocks that matched or coordinated with the designer paper. 
I decided to stamp some trees on the kraft rectangle panel, just for added interest. I used tranquil tide ink.
Step 2: My card elements are prepared and I am ready to start card assembly. I attached the panels with double sided tape. I used burlap ribbon for the long rectangle panel on the sketch. I thought it gave a more woodsy type look. 
Next, I attached the trees to the square panel. I originally cut a small and large tree but that didn't work on the square, so I changed to 2 smaller trees. The moose is attached with dimensional adhesive. 
I wanted to stamp a sentiment on the designer paper, but I wasn't sure if it would be prominent enough. Then I remembered the Noel banner from the Christmas Car & Trailer die. I used it and placed it across the pine trees. I like the touch of Christmas red that it added to my card. 

To finish off my card I added 3 rhinestones and attached the image panel to the card base. And, that's it for me for this week. I hope I have given you an idea for a way to use this cute new die. See you next Saturday!

dies I used to create card:


Saturday, November 02, 2019

Christmas Car & Trailer

Hello Scrapping Cottage friends! Thanks for taking the time to stop and visit with us today. It's Mary Marsh here bringing you the Saturday edition of the Blog. 

We have the new release of Christmas Part 2 in the online store and they are all in stock and available for delivery. There are 34 new designs in this release. 

This release has something for everyone. So if you prefer a more religious tone to your cards- we have you covered. If you like a more whimsical design featuring Santa, reindeer, gnomes, moose or even a hot chocolate theme you will find some really cute dies.

I actually do a combo of religious and whimsical for my Christmas cards. Today, for your viewing pleasure, I am going whimsical with the new Christmas Car & Trailer. It's part of the Part 1 release

I have a friend that has a trailer and camping is a big part of her life now that she and hubby are retired. So I made this card for her. So let's get started with some details on how I created this card.  

Step 1: I started with cutting out the card and trailer. I used the die packaging for colors. Our dies always have such beautiful coloring that it makes it easy for you to use cardstock or any coloring medium. My preference is cardstock.
Next I decided on my background designer paper. This paper reminded me of a blue sky with even a bit of snow.

blue card base: 5 3/4" x 4 1/2"
white layering panel: 5 1/2" x 4 1/4"
designer paper layer: 5 3/8" x 4 1/8"
I decided to emboss the designer paper with a birch tree embossing folder. Just thought it would add interest to the card and give the appearance of a wooded campsite.
Step 2: I am ready to start card assembly. Attached the designer paper layer to white layer panel with double sided tape.
To attach the die-cut images I used dimensional adhesive. This adds depth to your design.
I attached the image panel to the blue card base with double sided adhesive.
I felt like the card wasn't complete so I decided to add a Merry Christmas sentiment and several snowflakes. The snowflakes are from the Holiday Hedgehog die. The sentiment is from last year's Christmas collection - Merry Christmas w/Deer Family
Well that's it for me for this week. I hope I have given you an idea for using this new die. It makes a perfect card for your camping friends and family. See you next Saturday!

dies I used to create card:


Wednesday, September 18, 2019

A Christmas Wish Just for You!

Hello!  This is Sukie and today I'm sharing a project created with the new Christmas dies.  There are 25 new dies in this collection and they are perfect for those Christmas creations and they are all on sale right now!
I went with a traditional color palette for my card pulling the colors from the beautiful patterned paper.
The die cuts are from the Christmas Car & Trailer set.  I mixed in some additional patterned papers from my stash for the details on the car & trailer.  I also cut the oval for the background in white card stock from the Double Stitched Oval set.
As I was thinking of my card design, I found a fun sentiment in my stash from the Scrappy Moms (retired) Merry Kissmas stamp set.  I also cut out a frame for my sentiment using the coordinating card stock.  The white oval was given a splash of color with some Oxide Inks.
I pulled my card base together and layered it with the oval which would eventually frame the scene on my card.  The shaded oval helped to mute the fun and vibrant colors of my card.
The trees were placed to the right of the oval frame.  The layering of the trees created a bit of dimension behind the car & trailer.
The sentiment fit perfectly above the Christmas scene which was the final accent on this festive card.
Here are the dies used on my card, available in the shop: