Showing posts with label Candy & Gumballs. Show all posts

Sunday, June 19, 2022

You Sweet Thing - Gumball Shaker


Happy Sunday ~ it's Kris here with a "sweet" gumball shaker card!  I set out to make simpler card this week but I just couldn't help myself when I pulled out this Candy & Gumballs die - I just HAD to make it into a shaker card, so I hope you'll shake it up with me! ☺   

Products used on my card:
Other:
acetate
patterned paper
shaker elements
foam Tape
glue

*NOTE:  You can swap out some of the circle or cloud dies for other CottageCutz dies you have on hand!  I just used what I had. 

Design Steps:

1.  Cut a card base from thick white cardstock at 4-1/4 x 11"
      -  score at 5-1/2"
      -  round bottom corners (I used envelope punch board)

2.  Cut a patterned paper at 4" x 5-1/4" (I used some from Queen & Co. called Candy Land)
      -  round bottom corners
      -  attach to card front

3.  Cut (2) coordinating pieces of patterned paper at 2" x 4"
      -  cut each piece with one of the Clouds Slimline dies.
      -  attach to card front so that one is slightly longer than the other.


4.  Die-cut pieces of your gumball machine.  (I originally cut mine from pink foiled cardstock, then switched it out for a solid pink.)

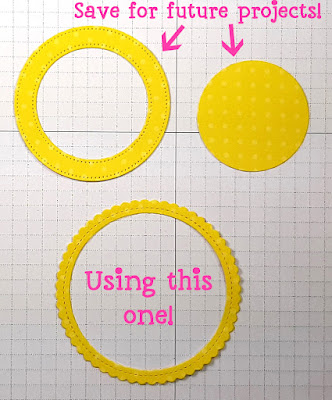
5.  Lay out your dies onto a piece of white cardstock as shown below with the smallest of the Pierced Wide Circle Frame Set, and the 2nd from the largest of the Nested Wacky Stitched Circle Set so that the gumball machine is centered (not the circle!)


6.  Tape the dies in place with a low-tac tape and remove the gumball machine pieces.
      -  run through die-cut machine


7.  I used that first doughnut as a template to create 6 or 7 more (can do less if you're using a thicker cardstock) by placing that doughnut onto another white cardstock and lightly trace inside of smaller circle with pencil and place a dot in the middle.  
      -  remove that doughnut and place your small circle in place & tape with low-tac tape. 

8.  Set aside ONE of your doughnuts.  

9.  Working with 2 doughnuts at a time, place one on top of the other and move them around in a circle motion using your thumbs to feel when the small holes are lined up exactly.  
      -  tape the 2 together with low-tac tape in just one spot  
      -  lift up the open end and glue together.  Remove tape and and add glue so it's all adhered
      -  repeat using all doughnuts except the one you put aside.
      -  run your bone folder over it to flatten any glue bumps after adding each doughnut


9.  Cut a small piece of acetate a li'l larger than the small circle opening and glue it to the top of your doughnut stack.

10.  Glue your last doughnut to the top of your stack to cover up the edges of acetate
      -  be sure to line up the small circles!
      -  be sure to not get glue on your acetate! 

11.  Turn your stack upside down and add your shaker elements in the center.  If your stack isn't tall enough to let your elements "shake", you can cut more doughnuts and add to the bottom of your stack.

12.  Die-cut a white circle using the same size (2nd from largest) of the Nested Wacky Stitched Circles set ---- but don't cut the smaller circle from the middle!

13.  With your stack still upside-down. add glue to all the white area and add your solid circle centered to the top and set aside to dry a little. 


14.  Next, cut a scalloped frame for the front by placing the 2nd from the largest of the Nested Stitched Scalloped Circle set  on a piece of patterned and place the middle die from the Pierced Wide Circle Frame set evenly in the middle and taped both with low-tac tape.
      - run through die-cut machine


15.  Glue frame onto the front of your doughnut.

16.  Glue your gumball machine die-cut pieces to the front as shown:


17.  Attach your shaker to card front and finish off with a sentiment and embellies!  
      *Note:  the bow in top corner is from this Candy & Gumballs die!


Here are the products I used on my card today:


Thanks so much for taking a peek!  
I hope you'll SHAKE IT UP with your next card!  

Have a Blessed Sunday!
~Kristine

Thursday, June 16, 2022

Happy 4th of July!

 Hello Friends

It is Pam sharing with you today!

I make a few 4th of July cards for friends and family so I thought I would get a little head start.  Even though time just seems to fly!   I think this release is perfect for the old red, white and blue!!

I am using the Candy and Gumballs die to create this little mini slimline card. (I did get a little glare off of the ascetate that I used for the glass.)


Design Steps:

1.  Use the Candy and Gumball die and cut: red, white, blue, silver, acetate and black.  Next use the Scallop  Rectangle die third from the largest and cut white card stock.  Use the second from the largest Scallop  Rectangle die and cut out a blue rectangle
2.  Assemble the Gumball machine on the white rectangle using a fine tip glue (careful not to get the glue on the acetate.) 
3.  Card base is white card stock 3 1/4 x 6 1/4.  Red is 3 1/8 x 6 1/8 and the DP is 3 x 6.  Glue the red to the base and then add the DP
4.  Glue the blue rectangle flat to the card. Add the white rectangle using dimension tape.  Stamp the sentiment on blue and emboss in white then layer onto red card stock. Add dimension tape to the sentiment and adhere to the front as shown below.  Add a few stars and your card is complete

CottageCutz Productions


We have more inspiration on our YouTube Channel check it out HERE
Thanks so much for stopping by!  And I will see you next Thursday.

Blessings and Take Care


Tuesday, June 07, 2022

Happy Birthday Gnome Paper Piecing Card

Hello Scrapping Cottage friends!  
Melinda here with you on this Terrific Tuesdie!  Today I am sharing a FUN card featuring more dies from the New Sweet Treats Release! Last week I shared this cute little gnome piecing I created with some leftover pieces. This week I will show you what I used and share the cute little card he is on!
Here's a look at my completed card. I started with a horizontal top folding card base. I used some white cardstock for that. I then cut a piece of some colorfully cute diagonal striped patterned paper I had in my stash. I cut it to 4x5.25 for the mat. 

Here's the photo I shared last week of the little Gnome I made with some leftover pieces.

So here are the pieces I used to create this cute little fella. They are all pieces from various dies in this "SAHWEEET" release! 

So here's a closer look at the pieces I used for his arms (the top pieces). I cut off the bottom part and used that for his "hand". I also cut off that extra piece around the edge and it made a little lip at the bottom to look like a slight cuff.

Here are the pieces that I used for his "head". I added the side pieces to fill in the sides for the "hair". I did cut off the extra  once his beard was in place.

Here is what his head pieces look like. I loosely layered them onto each other to give you the idea.


Here is his body along with his two "shoes". I just cut the extra lip off the bottoms.


Here's another look at little Mr. Gnome. I mounted him onto a stitched rectangle scalloped mat with a yellow cardstock mat. I put some of those super cute cupcakes along side. I added some glaze to that tiny cherry, but it doesn't really show on the photo. I also added some stickles to the top cupcake and the centers of the flowers on the bottom cupcake.


Here's a closer look at the large cupcake and the Happy Birthday sentiment. I did add some foam tape underneath them all to give them just a little lift. I also added some cinnamon stickles to the brown swirls. It didn't show up too well in the photo but the swirls are nice and sparkly.

Here is the new sweet treats release.

Sweet Treats Release


The Dies I used to create this project:


The jar piece on the right is what I used for the gnomes arms


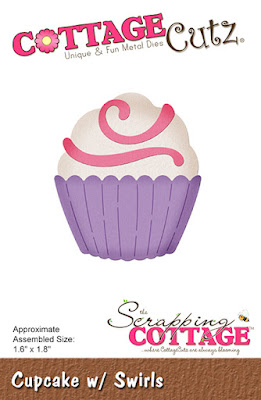
I used this cupcake and the top for the gnomes head and beard. I also used the top right "pink" piece for his mustache.

I used this cupcake top piece for his hat and the longer swirl piece for his "hair". I did also use this complete cupcake to decorate my card.

I used the sundae cups top ruffled piece (just above the heart) for the Gnome's hat brim.

I used the brown frosting on the cupcake on the top right for the gnomes hat top. I also used some of the cupcakes from this die to decorate my card.

Nested Scallop Rectangle Set


Make sure you head over to the CottageCutz YouTube channel and check out all of the amazing projects on there. Our video team is doing a wonderful job of filling the channel with all sorts of creative content! You don't want to miss it!

Well that about covers it for today! Until the next time, have a wonderfully craft-die day!
Melinda Beltran

Tuesday, May 31, 2022

2 Cupcakes Card and a little extra

Hello Scrapping Cottage friends!  
Melinda here with you on this Terrific Tuesdie! For those in the USA and who observe Memorial Day, I hope you had an wonderful holiday!  Today I am sharing a quick and simple card featuring more dies from the New Sweet Treats Release! Talk about sweet! This set is over the top adorable!  Here is what I created.

Here's a look at my completed card. I started with a horizontal top folding card base. I used some white cardstock for that. I then cut a piece of some colorfully cute patterned paper I had in my stash. I cut it to 4x5.25 for the mat. 

Next I went to work on my cupcakes. I cute them out of white cardstock and then colored them with  my markers. i then mounted them onto a yellow cardstock mat and then mounted those onto the Eyelet Stitched square mats.

I then added some of the adorable little gumballs, jelly beans and candies from the Candy & Gumballs die set. I then also Dressed up my cupcake tops with some stickles.  I used the stardust color so that it would play off the colors underneath it.

Here is a closeup of my other cupcake.

Here is the new sweet treats release.

Sweet Treats Release


The Dies I used to create this project:


Have you checked out the CottageCutz YouTube channel yet? 
It is filling up with beautiful projects and great how-tos!  
Head over and check out the latest video! 

So before I sign off, I just have to share one more thing....

I wanted to share this adorable little "gnome" I made. He is pieced together with all various pieces and parts form several of the dies from the new release. I think he is so stinkin' CUTE!!! You know how it is when you are working and you have parts and pieces strewn about your table and then....SHAZAM! Inspiration strikes!....lol!  Can you guess which pieces are which? Well you have a week to think about it. I will be putting this sweet little fella on a project and then sharing the pieces I used to err...well... "piece" him together...so be sure to come back.. :-)

Well that about covers it for today! Until the next time, have a wonderfully craft-die day!
Melinda Beltran