Showing posts with label Birthday Card. Show all posts

Tuesday, July 11, 2023

Folk Art Mixed Flowers Birthday Card

Happy Tuesday crafty friends,
I hope your day is going well and you are beating the heat wherever you're at. It has been sizzling here in Florida.

One of the best ways to beat the heat, is to stay inside and do a little crafting. I had the chance to work with some of the wonderful dies from Cottage Cutz's rescent Folk Art dies release. Here is what I created.
I created this birthday card for my future sister in law's 30th birthday. My card is a side folding A4 card. I used the pretty flower dies from the Folk Art Mixed Flowers Die Set available from their website:  CottageCutz.com

I started by cutting out the various flowers from the die. I cut them all out from White cardstock. I then proceeded to color them with my markers. Some I did leave white. I added some foam to the back of some of them so I could give them some lift.

I used some lavendar paper for a mat. Here you can see that I ran it through my die cut machine with an embossing folder. Towards the top you can see where I used the nested stitched circle doily die. I used one of the smaller pierced circle dies for a mat. I then added the Happy Birthday Shadow die for the top and main sentiment.

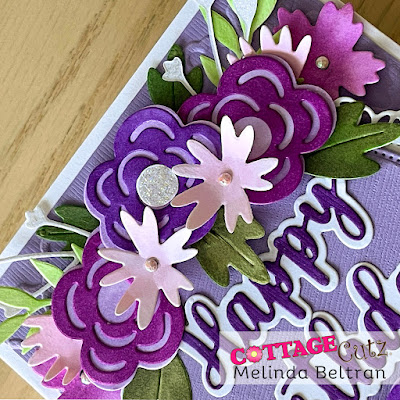
Here is a closeup of some of the flowers I assembled on the top. I added some stickles to some of the centers and the various flowers. I also used some diamond dots for the centers of some of the others.

Here's another photo and it also shows the happy birthday on top of the circle pierced mat on top of the doily die cut. You can see I used some foam tape to give it some lift. I also used a tiny diamond dot to dot the "i" in birthday.

Here is one last look at my finished card. I think it turned out very cute and I think she liked it. I used various shades of purple as that is her favorite color.


Happy Birthday w Shadow
Out of Stock


Don't forget to check out the Cottage Cutz You Tube channel to see all the wonderful project on there as well. It will really get your creative juices going!

Well that about covers it for today. Be sure to keep coming by each day to see what else the super creative designers are up to! Until the next time, have a wonderfully crafty day.

Wednesday, March 22, 2023

Happy Birthday!


Hello, my crafty friends.  It's Marla here today bringing you another CottageCutz YouTube video and GIVEAWAY.  I am featuring one of my favorite scene building techniques and a coloring tip to help add the illusion of dimension to your white die cuts.  

I will link all of the CottageCutz products that I used on this card below for easy shopping, but I hope you'll join me on our YouTube Channel

Until next time...... Marla


Wednesday, February 08, 2023

Easy Coloring with Distress Inks


Hello my crafty friends.  It's Marla back again with a new video over on the CottageCutz YouTube Channel.  The new "Flowers & More" release is live and packed with products to get you longing for spring.  My card today, features Flower 1, Flower 6 and Flower 7 dies from this release.  I just love a good flower die, don't you?

I have linked the products that I used on my card today.  If you would like an opportunity to enter to win the Flower 6 die, head over to the CottageCutz YouTube Channel to see how you can win.  Prize opportunity open to those in the U.S.A. only, due to shipping costs.


Until next time....Marla


Tuesday, January 03, 2023

Slimline Birthday Puppies Card

Happy Tuesday Cottage Cutz Friends!
Melinda here with you, and today I am sharing a fun and cheerful slimline birthday card. Here's a look at my finished project. I used the sweet little Christmas Puppies Dies from this year's Christmas release.
My card is pretty straightforward. It is a side folding slimline card. I started with a white card base. I cut a piece of paper to 8 x 9. I folded it in half at the 4" mark along the 8" length. I then cut a piece of red cardstock paper at 3.75 x 7.75. After I added that to my card base, I cut out the slimline circle windows base out. I then cut out a piece of the cute dotted patterned paper from doodlebug. I used some foam tape to give the slimline circle window base some lift. I then went to work cutting out the cute little puppies from some plain white cardstock. I then colored them with my markers.

Here's a closeup of the Happy title and the cute puppies in the first - top circle. The Happy title comes from the Fifties Phrase 1 die. I cut those pieces out in plain white and then used my markers to color the backgrounds.


Here is another closeup showing the cute puppy on the second window. I colored him with my markers and then put the paws along the rim.

In this final closeup, I have two more of the cute puppies. I colored them with my markers along with the Birthday sentiment. As for the hearts, I cut out the Whimsical Hearts Slimline die. You get a TON of hearts as part of the negative spaces. I love using them. I colored them with my same markers.

Dies I Used


Today's the last day for the fabulous New Year Sale! So head over and do some shopping and grab some terrific dies at a super price!


Well that about covers it for today! Until the next time, have a wonderfully craft-die day!
Melinda Beltran

Tuesday, June 21, 2022

Cupcake Slimline Birthday Card

Hello Scrapping Cottage friends!  
Melinda here with you on this Sweet Summer TuesDIE!  Today I am sharing another cheerful and fun birthday card. It features some more of the delightful cupcakes from the New Sweet Treats Release! Here is my slimline card.
I started by creating my base with some white cardstock. I then cut out a piece of yellow cardstock for the base mat. I used the cute scallop stitched slimline die for the next layer. To that I added a mat of some sweet yellow gingham patterned paper. Then the fun really began as I cut out my cupcakes and started coloring them in.

Here is the sweet little puppy dog die I used. I colored her in with some light brown marker. I gave her a pink nose and then added a couple of bows to her ears. The bows are part of her pieces in her die.

I nestled my sweet puppy by a couple of cupcakes. I decorated them with some stickles for a little extra pizazz. kind of hard to tell in the photo but there is some extra sparkle.

I added the happy birthday shadow sentiment and one more luscious cupcake. I then scattered some dew drops for one final decorative touch. Oh I did use some stickles to "glue" them to the base. This actually gives them a little sparkle underneath. The sparkle kind of shines through them when the light hits them. Subtle but a nice extra touch.


Here is the new sweet treats release.

Sweet Treats Release


The Dies I used to create this project:


Make sure you head over to the CottageCutz YouTube channel and check out all of the amazing projects on there. Our video team is doing a wonderful job of filling the channel with all sorts of creative content! You don't want to miss it!

Well that about covers it for today! Until the next time, have a wonderfully craft-die day!
Melinda Beltran


Thursday, April 28, 2022

Happy Birthday Tasmanian Devil Card

Happy Thursday Scrapping Cottage friends!  
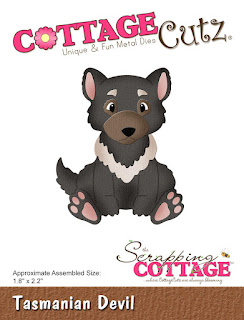
Melinda here with you on this Thankful Thursday! Today I am sharing a project featuring that sweet little Tasmanian Devil die from the Fantastic new Australian Friends Die Release!!! Here is what I created.

A fun happy birthday card with that sweet Tasmanian Devil.


I started by cutting out the little Tasmanian out of lain white cardstock. I love coloring in the pieces with my markers and colored pencils.

I added the cute cupcake from the cute Birthday Cupcake With Roses.

I also added a cute little Party Hat from the Party Hats die cut.


I also used the fun Happy Birthday W/Shadow die set. 

I layered all of those fun dies onto the stitched scallop rectangle. I then put that onto a standard A4 top folding white cardstock base. I used some fun patterned paper that matched the colors well! This is perfect because I need to build up my birthday card stash.

Here is the fantastic new collection 
FROM DOWN UNDER!
Hurry for a limited time...
New CottageCutz 


PLUS FOR A LIMITED TIME....


The Dies I used to create this project:


I used the Scallop Stitched Rectangle set, however that is currently sold out. This is a great alternative through.


Have you checked out the CottageCutz YouTube channel yet? 
It is filling up with beautiful projects and great how-tos!  
Head over and check out the latest video! 

Well that about covers it for today! Until the next time, have a wonderfully crafty die day!
Melinda Beltran