Showing posts with label Berry Phrases. Show all posts

Tuesday, August 29, 2023

Lady bug and gnome piecing die cut cards.

Happy Tuesday crafty friends,
I hope your day is going well. If you are like me, and live in Central Florida, you are getting prepared for the impending storm. I am hoping and praying all goes well and that it passes without too much trouble. In the meantime, I am sharing a fun card I created with some fun Cottage Cutz dies along with a cute gnome piecing. Take a look.


Here is my Berry Sweet card. 

Here is a shot of the pieces. I started with all of my pieces as white cardstock. I did my usual and colored my pieces in. I so enjoy doing that. I made the card in a pretty straightforward manor. I assembled the cupcake and the cute little ladybug and the surrounding pieces. I decorated the card with some patterned paper I created and then aded all of that onto the wacky stitched square die. As I was creating this card I had inspiration strike. With the pieces, I ended up creating the below little Gnope paper piecing.

This cutie was made by utilizing the pieces of the various dies.


I used the wing piece to create the feet and arms of the little gnome.


Here is how I created the mustache. I used the cute little daisy flower by cutting it and piecing two of the pieces together. His body is the cupcake wrapper and sponge. His nose is the center of the daisy flower. His hat is the whipped cream or frosting topping piece. And of course the berries, flowers and hearts are die cuts as they are.


Here is one last look at both of the projects.
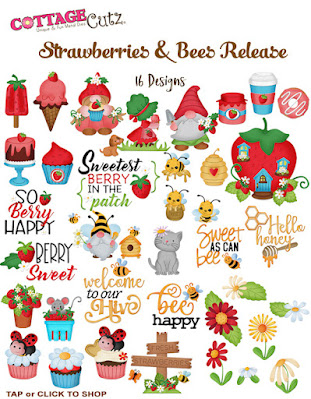


 Lady Bug Cupcake


Berry Phrases


Nested Wacky Stitched Set

Make sure you come back by each day to see what all the other super talented designers create! Don't forget to also head over to the Cottage Cutz YouTube Channel for more super creative inspiration!


Well that about covers it for this project. I hope you are inspired to think and look at your die cuts in different ways.  Until the next time, have a wonderfully crafty day!

Monday, February 06, 2023

So BLOOMIN' Sweet

Hello sweet friends!

Kris here with a Springy card for someone 'So Bloomin' Sweet'!

My card today uses 3 brand new dies from the "Flowers & More" Release!  For a limited time, the whole bundle is 50% OFF!!  Or, if you want to choose individual dies, they are 30% off!  ☺ 

Center Step Fold Card
When folded, this card will be a 5-1/2" square


How to Make It

Photo reference for cutting/scoring your base.  
BLACK lines = CUT  \  RED dashes = SCORING
You can click on the pic to see it larger.


• Cut base at 5-1/2 x 11".  

• Put cardstock in paper trimmer VERTICALLY and line the right side up on the 1" line.  Position the blade at 1" and cut down to 6-1/2".

• We need the same cut on the parallel edge.  To do so, you can flip it over (side to side, not bottom to top) and repeat that step.  

• Turn card horizontally and score from the outside edge to the cut lines at 1", 2" and 6-1/2"

• Score between the 2 cut lines at 5-1/2"

The 2" score lines are both valley folds.  All other score lines are mountain folds ☺


• Die cut the largest die from the Nested Wacky Stitched Rectangles set from white cardstock.   If you don't have these or similar, you can cut a rectangle that is 3-1/2" x 4-1/2" - I then sponged it with clouds.

•  Die cut 4 grass borders using the Grass Slimline set from lime green cardstock.  Trim 2 of them to 3-1/2" wide, and 2 of them to 5-1/2" wide.  I sponged Mowed Lawn Distress Oxide ink to 3 of them, leaving one of the 5-1/2" wide ones a lighter green.

• Die cut Bunny with Butterfly |  Little Flowers |  Fence w/ Flower Garland | Arch Sun - then  color and assemble them. 


Glue the sun to the top of the cloud layer, and one of the grassy layers to the lower part.

• Add foam strips to the back of the other shorter grassy layers and pop it to the bottom of the cloud layer, overlapping the glued grass.

• Add foam strips to the back of the fence and attach it between the 2 grassy layers.

• Pop the butterfly up with a foam dot.

•  Glue that whole layer to the middle section of  card base, aligning top edges.

• Add foam strips to the bottom 1" x 5-1/2" section and attach the lightest widest grassy layer.

• Add foam strips to the bottom only of the shorter grassy section and attach to the front bottom of card. You will want to leave the top part non-glued so you can tuck flowers behind it.  

•  Glue the lower half of the bunny between the 2 bottom layers of grass and the little flowers behind each layer of grass.

-- I added some Wink of Stella to the butterfly, bunny's bouquet, and the garland flowers for some shine!


• Cut 2 patterned paper strips to 7/8" x 4-1/4" and tape to each side panel.

• Die cut sentiments and glue to bottom front of card.   -  The "Bloomin" is pieced together from the Garden Phrases.  The "SO" is from Berry Phrases.  And "Sweet" is from Sweet w/ Shadow die.


Hope your week is BLOOMIN' with creativity! 
Kristine


Products I used:


Tuesday, January 10, 2023

Hey Sweet Heart Folded Flap Card

Happy Tuesday Cottage Cutz Friends!
Melinda here with you, and today I am sharing a fun and colorful Valentine's day card. Here's a look at my finished project. I used the sweet Mrs. Gingerbread Die as the focal image from this year's Christmas release.

Here is a look at my finished card. I started with a 5.5 x 5.5 white mat. I then used a pink cardstock mat and some yellow mini hearts patterned pattern.


Here's a closeup of the sweet little Mrs. Gingerbread die. I used some Doodlebug patterned paper for her hat and dress. I mounted her onto the 3rd pierced circle die from the set. I then used a smaller circle punch for the mat. I added a couple of hearts from my stash.

I used a scallop punch and some circles along with some hearts for the last part of my sentiment.

Here I used the Hey from the Berry Phrases Sentiment along with the Sweet as a Christmas Cookie die.


Here is the center slightly open. I used a small Velcro circle to help keep the flaps closed.

Here is a closeup of the inside. I used some of the heart stitched dies along with the I Love You 


How to do the center of the card
I used the largest Pierced Circle from the set and cut it out 4 times. I also cut a separate piece of white cardstock at 3.75 inches squared. I folded the circles in half.


Next I glued half of the circles to each side of the square. This is what it looks like in the photo above.

This is what the back of the card looks like once the 4 circles are attached. This photo is with the circles open.

This is what it looks like when the circle are closed.


I then used the next size circle down and used the pink cardstock for mats.

I then cut the circles in half and attached half on the front flaps and on the inside flaps. If you decide to put the mats on, make sure you leave a little room so they will close. I ultimately decided not to use the pink mats for the inside.

Dies I Used

Mrs. Gingerbread Gnome


I Love You


Berry Phrases


Sweet As A Christmas Cookie


Pierced Circle Set


Stitched Heart Set


Well that about covers it for today! Until the next time, have a wonderfully craft-die day!
Melinda Beltran

Tuesday, August 02, 2022

Strawberry Box and Card

Happy TuesDIE Cottage Cutz Friends!
Melinda here with you on on another sweet TuesDIE. Can you believe it is already August? Whew, time is just flying!!!! Today I am sharing a super cute card and little treat box set I created, featuring dies from the new Strawberries and Bees release

 I used the Strawberry Cottage to create the fun treat box. For the Card I used the Berry Phrases Die set. For the card I also used the Circle Pierced Nesting Die set.

My finished card size is a standard top folding A4 size. The base is white cardstock and then I added a piece of red cardstock. To that, I added a mat of some patterned digital paper I created. I proceeded to cut out the pierced circle in the largest die in white cardstock and the next size down in green cardstock.

I then colored all my strawberries and leaves and stems. I also cut out all the phrases in white cardstock. I then assembled the words and berries onto the green mat.

To Make My Little Box

I started by cutting out a piece of white cardstock to 5.25 x 5.25. I scored it at 1.75 on all four sides. After scoring, I cut out the four corners leaving just enough for glue tabs to assemble the box. See the photo above.

Next I cut out the strawberry cottage two times in plain white cardstock. I lined up the bottom of one and used my ruler to find where up the strawberry the width was 1.25". Once I found that, I cut off the bottom. I did that for two of them. I then went ahead and colored the strawberries with my red marker.

I colored the leaves and stems of the strawberries and adhered them to opposite sides of the box. I also cut out two squares of red cardstock and then the mini strawberry patterned digital paper I created. I cut them out at 1 5/8" and 1 3/8". I adhered them to the sides of the box.

I then cut a strip of the patterned diagonal plaid digital paper. It was approximately .75 x 5.25

I went ahead and assembled the box.

Here you can see I added the strip for a handle. I also added some plaid paper mats to the inside of the box. It finished off the inside and it also helped keep the little handle securely attached to the box. I sandwiched it between the box and the extra mat.

Here's a closer look at the sweet little box. I added some of the adorable flowers, berries and foliage from the die to each side. I also lucked out and found that old-fashioned strawberry candies. I used those for the box.

Here is one last look at my project.


Dies I Used


Be sure to check it out and all the amazing creations from the design team!


Also, don't forget to head over to the CottageCutz YouTube channel and check out all of the amazing projects on there. Our video team is doing a wonderful job of filling the channel with all sorts of creative content! You don't want to miss it!


Well that about covers it for today! Until the next time, have a wonderfully craft-die day!
Melinda Beltran