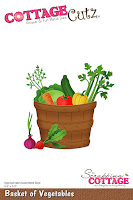
Showing posts with label Basket of Vegetables. Show all posts

Thursday, August 24, 2023

Fall Color

Hello Friend

I am making a few more fall cards.  I just love working with the color palette and it is my favorite time of year! I am so ready for the crisp air, football and beautiful colors!

Design steps:

1.  Use a brown A2 card base, 5 3/8 x 4 1/8 piece of cooper card stock, 5 1/4 x 4 piece of green cards stock, 5 1/8 x 3 7/8 piece of checked DP and a piece of cooper cut with the Wide Piereced Rectangle Frame die.  Glue the Cooper to the brown base, next comes the green and then the DP
2.  Use the Stitched Leaves die and cut out the following card stock colors: rust, plum, mustard, green, and kraft. Cut out the basket in dark brown using the Basket of Vegetables die.  Ink the pieces with complimentary colors
3.  Put a dot of glue in the center of the basket to hold in place then add the leaves

4.  Add the frame and then tuck in a few more leaves and acorns to the bottom of the basket.  You can now glue the basket edges down

5.  Layer your sentiment on green and add a twine ribbon

6.  I had a few scraps left over so I added them to the inside of the card


We have more inspiration on our YouTube Channel check it out HERE

Thanks so much for stopping by!  And I will see you next Thursday.

Blessings and Take Care


Tuesday, November 20, 2018

Autumn Cards

Hi, Janja is here.
For today's post, I prepared two autumn cards.


Supplies:
- kraft card base: 5.3 x 5.3 " (13,5 x 13,5 cm), folded
- white card base: 4.25 x 5.35 " (10,7 x 13,9 cm), folded
- patterned paper: 5 x 5 " (12,7 x 12,7 cm)
- beige card: 4 x 5.2" (10 x 13,2 cm)
- color cards
- colored pads
- embossing folder: brick
- fun foam
- sequins
- glue, double-sided adhesive tape, self-adhesive foam pads

For the first card, cut out a basket and vegetables from color cards. Use colored pads for more depth along the edges.


Cut out the sentiment and use only the lower part.


Use the card in a beige color and an embossing folder for the background. The bottom part of the background is not embossed.


Complete the card.


Cut out and assemble a fox and a hedgehog for another card.


Prepare and combine all the elements we need for a shaker card: card base, transparent foil, fun foam, frame and two pieces of patterned paper.


Add some sequins into the opening and complete the card.


I wish you a happy Thanksgiving day.


Sunday, November 11, 2018

A Harvest of Blessings

Hi!

This is Anja again. I have a Autumn cad for you today. Autumn is my favourite season for inspiration for coloring. I really love all the colors  around us in Autumn. And this last Autumn release was one of my favourite. So many beautiful dies to use and to craft with. And today I used two more for this card.


For this project I used:
- Cottage Cutz dies (Pumpkins & Vines, Basket of Vegetables),
- Distress Inks (Spiced Marmalade, Mustard Seed, Wild Honey, Crushed Olive, Barn Door, Vintage Photo, Forest Moss, Twisted Citron, Seedless Preserves, Mowed Lawn, Peeled Paint, Aged Mahogany, Walnut Stain),
- white card stock for die cuts and background  (14,1x14,1 cm),
- craft paper for background (14,5x14,5 cm),
- white card base (15x15 cm),
- sentiment stamp,
- Versafine Onyx black ink,
- acrylic block,
- paper glue.

First I colored the pumpkins.


Then I colored the vegetables. I used Distress Inks.


Then I made the background.


I stamped the sentiment on top.


Then I cut another piece of paper for the background to add a bit of dimension.


When I had everything cut and colored I glued and arranged everything together and adhere it to the card base.

And this is my finished card.


Hope you have a nice Sunday. I'm going on a short trip to have some fun after a very busy working week.

Enjoy and come back again next week.

Anja Z.


Cottage Cutz dies I used:


Saturday, October 06, 2018

Harvest Vegetables

Hello Scrapping Cottage friends! Thanks for taking the time to stop and visit with us today. It's Mary Marsh here bringing you the Saturday edition of the Blog. 

My card today is a sneak peek from the  soon to be released Autumn 2018 dies. I am featuring the Basket of Vegetables + Fall Phrases dies. As soon as I saw this die, it reminded me of our own vegetable garden that has most of these same veggies growing. We have had a big harvest this year.

Also, over in the online store we have the Halloween and Christmas Part 3 dies that are currently on a 25% off sale. All new designs and a really cute huskie die that is an online exclusive.

So let's get started with some details on how I created my card;

Step 1: I started off my card this week with the layout. I used the Splitcoaststampers Sketch #717 for my card. I thought the layout would show off this basket of vegetables die well.
Step 2: I wanted to use designer paper that had more of a fall theme to it. I had this sheet in my papers and I paired it with daffodil and a moss green cardstock. I also added another layer to my card than was called for in the sketch.

Daffodil card base: 4 1/4" x 5 1/2"
Mossy green layer: 4 1/8" x 5 3/8"
Designer paper layer: 3 7/8" x 5 1/4"
Step 3: I cut my basket and all the vegetables. I just used the colors that are on the packaging. They are the colors that are true to the actual vegetables.
I layered this on a white panel (element 2 of the sketch). I found the panel in my stash that was already embossed and sponged. The fence look was perfect as a background for my image. I changed the color of element 3 of the sketch. I decided to use the moss green cardstock and then orange bakers twine.
Added the vegetable basket image to the background. I used dimensional adhesive to lift it off the panel slightly. I die cut the Autumn phrase in orange cardstock and added it to this panel.
Step 4: Finished the assembly of the card. To cover the angled panel (element #4) of the sketch, I used the fig and radish.
Well that's it for me for this week. I hope you have enjoyed the sneak peek of some new dies. they will be in the online store shortly. See you next Saturday!

Dies I used to create card:
http://www.scrappingcottage.com/cottagecutzbasketofvegetables.aspx

http://www.scrappingcottage.com/cottagecutzfallphrases.aspx