Happy Monday CottageCutz friends!
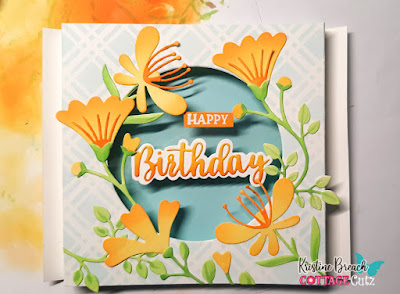
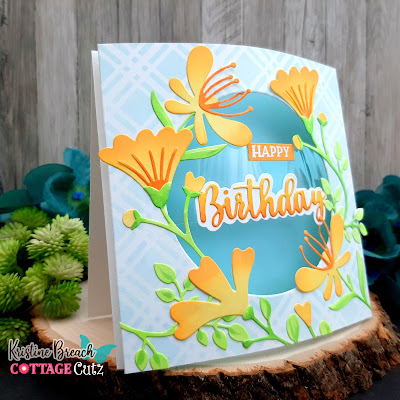
Kris here sharing with you today. I have a Floating Sentiment Shadowbox type of card. I've used Flower 1, Flower 6, and Flower 7 from the newest Flowers & More Release.
Design Steps:
1. I cut a white card base at 5" x 10" and scored at 5 inches.
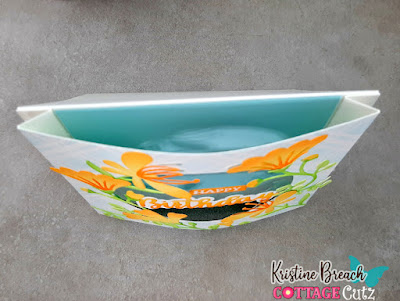
2. I cut another piece of white cardstock at 5" x 7" and scored along the 7" side at 1/2" and 1" on both ends. Accordion folded them and burnished.
3. I stenciled a background with the Plaid stencil from the Daisy Stencil set (La-La Land Crafts) with Tumbled Glass Distress Oxide ink.
4. I die cut a circle from the center of that piece using the 2nd largest Pierced Circle set.
5. Next, I die cut my flowers from white cardstock and added Distress Oxide ink in Squeezed Lemonade, Wild Honey, Carved Pumpkin, Twisted Citron, and then I added some shading to the leaves with a Copic marker.
6. I then placed them around the opening and glued them down.
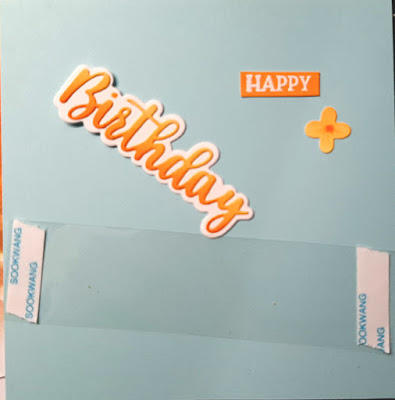
8. I cut a strip of window sheet about 4-3/4' x 1-1/2" and added Scor Tape to each end.
9. I then taped the window sheet to the back of my flower layer, in the center.
10. I attached my sentiment pieces to the front of the window sheet. I ended up cutting off one of the limbs from the stem on the left so it didn't cover up my sentiment too much.
11. I then tried out different colors of cardstock as my backdrop for my flowers and decided on this light teal color. I cut it to 3-7/8" x 4-7/8" and set it aside. *This is not attached to the front floral panel.
12. I added Scor Tape to the 1/2" scored flaps of the flower panel piece and lined them up with the side edges of my card front. I love how it causes the front panel to dome out!
13. I then added glue to the backside of my blue panel and inserted it between my front floral panel and the card front so that the 4-7/8" is vertical.
Done!
PRODUCT I USED:


.jpg)


This is a creative and beautifully designed card Kristine. I love the funfold ideas you bring us. I have to try this technique
ReplyDelete