Hello CottageCutz friends! Thanks for taking the time to stop and visit with us today. It's Mary Marsh here bringing you the Sunday edition of the Blog.
It's new release time!!! We have new dies in the online store. It's our Sweet Treats release with 13 new designs. They are so perfect for any card making occasion you may have. The individual dies are currently 30% off.
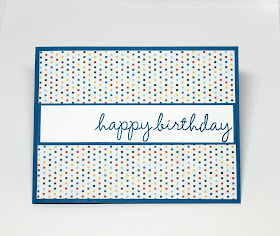
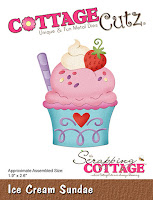
Today for your viewing pleasure I have created a birthday fun fold card. This fold is called a W-fold. I am using the new Build An Ice Cream Cone and the Ice Cream Sundae dies for my card. So let's get started with some details of how I made this card.
Design Steps:
Since I knew the fun fold I was going to use, I selected my card base and designer papers as my first step. I looked for a fun design and decided on this one. My fold is on the left side of my card.
Blue card base: 4 1/4" x 11" - scored at 5 1/4"
Designer paper Layer (outside) - 4" x 5 1/4"
I decided to stamp my sentiment on the card front at this point. I cut white cardstock at 1" x 1 5/8" and a blue layer at 1 1/8" x 5 1/4" and with the help of my MISTI, I stamped my "happy birthday" sentiment in blue ink to match the cardstock. Attached to card front with double sided tape.
Now onto the card inside. I added the same designer paper to the left side of the panel only. 4" x 5 1/4" for both panels. For the right side I decided to emboss a white panel for added texture. Added to the card base with double sided tape.
Now for the card bridge.
Cardstock is 1 3/4″ x 11″
score at 2 3/4″ x 5 1/2″, 8 1/4″.
Fold at the 5 1/2" score line and then bring the 2 end panels over to create a rectangle.
Now for the inside decorations. I cut an ice cream cone and an ice cream sundae. I layered these on coral cardstock measuring 2" x 2 3/4" and the white image panel is 1 3/4" x 2 1/2". Used double sided tape to attach. Tape is on the center of the panel only. The camera angle on this photo makes it appear that the centers don't line up. They do or card won't close properly.
To complete my card I added an ice cream cone to the card front.
I cut another piece of white cardstock 5 1/4" x 4" and attached to back of card for a personal note and to sign my name. I could have signed the yum - delicious panel but decided to leave that as is.
Well, that's it for me for this post. See you next Saturday.
Reminder: Our YouTube Channel has a new video from Linh Van. There is a giveaway for being a subscriber, liking the video and leaving a comment. Click here.


Adorable pop up card!
ReplyDeleteGreat card! I have been wanting to try one of these! I will have to follow your great instructions!
ReplyDelete