Hello Friends
I am enjoying the versatility of the new Spring Release. I have made two Valentines using them and today I am making a fun fancy fold belly band Birthday card.
Design Steps:
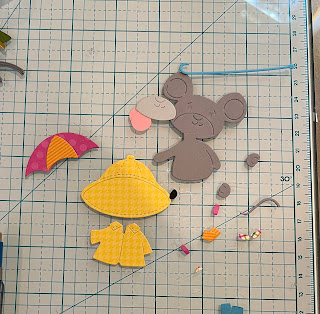
1. Start with the Spring Showers Mouse die and cut out the pieces in: grey, pink DP, yellow DP, orange DP, pink, black, and turquoise2. Assembly the mouse using a fine tip, clear drying glue. Color in the eyes with a fine tip black maker and add the white with a white ink gel pen. Set the little mouse aside
3. For the base start with a white piece of card stock cut 5 1/2 x 11. Score at 1 1/4, 5 1/2 and 9 1/4.Fold as shown above first score is a valley fold, second score is a valley fold and the last is a mountain fold
4. When you close it up it should look like the above picture
5. To cover the front cut 2 pink polka dot papers 1 x 5 1/4, cut 1 orange stripe paper 1 1/2 x 5 1/4 and last cut the rain cloud paper 5 1/4 x 3 1/2
6. Glue the pink to the first flap and then open the first flap and glue the second pink strip under the first pink strip, next flap glue down the orange strip and last open the orange flap and glue down the rainy paper
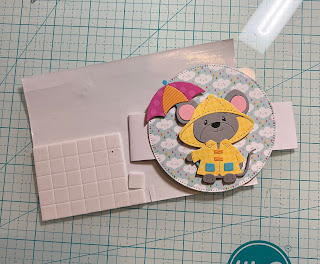
7. To make the belly band cut a white strip 1 x 11 inches. Wrap the belly band around the card and staple it together. Make sure you don't get it to tight. Use the second from the largest Pierced Circle die to cut out the rainy DP then glue to the center of the belly band
9. For the inside I cut a piece of turquoise card stock 4 x 5 1/4 added some left over strips to the bottom and stamped Happy Birthday. To complete the front stamp your sentiment and layer onto pink and pop to the side front of the card4. When you close it up it should look like the above picture
5. To cover the front cut 2 pink polka dot papers 1 x 5 1/4, cut 1 orange stripe paper 1 1/2 x 5 1/4 and last cut the rain cloud paper 5 1/4 x 3 1/2
6. Glue the pink to the first flap and then open the first flap and glue the second pink strip under the first pink strip, next flap glue down the orange strip and last open the orange flap and glue down the rainy paper
7. To make the belly band cut a white strip 1 x 11 inches. Wrap the belly band around the card and staple it together. Make sure you don't get it to tight. Use the second from the largest Pierced Circle die to cut out the rainy DP then glue to the center of the belly band
8. Take your little mouse and pop him to the rainy DP on the belly band
CottageCutz Products
Don't forget to check out the new Spring Release. It is perfect for Valentines, Spring Birthdays and of course Easter!
We have more inspiration on our YouTube Channel check it out HERE
Thanks so much for stopping by! And I will see you next Thursday.
Blessings and Take Care
Pam


This little rainy-day mouse is adorable!!!
ReplyDeleteLove the Mouse! The card is adorable. Is the verse on the front a rubber stamp?
ReplyDeleteWhata delightful card Pam, this has brought a smile to my face today
ReplyDeleteSo cute Pam - I like the fun fold
ReplyDelete