Hello CottageCutz friends! Thanks for taking the time to stop and visit with us today. It's Mary Marsh here bringing you the Saturday edition of the Blog.
IT'S NEW RELEASE TIME! The Spring Release with 20 new designs is in the online store. The individual dies are currently at 30% off. There is a nice combination of both religious and whimsical designs. So perfect for all card makers out there.
And the dies don't have to be used strictly for Spring or Easter. The team has done Valentine, Birthday and Thinking of You cards with these new dies. Take a look back on the Blog for lots of ideas.
And because it's President's Day weekend, we have a sale going on with up to 60% off selected dies. So, check out the store early for best selections.
Design Steps:
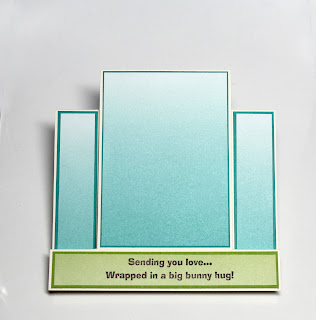
I decided to make a fun fold card for today's post. This fold is called a center step. I bought these precut cardstock panels at my local stamp store. I felt it was a bonus when I spotted them. But I will give a link that shows how to cut this particular fold. Here is a link to a Splitcoaststampers tutorial- there are photos as well as a YouTube video.
I cut blue and green ombre designer paper for the center and side panels and layered with the coordinating cardstock. The center panel is 4 3/8" x 3 1/4" and the side panels are 1" x 4 3/8".
I attached the panels to the card base with double sided tape.
I cut my bunny image with various colors of cardstock. I used colors that would coordinate with the designer paper panels and also project a spring vibe.
Next, I stamped my sentiment in a grape ink. It was a bit tricky because the panel was already attached and I didn't want to remove it. My stamp is a red rubber wood base, so I had to use my stamp-a-ma-jig for alignment. When I use this method, I only get one shot at inking because I can never line it up straight again. It didn't stamp quite as dark as I wanted but I think it's ok.
Reminder: Our YouTube channel is active again. Check out the latest video from Marla, and we are having a giveaway for subscribing, liking the video and giving it a thumbs up. Click here.
I attached my bunny image with glue dots and double-sided tape.
I decided to add a hugs phrase on the image panel. I used the Hugs w/Shadow die. Then for the side panels I added some tulips. I cut them from the Spring Kitten w/Envelope die in a light purple cardstock. I finished off my card by scattering a few butterflies and adding a few hearts on the sentiment panel. And that's my card for this week. I hope I have given you a way to use this ever so cute little bunny. See you next Saturday!!


Such a sweet center step card love it!
ReplyDeleteI like these step cards and never think to make them. Your card is inspiring! That little bunny is adorable!
ReplyDelete