Hello CottageCutz friends! Thanks for taking the time to stop and visit with us today. It's Mary Marsh here bringing you the Saturday edition of the Blog.
IT'S NEW RELEASE TIME! The new Christmas dies are in the online store with 40 new designs from Christmas Part 1 and 19 new designs from Christmas Part 2.
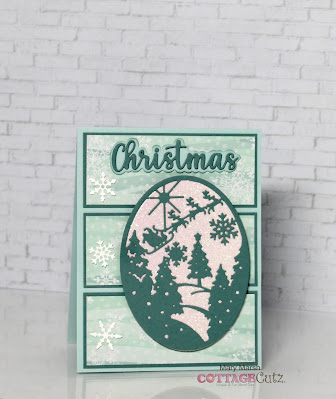
Today for your viewing pleasure, I have a design featuring The Magic of Christmas die. It made for such a cute and whimsical scene as so many of our dies do. Here are two other cards I made using our scene building dies. So let's get started on some details of how I created my card.
Design Steps:
Blue Card Base: 4 1/4" x 5 1/2"
Designer Paper Layer: 3 7/8" x 3 11/16"
Layer under DSP: 4" x 3 11/16"
Next, I cut the image from blue green (lost lagoon) cardstock. Then I used the 2nd largest die from the Oval die set to cut a snowy background from white glitter paper.
I cut the Christmas sentiment using the Merry Christmas w/Shadow die. The shadow is the light blue (card base) and the Christmas phrase is the lost lagoon shade.
Now that all my card elements are prepared, I am ready to start card assembly. I attached the designer paper layers to the card base using double sided tape.
I attached the image panel to the white glitter panel with Art glitter glue. Then I attached to the card base with dimensional adhesive. To finish off my card I attached the Christmas phrase with glue dots and added a few snowflakes for element 4 of the sketch.
Well that's it for me for this week. I hope I have given you a fresh idea for a way to use this new die. We are having a Black Friday release and the DT will begin showing samples starting tomorrow. See you next Saturday!
Reminder: The CottageCutz You Tube Channel is up and running again. We have new videos every Wednesday. Plus there is a giveaway on the channel. Details on the channel. Check it out here.

dies I used to create card:


So pretty love the sparkle and color
ReplyDeleteSimple, elegant, classy!
ReplyDelete