Hello! This is Sukie and with only a month away from Halloween I have a sweet little kitty card to share! I'm showcasing one of the fun dies from the Cottage Cutz Halloween die release. This is just one of the 3 new releases in the store.
Pages
Wednesday, September 30, 2020
Happy Meow-oween!
Tuesday, September 29, 2020
We all Have Magic in Us
Hi Cottage Cutz fans. It's Jeanne today with another Halloween card using the adorable Black Cat w/ Jack-o-Lantern die. However, in this card you won't find a Jack-o-Lantern!
I love this cat (she reminds me of a black cat we had years ago) but I wanted her peeking out from behind the books in the Spell Books and Potions die rather than a pumpkin.For the card I cut the books in white cardstock several times and then stacked them to see how many I needed to approximate the height of the pumpkin in the other die. Although I had several of the "Vampire" books I only used one and the remainder are "Spells" books. I thought a witch would probably have multiple books of spells but probably only one on vampires!
After cutting the pieces, I used Distress Oxide inks to color the pieces and add some antiquing. I love these inks for that purpose. They blend so easily. The cat is cut from black cardstock to get her nice and dark. Rather than the large eyes shown in the packaging, I used just the pupils colored in yellow for her eyes. I wanted to personalize her to look more like a "classic" black cat.
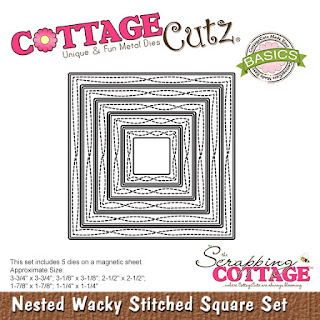
For the layout I used the largest of the Nested Wacky Stitched Square dies with a Halloween newspaper patterned paper and I antiqued the edges.
My sentiment is heat embossed in sliver on a 1 7/8 inch wide banner. The point is hand cut and I mounted it on 2 inch wide black glitter paper. It was easy to then hand trim the glitter paper to finish outlining the banner.
My final step was to add lots of sequins for sparkle!
Dies used:
Sunday, September 27, 2020
Upside Down Christmas
Hi!
It's Anja here. I have a first Christmas card I made this season for today's blog post. The scene I made is a bit unusual, as is this whole 2020.
For this card I used:
- Cottage Cutz dies (Upside Down Santa, Snowman in Snow, Owl),
- Distress Inks,
- white cad base (10x21 cm),
- white card stock for die cuts,
- black card stock for background (9,5x20,5 cm),
- alcohol markers,
- white pigment ink,
- white acrylic paint,
- black pen,
- white pen,
- scissors,
- paper trimmer,
- heat gun,
- brush,
- paper glue.
First I cut and colored the Santa. I used alcohol markers to color the lights.
Next I cut and colored the snowman.
And last I cut and colored the branch to hold Santa.
Next I started on the background. I used black cardstock and lightened it a bit with white pigment ink. After that I spritzed the paper with white acrylic paint. I dried the paper with the heat gun.
Next I trimmed a piece of white card stock for the snowy ground.
And then I put all the pieces together and my card was done.
Have a nice Sunday and see you again next week.
Anja Z.
Cottage Cutz dies I used:
Saturday, September 26, 2020
Kittie & Jack-o-Lantern
 |
| terracotta tile, soft suede, flirty flamingo |

I finished off my card by scattering a few terracotta tile enamel dots and to the sentiment panel a couple of leaves.
Friday, September 25, 2020
It's a Halloween Party!
Happy Friday Cottage Cutz fans! It's Jeanne today and I have a fun card using dies from the new Halloween release. Someone in this camper is having a party and I think they left their cauldron outside!
I started by die cutting the camper, cauldron, ghosts and bats from the Spooky Camper and the Spooky Witch House dies. These two are perfectly sized to coordinate with each other. I used various colors of cardstock and shaded only the fire by using a sponge and orange ink.
I cut the trees in black from a Christmas die (think outside the box when using your dies!) The Merry Christmas w/Deer Family die.
For the background I used a pre-printed card from a card kit that I received this summer. The cards are all night skies - perfect for Halloween cards!
The ground is a piece a black cardstock cut to 2 1/8 x 4 1/4 inches.
I glued the ground leaving the top edge open so I could slip in the trees. Then I glued this down and added the sentiment from Halloween Phrase and More.
I adhered the camper and added the cauldron using foam dots to pop it up from the card.
I think my favorite part of this card is the kitty in the door window. Although she's from the Spooky Witch House die she fits just perfect in the camper window!
Dies used:
Be sure to visit the online store where the Halloween release is on sale for a limited time!
Thanks for visiting today! I hope you have a fun and creative weekend!


