It is Pam sharing with you on the blog today!
I am using several different dies today to create this little garden card. Plus some fun designer paper and ribbon. Hope you can play along with me today!
Design Steps:
2. Color the pieces using Tim Holtz inks and a sponge applicator. Assemble the pieces using a fine tip glue
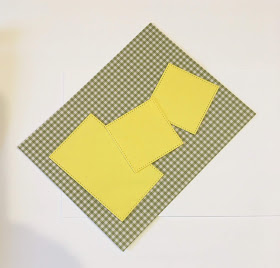
3. Use a white A2 card base, Yellow card stock cut to 4 x 5 1/4 and Green checked DP cute 3 3/4 x 5. Cut 2 yellow squares and 1 rectangle square using the Pierced Square and Pierced Rectangle dies. Layer the squares and rectangle onto white card stock
4. Glue the checked DP to the yellow card stock layer. Glue the yellow retangle and squares to their white layer then arrange onto the DP
5. Add the ribbon to the checked DP as shown. Put pop dots onto the back of the squares and retangle then adhere to the check DP
CottageCutz Products
Thanks so much for stopping by! I hope you are enjoying this release as much as I am there are a ton of different uses for these dies!
Blessings and see you next Thursday!
Pam


Such a sweet thinking of you card- I have so many gardener friends who would love this
ReplyDeleteWonderful card! I love the layout; it highlights the dies nicely and the gingham makes it very fresh.
ReplyDeleteVery nice card! I love the design you created with all of the fun dies! It looks amazing!
ReplyDeleteThis is very beautiful!
ReplyDelete