Hello Scrapping Cottage friends! Thanks for taking the time to stop and visit with us today. It's Mary Marsh here bringing you the Saturday edition of the Blog.
We have a new release of dies over at the online store. Our Autumn 2018 dies are here with 10 new designs. They are currently 25% off for a limited time. So, if you still need to make some Thanksgiving cards head over to the store and pick up some of these amazing dies. And, if you need some card ideas for the dies look back on the blog because the DT has posted some beautiful cards for inspiration.
My card this week is featuring the Love, Peace & Joy die. I was looking to create a Christmas card that would be easy to make multiples of. I accomplished that and am going to make at least 10 more of these for my own Christmas cards. I like to make a lot of different designs with my Christmas cards. Let's get started with some details on How I created this card.
Step 1: I started my card this week using the sketch #722 on Splitcoaststampers. I thought it was a great layout for the idea I had in mind to showcase these dies.
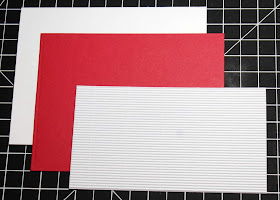
I used white corrugated paper for panels 3 & 4. What I did though was cut a single piece of cardstock and then used ribbon to divide the panels.
white card base: 5 1/2" x 4 1/4"
red layering panel: 5 3/8" x 4 1/8"
white corrugated image panel: 3" x 5 3/8"
Step 2: I cut the Peace, Love & Joy phrases in red cardstock and also the corresponding images for each phrase.
Now that my elements are prepared, I am ready to start card assembly. I attached the corrugated panel to the red layering panel with double sided tape. I used 3/8" red grosgrain ribbon to divide the panels.
Attached the word phrases with Ranger multi matte medium. I like this adhesive because it dries clear and is a strong hold. The images are secured with dimensional adhesive.
The sketch calls for the sentiment to be added to the right corner. So I looked through my Christmas stamps and found this one. It filled up the bottom of the card for a nice balance. I used my MISTI for help in placement.
Step 3: To finish up my card, I attached the image panel to the white cardstock base and then added a few white sequins. I thought they finished off the card nicely.
Well, that's it for me for this post. I hope I have given you an idea for a Christmas card using these super cute dies.
See you next Saturday!
die I used to create card:


Love the use of all the holiday sentiments! Cute design!
ReplyDeleteYou've made a wonderful card using that layout, Mary. I love all the red and white.
ReplyDeleteGorgeous card and design! The red and white color combination is the perfect holiday mix! The Santa and sentiments are perfectly placed on your card!
ReplyDeleteThis card is so beautiful.
ReplyDelete