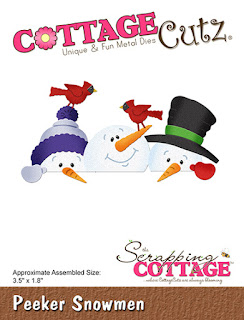
These little guys are so cute and are super easy to put together making this a great card for multiples.
I cut everything in white card stock and used Copic markers to color.
Because of the large greeting I opted to not use the birds. I cut the greeting from gold foil that I had backed with a self adhesive sheet.
Next I took a panel 5 1/2 x 4 1/4 inches and used Distress Oxide inks and a blending tool to create a sky. After this was finished, I trimmed it to 5 3/8 x 4 1/8 inches.
I used a wood-look background stamp to stamp the fence then I trimmed off the top and used paper snips to cut notches to mimic the planks of a fence.
I trimmed the fence to 5 3/8 x 1 1/2 inches tall and adhered it to the background leaving the top portion unglued so I could slip the snowmen underneath.
When everyone was added, I adhered the greeting and then mounted it all to a red A2 card base.
Very easy and fun to make!
Dies Used:
Thanks for stopping by today. Don't forget to check out the savings on the website! It's only for a limited time.
I hope you have a fun and creative weekend!


These little peeking snowmen are super cute Jeanne - I love the fence they are peeking over- creative idea- I may case your idea for some of my Christmas cards- it’s too sweet not to (lol)
ReplyDeleteLove the row of snowmen peeking over the fence just adorable!
ReplyDeleteI see people from the CottageBlog use a lot of distress inks, but have you ever used the Tim Holtz alcohol inks in the bottles? I was wondering if you could tell me what the difference is and how they can be used in card making. thanks.
ReplyDeleteadorable!
ReplyDeleteI think this die was my favorite of Part 2 of the release. Your card is adorable -- love the fence you created!
ReplyDeleteTo Anonymous: Our Blog focus is on CottageCutz dies. For information on alcohol inks, I would do a search on YouTube. There are many tutorials there that will be helpful to you.
ReplyDelete