Pages

Sunday, December 31, 2017

Look Through A Window

Hi!

It's Anja here on the last day of 2017. It was an awesome year for me. I got a new job, met a lot of new people and got a ton of new experiences. One of the highlights for sure was joining Cottage Cutz Design Team.

For my last craft project I made a card with a window and decorated interior. It was such a fun making it.


For this card I used:
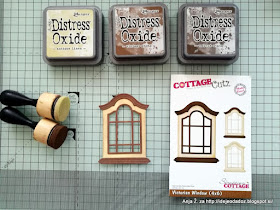
 - Cottage Cutz dies (Fireplace w/ Accessories, Victorian Window, Lantern w/ Holly Vine),
- Distress Inks (Peeled Paint, Forest Moss, Pine Needles, Wild Honey, Mustard Seed) and Oxides (Fired Brick, Vintage Photo, Antique Linen, Walnut Stain, Black Soot),
- craft card base (14,5x10,5 cm),
- craft and white cardstock for background (10x14 cm),
- white cardstock for die cuts,
- white pigment ink pad,
- adhesive foam pads,
- double sided adhesive tape,
- textured plate - bricks,
- acetate foil
- craft knife,
- paper glue.

First I cut two holes for the window, one in the card base and the other into the craft rectangle. I die cut the window first two use it for drawing the cutting line. 


Then I made the brick background. I used white pigment ink to color around the edges of the craft paper.


I used acetate foil for the window. I adhered it with double sided tape.


I used adhesive foam pads to add the brick background.


I used Distress Oxides to color around white brick background.


Then I die cut and colored all the pieces for the window and the fireplace.


And then I had to glue everything together. This is the final result.


I'm off to my friends house now to spend the New Year's eve there.

I wish you all the best in 2018. Lots of peace, smiles, health, love and positive energy. Have a great celebration tonight.

See you again in 2018 :)
Anja Z.


Cottage Cutz product I used:


Saturday, December 30, 2017

A Blooming Heart

Good morning!  Mary is on vacation so it's Jeanne posting again this week.  And I have another Valentine's Day card today.
This is one of those cards that started one way and ended up completely different than planned.  I love this Blooming Heart die and planned to use it as a stencil.  (I received a set of 12 shimmer mists for Christmas and really wanted to play with them!)  So I first cut the heart from a piece of mixed media card stock.
I used temporary snail adhesive to stick the heart to another piece of mixed media card stock and I placed it in a box.
I used two colors of the shimmer mist to spray the card stock.
Then I used my heat gun to dry it.  (I'm pretty impatient when it comes to things like drying - so my heat gun is a favorite tool!)
When I removed the stencil I had a very pretty heart impression.  Hard to tell in the photo but it is VERY shimmery.  The shimmer is just perfect for this elegant heart.
I wasn't quite sure what I wanted to do with this piece, but I loved the "stencil" that was now also coated in the shimmer mist.
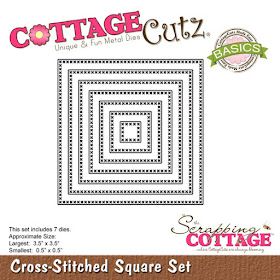
So I glued it to a piece of  white card stock that I had die cut with the Cross-Stitched Squares die. (The 3" square one.)
I then used a piece of 4" square paper for the background and glued it all to a top folding 4" square card.  As a final touch I added some rhinestones.

Sometimes just playing around with your supplies yields wonderful results.  I had planned to throw away the "stencil" but it ended up making a simple yet beautiful card!  And I still have the original piece, I just haven't decided what to make with it yet.

Dies used:
http://www.scrappingcottage.com/cottagecutzbloomingheart.aspx
http://www.scrappingcottage.com/cottagecutzcross-stitchedsquaresetbasics.aspx

Thanks for stopping by today.  I hope you have a very creative weekend!  And don't forget - Cottage Cutz is having a wonderful sale right now.  Click the owl above to be taken to the web site!


Friday, December 29, 2017

Love Mail

Good morning!  It's Jeanne today with a Valentine's card.  Hard to believe that it's just around the corner, and for card makers it is never too early to start making your cards!
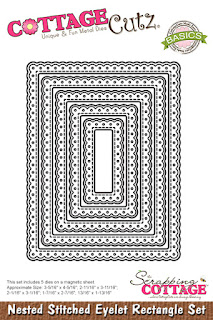
For this card I picked the patterned paper first and chose colors based off of it.  I cut an A2 card base from Very Vanilla card stock, a panel for the front that is 4 1/4 x 5 1/2 inches from the paper and a panel from Rose Red card stock using the largest of the Nested Stitched Eyelet Rectangles dies.
I used snail adhesive to glue the eyelet panel to the patterned piece.  I placed it at an angle that I felt was pleasing, then used my paper trimmer to cut the overage.

Very easy to do.  I have also done this with scissors if the amount of paper hanging off the sides is small.  However, I'm not that good with keeping the cut perfectly straight so I find the paper trimmer works best for me.
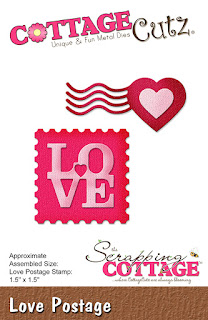
I cut the mail box and letters from Love Letters and the postmark and stamp from Love Postage using various colors that matched my patterned paper.
I played around with placement before gluing down.  I did cut off the branches from the mailbox post and added another letter and some small hearts (not shown in this photo).  One thing I love about the Love Postage dies, I now have a reverse color of the postmark and the stamp to use on another card.  When you cut them out of two different colors you will get two of each piece.  I'm planning to make a reverse version of this card with a red mailbox and blue background!

Dies used:
http://www.scrappingcottage.com/cottagecutzloveletters.aspx

http://www.scrappingcottage.com/cottagecutzlovepostage.aspx

http://www.scrappingcottage.com/cottagecutznestedstitchedeyeletrectangleset.aspx

The dies I used today are on sale right now along with many other wonderful dies.  Visit the website for some great prices! The sale ends January 4.


Thursday, December 28, 2017

Valentine's Day!!

Hello Everyone!

It is Pam creating with you today! I hope you had a wonderful Christmas celebration!  I can't believe I am saying this but I am starting on my Valentine's!!! The little bear I am using is actually from our Get Well release.  But she is very versatile and so is the sentiment. They are perfect for Valentine's Day cards!


Design Steps:

 1.  Cut an A2 white card base then on the front flap cut off a 2 inch strip.  Cover the inside first with a red piece of card stock then a piece of DP.  Next on the left side of the inside cut a 2 x 5 1/8 piece of white card stock and glue inside to the left

2.  Using the Stitched Cupcake die set cut out 4 stitched red hearts and glue 3 of them next to the white panel on the inside of the card.  Then glue the remaining heart to the white panel as shown below
 3.  Next cut a piece of red card stock for the front flap at 2 1/8 x 5 3/8 then layer on a piece of DP at 2 x 5 1/8. Glue to the front
4.  Use the Sweetheart Doilies die and cut out the largest circle in white and then the next largest in red glue together
 5.  Cut the sentiment Sending Hugs in red using the Sending Hugs Bear die
5.  Glue the sentiment to the front flap of the card and also attach the heart doily

6.  Using the Sending Hugs Bear die cut out the bear in brown, the flower and bow in red, the stem in green and the tummy in tan.  Shade all the pieces and assemble them add black rhinestones for the eyes


 7. Place pop dots on the back of the bear and place the bear onto the heart doily


Cottage Cutz Products!


I love how the cute bear made this Valentine extra special!! Hope you give it a try!

Blessings
Pam