Hello Scrapping Cottage friends! Thanks for taking the time to stop and visit today. It's Mary Marsh here bringing you the Saturday edition of the Blog.
A couple of months ago there was a new release of the cutest little bear stamps & coordinating die sets. Adventures of Chloe & Ben have been featured by many of the Design Team. If you haven't seen them before take a look back on the Blog.
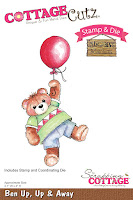
Today for your viewing pleasure, I am showcasing one of those dies. I present Ben, Up Up and Away. He will be the star of my birthday card. So without further delay, let's get started on how I created my card.
Step 1: I used Tuxedo Black (Memento) ink on X-Press It Blending cardstock to stamp the image. I always stamp 2 just in case I make a mistake in coloring. Used both Copic Markers and Prismacolor pencils to color and this cardstock works great with both these mediums.
Copics used: R27, R29 (red), B93, B95 (blue), YG 41, YG 45 (green) and R20 (blush)
Prismacolor Pencils: PC1082, PC947 (brown) and PC928 (blush)
After coloring I cut Ben out with the coordinating die. It's included in the set.
Step 2: My layout decision was next. I looked at a couple of different sketches and finally settled on this one. It allowed me to use some bright and festive patterned paper and also had a separate layer where Ben would have the center stage.
When I work with a sketch, I print it out and then figure out the sizes of my panels. My card base and first layer are the easiest.Turquoise Card Base: 5 1/2" x 4 1/4"
1st Patterned Paper layer: 5 3/8" x 4 1/8"
Then I look at my printout and guesstimate how much of a border will be around the next layer. In this case, I thought 1/2" was about right. I cut a piece of scrap paper to lay it down and check to make sure it works. Then I actually cut the cardstock and patterned paper I will use.
Neon Pink cardstock layer: 4 5/8" x 3 3/8"
Striped Patterned Paper Layer: 4 3/8" x 3 1/8"
For the image panel, I again take a piece of scrap paper and fold it roughly and make sure the borders on my card look like the borders on the printout. Then I used the 2nd largest CottageCutz stitched stitched rounded rectangle die and cut my panel. I stamped my birthday sentiment in an emerald green ink.
ImagePanel: 2 5/8" x 3 5/8"
For the long rectangle piece running the width of the card, I used turquoise cardstock. I thought of ribbon but I didn't have any turquoise that worked on this card. The sketch has a bow on this panel. But, I decided to use the CottageCutz Number Candles die and add a "3" for this element. I need a birthday card for a 3 year old. So this worked out perfectly for me.
Step 3: Now that everything is cut and stamped, it's time to assemble my card. I used dimensional adhesive on the image panel and also on Ben. It adds depth and interest to your card. I did the same for the #3.
And that is my card for this Saturday. I hope I have given you another idea of a way to use these new stamp & die combo sets. See you next Saturday!
Dies I used to Create Card:


Mary, this is so cute!
ReplyDeleteI love the bold colors you used on this cute birthday card, Mary. And I love those birthday candle numbers! I'll have to put them on my wish list.
ReplyDeleteSuper cute card
ReplyDeleteLove your card Mary. Cute, cute cute!
ReplyDeleteI love your interpretation of the given sketch.
ReplyDeleteGreat coloring love the bold colors! Perfect for a little boy. I really love the number too. I will have to put the Birthday numbers on my wish list!
ReplyDeleteMary, your birthday card is so adorable with the beautifully colored Ben! The designer papers and card design are wonderful! I, too, like the birthday number die you used. I've missed that one. Great art, Mary!
ReplyDelete