Hello
Scrapping Cottage friends! Thanks for taking the time to stop and visit today. It's
Mary Marsh here bringing you the Saturday edition of the Blog.
We just had the cutest release of
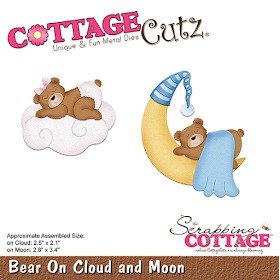
baby dies. There are 42 different designs. So perfect for creating cards to welcome the new baby, baby birthday cards or even as baby shower invitations. I have several nieces who recently married and now are expecting so I will need baby cards as well as Christening cards very soon.
So today for your viewing pleasure, I am showcasing the new
girl christening gown die. It's such a beautiful die that cuts a sweet baby dress. So let's get started with some details on what I did this week.
I already had the card idea in mind. So when I saw the sketch #642 on Splitcoaststampers this week, I knew it would work perfectly as my layout. It's a square layout this week. I haven't made a square card for awhile.
Vanilla Card Base: 5" square
Blush Pink Layer: 4 1/4" square
Blush Pink Patterned Paper Layer: 4 1/8" square
Champagne Mesh Ribbon Layer: 1 1/2"
Blush Pink Ribbon Layer: 1/2"
Step 1. I figured out my card sizes and then cut all the cardstock and patterned paper. I found this pretty blush pink paper in my stash. I liked how the hearts are cascading down the paper. On the reverse side is a pretty sand color lace pattern.
Step 2: I wanted to have a cross in this design because it is a christening. And in this Christian ceremony the baby is dedicated to God. I decided to stencil the cross pattern instead of using the die cut. I was going after a very soft look for this card.
I used the
Easter Cross die and cut the stencil from a window sheet. I used blush pink ink to stencil the cross. The paper size on this vanilla panel is 1 3/4" x 3 1/4" and the pink layering panel is 1 7/8" x 3 3/8". I used a corner rounder for some added interest. It's layer #6 on this sketch.
I decided to stamp my sentiment directly over the stenciled cross. I used a brown sugar ink. This sentiment is layer #7 in this sketch.
Step 3: I cut the christening gown in vanilla cardstock. The other pieces are cut in blush pink. This is another of the detailed dies from CottageCutz. With this die you can cut the collar, buttons, sleeve trim, waistband, bow and hemline. You have the option to cut in white and color the pieces, or do as I did and cut with colored cardstock. I really like how this gown turned out. It's so soft and girlie.
Step 4: Time for card assembly. I originally was going to use the lace pattern that is on the reverse side of my patterned paper. But when I placed it on the card I thought it was a bit dark. So I used a champagne mesh and blush pink ribbon. It kept the softness of my card. To finish it off I added some pearls in the corner and a butterfly to the cross panel.
Well, that's it for me for this post. I hope I have given you some inspiration for using this new die. So until next time........hugs to you Blogger friends!
Dies I used to create this card:


