Hi, Janja here!
Gift set of cards in a folder which I share with you today are created with new CottageCutz dies - Spring.
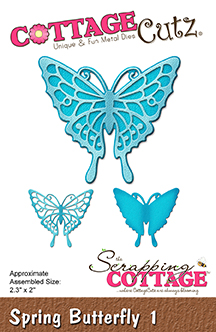
CottageCutz dies: doodle bugs, spring butterfly 1, spring butterfly 2, spring butterfly 3, spring foliage border, stitched square set or pierced square set
For the folder we need:
- white cardstock for the cover: 11.4 x 5.3" (29 x 13,5 cm)
- white cardstock for the insert: 11 x 5.3" (28 x 13,5 cm)
- patterned paper: 5.2 x 5.2" (13,3 x 13,3 cm)
- white and colored cardstock
Trim white cardstock for the cover and insert sheet. Fold them on:
- 5.3" and 6.1" (13,5 cm and 15,5 cm)
- 5.3" and 5.7" (13,5 cm and 14,5 cm)
Trim four pockets from white cardstock in the size of 6.3 x 3" (16 x 7,5 cm). Made the folds 0.6" (1,5 cm) from left, right, and from the bottom edge.
Glue patterned paper on pockets, which should be slightly smaller then the size of the pocket.
On each of four pockets glue spring foliage border.
Glue the cover and the insert sheet in each other.
Make a tab in the size of 5.5 x 1" (14 x 2,4 cm). Fold cardstock at 2.4" and 3.2" (6 cm and 8 cm).
Insert two magnets under a patterned paper, which hold a tab in place, when the folder is closed.
Decorate the front cover and attach it to the base.
Supplies for cards:
- white card base: 4.7 x 4.7" (12 x 12 cm)
- colored cardstock: 3.7 x 3.7" (9,5 x 9,5 cm)
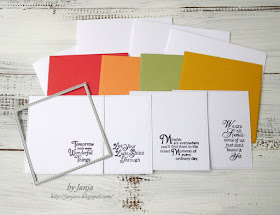
- white nad colored cardstock
- Memento ink: Lady Bug, Bamboo Leaves, Tangelo, Dandelion
Prepare four card bases and trim squares from colored cardstock.
Cut out squares with the largest die from white cardstock. Stamp various sentiments on them.
Cut out butterflies.
In addition to sentiments do some smudges. We can use a brush, stamp or ink smooshing technique. Whichever you prefer.
Select colors that match the color of butterflies.
Assemble the cards.
Insert cards into pockets.
That's all for today. I hope you like it.


Beautiful project and a gift.
ReplyDeleteWhat a pretty project. I loved those colourful butterflies against the white background. Very nice.
ReplyDeleteI love 3-D projects, and your little gift folder is so fun! The enclosed cards are beautiful -- a wonderful gift for someone special!
ReplyDeleteWow, this is absolutely gorgeous! Such a fabulous idea! I love all the dies you used! I just got some new Cottage Cutz dies and I am wondering if you have a challenge here on your blog? Thanks so much! Have a lovely day!
ReplyDeleteThis is so cute, thank you so much.
ReplyDeleteSo beautiful Janja!!!
ReplyDeletethis is a great project Janja-I love how you decorated the front cover
ReplyDeleteGreat project, love how you decorated the top!
ReplyDelete