Hi, Janja here!
Today I share with you another card created with CottageCutz Christmas dies. In the forefront of snowy landscape I placed a fox.
For the card we need:
- craft card base: 4.5 x 6" (11,5 x 15 cm), folded
- light blue paper: 4 x 5-3" (10 x 13,5 cm)
- white and colored cardstock
- Distress ink: Rusty Hinge, Evergreen Bough, Iced Spruce, Vintage Photo, Walnut Stain
- white pigment ink
On light blue background stamp some spruce trees. From white cardstock cut out four stitched ovals (the 7th die from the center) and winter cabin border.
Shadow edges with Distress ink Walnut Stain, and while still wet gently spread them with white pigment ink.
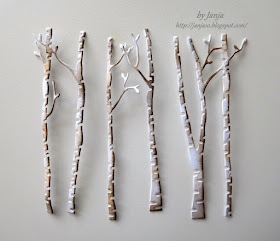
Cut out birch trees with the birch trees and deer die. With Distress ink Walnut Stain strongly emphasize the right edges.
Also prepare a few white cutouts with the snowy tree die. They are treated the same way as ovals.
Cut out the fox from color cardstocks.
"Brr, it's cold outside today", said the fox and put on a scarf :).
On the right bottom corner stamp warm wishes and start assembling the card. Use a glue and self-adhesive foam pads.
Completed card.
You still have time to share your projects with us on
challenge #7 - fall.
challenge #7 - fall.
Thank you for coming over and have a great day.


I love the contrast between the bright orange of the fox and the white background. He really pops!
ReplyDeleteBeautiful card!!
ReplyDeleteLove this! what a great card!
ReplyDeleteSo beautifully done.
ReplyDeleteThis is a beautiful snowy scene and I really like the added fox image- he draws your eye right into the scene
ReplyDelete