Hello Scrapping Cottage friends! Thanks for taking the time to stop and visit today. It's Mary Marsh here bringing you the Wednesday edition of the Blog.
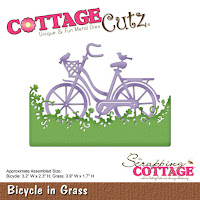
Today for your viewing pleasure, I am featuring a new die set from the May "This and That" release. I have used the Bicycle in Grass die to create a graduation card. We had 3 high school graduations in our family this month plus 3 other of our friends' kids graduated.
This card I created for a young woman that we know through our church. I didn't want to create the typical grad card so I made something different an out of the graduation box. It makes me look at m dies in a different light when I am in that mode.
So let's get started with some details on exactly what I did here. Since I had already decided on the bicycle die, I looked through my patterned paper for something that would coordinate. Voila! I found this paper with bicycles on it and I liked the color scheme. So I was off and running (lol)!!!
Card Base: 5 1/2" x 4 1/4"
Patterned Paper: 5 3/8" x 4 1/8"
Next, I cut my bicycle with a maraschino red cardstock. I used the buttons from the Fancy Pocket Plus die and cut them in a honey card stock. For added interest, I used the red cardstock and laced it through the button holes.
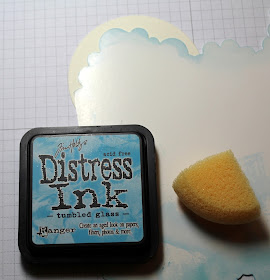
Decided to place the bicycle and grass in a circle die. I used a cloud template to sponge in my background clouds with tumbled glass distress ink. It bumps the background up a notch.
 |
| cloud template sponged with distress ink |
Now that all the 2 line stamping and background sponging is done, I assembled my card. I added 2 hearts to the top left. These are also cut from the Fancy Pockets Plus dies.
I completed the inside of the card with the typical graduation sentiments. Cut the sentiment layer with the largest CottageCutz rectangle die. Then I cut another layer 1/4" larger in red cardstock.
Well, friends that's it for me for another week. Just a reminder that our 3rd Challenge is in full swing with a pocket theme. get info here. Until next time........inky hugs!!!


Such a lovely card. Great idea with buttons on the bicycle. I love it.
ReplyDeleteVery nice card, Mary. The buttons on bike are beautiful decoration.
ReplyDeleteVery pretty card
ReplyDeleteSo cute Mary. I love the buttons on the bicycle...great idea!
ReplyDeleteI love the circle focal point with this bicycle die. And the patterned paper goes perfectly.
ReplyDeleteKaren